Anvil/ja: Difference between revisions
(Created page with "金床は、金属を鍛える際の作業台となる機能ブロックです。") |
(Updating to match new version of source page) |
||
| (30 intermediate revisions by 2 users not shown) | |||
| Line 1: | Line 1: | ||
<languages /> | <languages /> | ||
{{GameVersion|1.18.15}} | |||
{{Block | {{Block | ||
|Name = Anvil | |Name = <span lang="en" dir="ltr" class="mw-content-ltr">Anvil</span> | ||
|Image = File:Grid Copper anvil.png | |Image = File:Grid Copper anvil.png | ||
|Stackable = | |Stackable = <span lang="en" dir="ltr" class="mw-content-ltr">No</span> | ||
|Material = Metal | |Material = <span lang="en" dir="ltr" class="mw-content-ltr">Metal</span> | ||
|Drops = Itself | |Drops = <span lang="en" dir="ltr" class="mw-content-ltr">Itself</span> | ||
|FloatRight=yes | |||
|NoBreak=yes | |||
}} | }} | ||
<div class="mw-translate-fuzzy"> | |||
金床は、金属を[[smithing|鍛える]]際の作業台となる機能ブロックです。 | |||
</div> | |||
__TOC__ | __TOC__ | ||
<div class="mw-translate-fuzzy"> | |||
==作り方== | |||
金床を作る最初のステップは、[[Clay Forming/ja|粘土成形]]のメカニクスで[[Molds|金床の鋳型]]を作ることです。そして[[casting|鋳造]]メカニックを使って鋳造します。鋳型を満たすためには900ユニット(インゴット9個)の銅または青銅合金が必要です。鋳造して鋳型から取り出した金床は、他のブロックと同様に固体の表面に置くことができます。金床を壊して拾い上げ、再配置するのに道具は必要ありません。 | |||
</div> | |||
<div lang="en" dir="ltr" class="mw-content-ltr"> | |||
In the game, you will need a Tier (n-1) anvil to work Tier (n) materials, i.e. you will need a bronze (Tier 2) anvil to work iron (Tier 3) ingots. | |||
</div> | |||
== | <div lang="en" dir="ltr" class="mw-content-ltr"> | ||
===Copper (Tier 1) and Bronze (Tier 2) Anvil=== | |||
</div> | |||
=== | <div lang="en" dir="ltr" class="mw-content-ltr"> | ||
The first step in this process is to create an {{ll|Molds|anvil mold}} via the {{ll|Clay Forming|clay forming}} mechanic. The anvil is then cast using the {{ll|casting|casting}} mechanic. An anvil requires 900 units (9 ingots-worth) of copper or bronze alloy to fill the mold. Once an anvil is cast and removed from the mold, it may be placed like any other block onto a solid surface. No tools are required to {{Breaking|break}} an anvil to pick it up and re-position it. | |||
</div> | |||
<div class="mw-translate-fuzzy"> | |||
===鉄と隕鉄の金床=== | |||
[[File:Anvil welding.PNG|thumb|200px|ホウ砂を塗布して上部を鍛接する準備ができた、鉄の金床の土台]] | |||
鉄か隕鉄で作る金床は、他の金属のように鋳造することはできません。はじめに金床の上部と下部を青銅の金床で鍛造して別々で作り、そしてそれらを鍛接する必要があります。 | |||
<br> | |||
鉄の金床を完成させるには、合計で10個の鉄のインゴット(土台と上部で5個ずつ)と、ホウ砂の粉末がひとつ必要です。インゴット1つで42ピクセル追加でき、金床の土台と上部でそれぞれ196、210ピクセル必要になります。 | |||
</div> | |||
<div lang="en" dir="ltr" class="mw-content-ltr"> | |||
[[File:Anvil welding.PNG|thumb|200px|An iron anvil base with applied borax waiting for the top part.]] | [[File:Anvil welding.PNG|thumb|200px|An iron anvil base with applied borax waiting for the top part.]] | ||
Anvils made out of iron or meteoric iron | Anvils made out of iron or meteoric iron cannot be cast in molds like copper and bronze anvils, since iron and meteoric iron cannot be melted in a crucible. The player first has to make the upper and lower parts of the anvil separately, smithing them with any {{ll|hammer|hammer}} on a bronze anvil. Then, the two parts need to be welded together with powdered {{ll|borax|borax}}. | ||
< | </div> | ||
To make a complete iron anvil, a total of 10 iron ingots are needed, 5 each for the anvil base and anvil top, as well as one powdered borax. One ingot amounts to 42 | |||
<div lang="en" dir="ltr" class="mw-content-ltr"> | |||
To make a complete iron anvil, a total of 10 iron ingots are needed, 5 each for the anvil base and anvil top, as well as one powdered borax. One ingot amounts to 42 voxels added, and the anvil base and top need 196 and 210 voxels respectively. | |||
</div> | |||
<div class="mw-translate-fuzzy"> | |||
{{Protip | {{Protip | ||
| | |ピクセルの高さには上限があります。そのため先に追加したピクセルを広げずにインゴットを追加しすぎると、ピクセルが完全に削除されてしまう可能性があります! 先に追加したピクセルを広げてから、次のインゴットを追加するようにしましょう。 | ||
}} | }} | ||
</div> | |||
<div class="mw-translate-fuzzy"> | |||
====金床の土台==== | |||
熱した鉄のインゴットを金床に置き、クラフトを始めましょう。青銅以上のティアの金床が必要です。金床の土台を選び、ハンマーで叩きます。土台を作るには合計で5個のインゴットを加える必要があり、ミスをしても14ピクセルまでは無駄にできる余裕があります。このプロセスは土台として鉄のプレート1枚から始め、その後3個のインゴットをひとつずつ加えていくほうが簡単かもしれません。<br> | |||
ピクセルを(つまりインゴットを)無駄にする可能性を減らすためには、加えたインゴットを平らにし、その後に次のインゴットを加える必要があります。次のインゴットを追加できるスペースは常に変わらず、最大の高さ制限である6ピクセル(3つのインゴットを積み重ねた高さ)以下になります。新たなインゴットを追加すると、このスペース内の空いたピクセルのみが満たされることに注意しましょう。インゴットを追加するスペースは平らにしておくことが推奨されます。インゴットは追加するごとに高くなっていき、現在の表面の「上に」追加されます。 | |||
<br><br> | |||
「インゴットの着地点」を平らにすることに重点を置いた、最適な方法を下図に示します。ただし、この方法はインゴットを節約する最適な方法であり、石炭を節約する最適な方法ではないことに注意してください。 | |||
</div> | |||
=== | <div lang="en" dir="ltr" class="mw-content-ltr"> | ||
Start the crafting process by placing a heated iron ingot on the anvil - bronze or higher anvil tier is needed. Select the anvil base and start hammering. Note that for the base, a total of 5 ingots need to be added, and there is at maximum 14 | Start the crafting process by placing a heated iron ingot on the anvil - bronze or higher anvil tier is needed. Select the anvil base and start hammering. Note that for the base, a total of 5 ingots need to be added, and there is at maximum 14 voxels worth room for error. This process might be easier when starting with one iron plate as the base, and then adding 3 more ingots, one at a time.<br> | ||
To lessen the chance of wasting | To lessen the chance of wasting voxels - and thus ingots - it is necessary to add one ingot, flatten it out and only then add the next - and so forth. The space on which the next ingot will be added is always the same, and the player can make sure that this space is flat and below the maximum height limit of the recipe, which is 6 voxels, or 3 ingots stacked. Keep in mind that a new ingot added will only fill in the empty voxels in that specific space, so it is recommended to keep the ingot place as flat as possible. The ingot will however rise with the rest, meaning it will be added ''on top'' of the current surface.<br><br> | ||
An optimum way of smithing can be seen below, with the focus on keeping the "ingot landing space" as empty and flat as possible. However, keep in mind that this is the best way to save iron ingots, not the best way to save coal. | An optimum way of smithing can be seen below, with the focus on keeping the "ingot landing space" as empty and flat as possible. However, keep in mind that this is the best way to save iron ingots, not the best way to save coal. | ||
</div> | |||
<div class="mw-translate-fuzzy"> | |||
{{Protip | {{Protip | ||
| | |作業台となる金床を高くすることで、ピクセルの欠けや置き間違いに気づきやすくなるかもしれません。金床を目線の高さに置くか、金床の周りに溝を掘りましょう。これにより、加工アイテムを横からチェックすることができます。Gキーで座るのも、同様の効果があります。 | ||
}} | }} | ||
</div> | |||
<gallery widths=200px heights=200px mode="packed"> | <gallery widths=200px heights=200px mode="packed"> | ||
File:Anvil base 2.PNG| | File:Anvil base 2.PNG|インゴット2個 | ||
File:Anvil base 3.PNG| | File:Anvil base 3.PNG|インゴット3個 | ||
File:Anvil base 4.PNG| | File:Anvil base 4.PNG|インゴット4個 | ||
File:Anvil base 5.PNG| | File:Anvil base 5.PNG|インゴット5個 | ||
</gallery> | </gallery> | ||
<div class="mw-translate-fuzzy"> | |||
* | 金床の土台には合計196ピクセル必要で、各層は以下のようになっています。 | ||
* | *最初の層:80 | ||
* | *二層と三層:それぞれ38 | ||
*四層と五層:それぞれ20 | |||
</div> | |||
<div class="mw-translate-fuzzy"> | |||
====金床の上部==== | |||
金床の上部も同じプロセスで作ります。しかしながら、1ピクセルも無駄にならないように注意して、慎重に鍛えるようにしましょう。ミスをする余地はなく、ピクセルを無駄にした場合は6個目のインゴットの追加する必要があります。上部は土台よりも細いため、プレートから始めることはできません。<br> | |||
</div> | |||
=== | <div lang="en" dir="ltr" class="mw-content-ltr"> | ||
For the anvil top, follow the same process. However, keep in mind that for the top part | For the anvil top, follow the same process. However, keep in mind that for the top part, not even one voxel should be wasted. This means there is no margin for error, and any wasted voxels will result in a sixth ingot added to finish the item. As the top part is rather slim, a plate is not helpful as the smithing base.<br> | ||
</div> | |||
<gallery widths=150px heights=150px mode="packed"> | <gallery widths=150px heights=150px mode="packed"> | ||
File:Anvil top 1.PNG| | File:Anvil top 1.PNG|インゴット1個 | ||
File:Anvil top 2.PNG| | File:Anvil top 2.PNG|インゴット2個 | ||
File:Anvil top 3.PNG| | File:Anvil top 3.PNG|インゴット3個 | ||
File:Anvil top 4.PNG| | File:Anvil top 4.PNG|インゴット4個 | ||
File:Anvil top 5.PNG| | File:Anvil top 5.PNG|インゴット5個 | ||
</gallery> | </gallery> | ||
<div class="mw-translate-fuzzy"> | |||
* | 金床の上部には合計210ピクセル必要で、各層は以下のようになっています。 | ||
* | *最初の層:78 | ||
* | *二層:48 | ||
* | *三層:40 | ||
* | *四層:24 | ||
*五層:20 | |||
</div> | |||
==== | <div class="mw-translate-fuzzy"> | ||
====鍛接==== | |||
土台と上部の両方が完成したら、両方を炉で熱します。熱したら、まず土台部分を地面に置きます。粉末のホウ砂を1回ぶん持ち、置いた土台にShiftキーを押しながら右クリックで塗り、次に上部を追加します。そして2つのパーツが鍛接されるまでハンマーで叩きます。12回ほど叩けば完成です。 | |||
</div> | |||
== | <div lang="en" dir="ltr" class="mw-content-ltr"> | ||
After both the base and top are finished, heat both of them up in a forge. Once heated, first place the base part down on the ground. Take one portion of {{ll|Borax|powdered borax}} and apply with a {{SneakClick}} on the placed base, then add the top part. Hammer until both parts are welded together, this should take about 12 hits. | |||
</div> | |||
=== | <div class="mw-translate-fuzzy"> | ||
==使い方== | |||
金床は、[[forge|炉]]で熱したインゴットから[[metal|金属]]の[[Tools and Weapons|道具]]を[[smithing|鍛える]]ための作業台です。熱したインゴットを金床に置くとダイアログボックスが開き、クラフトするアイテムを選択することができます。銅や青銅のアイテムはどのような金床でも加工できますが、鉄のアイテムは青銅か鉄の金床でしか加工できず、鋼鉄のアイテムは鉄の金床でしか加工できません。 | |||
</div> | |||
<div lang="en" dir="ltr" class="mw-content-ltr"> | |||
The anvil is the work surface used for {{ll|smithing|smithing}} {{ll|metal|metal}} {{ll|Tools and Weapons|tools}} from ingots heated in a {{ll|forge|forge}}. When a heated ingot is placed on the anvil, a dialog box opens to allow the player to select the item to be crafted. Copper and Bronze items can be worked on any anvil, but iron items can only be worked on a bronze or iron anvil and steel items can only be worked on an iron anvil. | |||
</div> | |||
<div lang="en" dir="ltr" class="mw-content-ltr"> | |||
There is no need to craft steel anvils at this time, as there are no Tier 5 metals in the game. | |||
</div> | |||
<div class="mw-translate-fuzzy"> | |||
===特殊=== | |||
金床を製錬して素材を回収することはできませんが、バージョン1.14から同じ金属のノミと金床をクラフトグリッドに入れると、8個のインゴットを回収できるようになりました。このプロセスで金床とノミの両方が破壊されるので、2個以上のインゴットが失われることに注意しましょう。<br> | |||
<br> | |||
バージョン1.14から、落下した金床がプレイヤーやその他の存在に当たると、かなりのダメージを与えるようになりました。 | |||
</div> | |||
<div lang="en" dir="ltr" class="mw-content-ltr"> | |||
An anvil cannot be smelted to recover the material used in creating the item, however since version 1.14, the player can use a chisel and anvil of the same metal type in the crafting grid to recover 8 ingots worth of metal. Keep in mind that both the anvil and the chisel will be destroyed in the process, meaning from the original 10 ingots, two will be permanently lost.<br> | An anvil cannot be smelted to recover the material used in creating the item, however since version 1.14, the player can use a chisel and anvil of the same metal type in the crafting grid to recover 8 ingots worth of metal. Keep in mind that both the anvil and the chisel will be destroyed in the process, meaning from the original 10 ingots, two will be permanently lost.<br> | ||
<br> | <br> | ||
Since version 1.14, falling anvils do considerable damage when hitting a player or other entity. | Since version 1.14, falling anvils do considerable damage when hitting a player or other entity. | ||
</div> | |||
== | <div class="mw-translate-fuzzy"> | ||
== ビデオチュートリアル == | |||
{| class="wikitable" | |||
|- | |||
! 鉄の金床の鍛冶プロセスの詳細ガイド | |||
|- | |||
| <youtube width="400" height="240">7tUv8N3yg3Q</youtube> | |||
|} | |||
</div> | |||
<div lang="en" dir="ltr" class="mw-content-ltr"> | |||
{| class="wikitable" | {| class="wikitable" | ||
|- | |- | ||
| Line 82: | Line 170: | ||
| <youtube width="400" height="240">7tUv8N3yg3Q</youtube> | | <youtube width="400" height="240">7tUv8N3yg3Q</youtube> | ||
|} | |} | ||
</div> | |||
<div lang="en" dir="ltr" class="mw-content-ltr"> | |||
== History == | |||
</div> | |||
<div lang="en" dir="ltr" class="mw-content-ltr"> | |||
== Notes == | |||
</div> | |||
<div lang="en" dir="ltr" class="mw-content-ltr"> | |||
* While the metal tier matters for the anvil, it doesn't matter for the hammer or helve hammer. | |||
** A copper hammer may be used to smith a steel ingot. But higher tiers are preferable for their higher durability (more uses before breaking). | |||
** A bronze helve hammer may be used to smith a steel ingot. Helve hammers have no durability, and there's no reason to prefer higher tier metals. | |||
* Though iron and meteoric iron anvils are both tier 3, you need an iron anvil in order to smith meteoric iron ingots. | |||
</div> | |||
<div lang="en" dir="ltr" class="mw-content-ltr"> | |||
== Gallery == | |||
</div> | |||
<div lang="en" dir="ltr" class="mw-content-ltr"> | |||
== See also == | |||
</div> | |||
<div lang="en" dir="ltr" class="mw-content-ltr"> | |||
== References == | |||
</div> | |||
{{ | {{Metals navbox}} | ||
{{Blocks navbox}} | |||
{{Game navbox}} | |||
[[Category:Blocks{{#translation:}}]] | |||
[[Category:Tools{{#translation:}}]] | |||
Latest revision as of 10:30, 7 April 2024
This page was last verified for Vintage Story version 1.18.15.
| Anvil | |

| |
| Material | Metal |
| Stackable | No |
| Drops | Itself |
| Blocks | |
金床は、金属を鍛える際の作業台となる機能ブロックです。
作り方
金床を作る最初のステップは、粘土成形のメカニクスで金床の鋳型を作ることです。そして鋳造メカニックを使って鋳造します。鋳型を満たすためには900ユニット(インゴット9個)の銅または青銅合金が必要です。鋳造して鋳型から取り出した金床は、他のブロックと同様に固体の表面に置くことができます。金床を壊して拾い上げ、再配置するのに道具は必要ありません。
In the game, you will need a Tier (n-1) anvil to work Tier (n) materials, i.e. you will need a bronze (Tier 2) anvil to work iron (Tier 3) ingots.
Copper (Tier 1) and Bronze (Tier 2) Anvil
The first step in this process is to create an anvil mold via the clay forming mechanic. The anvil is then cast using the casting mechanic. An anvil requires 900 units (9 ingots-worth) of copper or bronze alloy to fill the mold. Once an anvil is cast and removed from the mold, it may be placed like any other block onto a solid surface. No tools are required to break an anvil to pick it up and re-position it.
鉄と隕鉄の金床

鉄か隕鉄で作る金床は、他の金属のように鋳造することはできません。はじめに金床の上部と下部を青銅の金床で鍛造して別々で作り、そしてそれらを鍛接する必要があります。
鉄の金床を完成させるには、合計で10個の鉄のインゴット(土台と上部で5個ずつ)と、ホウ砂の粉末がひとつ必要です。インゴット1つで42ピクセル追加でき、金床の土台と上部でそれぞれ196、210ピクセル必要になります。
Anvils made out of iron or meteoric iron cannot be cast in molds like copper and bronze anvils, since iron and meteoric iron cannot be melted in a crucible. The player first has to make the upper and lower parts of the anvil separately, smithing them with any hammer on a bronze anvil. Then, the two parts need to be welded together with powdered borax.
To make a complete iron anvil, a total of 10 iron ingots are needed, 5 each for the anvil base and anvil top, as well as one powdered borax. One ingot amounts to 42 voxels added, and the anvil base and top need 196 and 210 voxels respectively.
Protip:
ピクセルの高さには上限があります。そのため先に追加したピクセルを広げずにインゴットを追加しすぎると、ピクセルが完全に削除されてしまう可能性があります! 先に追加したピクセルを広げてから、次のインゴットを追加するようにしましょう。 |
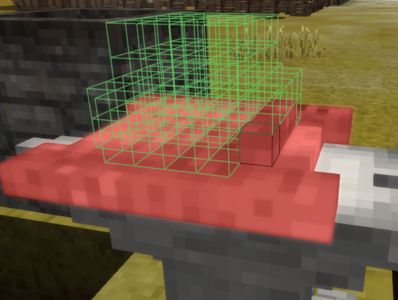
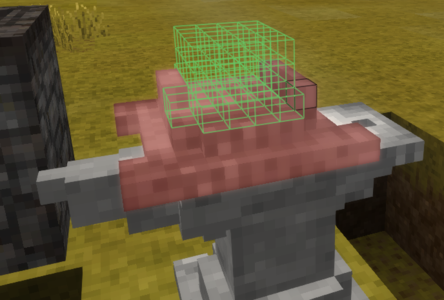
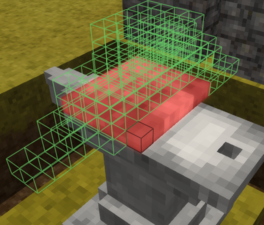
金床の土台
熱した鉄のインゴットを金床に置き、クラフトを始めましょう。青銅以上のティアの金床が必要です。金床の土台を選び、ハンマーで叩きます。土台を作るには合計で5個のインゴットを加える必要があり、ミスをしても14ピクセルまでは無駄にできる余裕があります。このプロセスは土台として鉄のプレート1枚から始め、その後3個のインゴットをひとつずつ加えていくほうが簡単かもしれません。
ピクセルを(つまりインゴットを)無駄にする可能性を減らすためには、加えたインゴットを平らにし、その後に次のインゴットを加える必要があります。次のインゴットを追加できるスペースは常に変わらず、最大の高さ制限である6ピクセル(3つのインゴットを積み重ねた高さ)以下になります。新たなインゴットを追加すると、このスペース内の空いたピクセルのみが満たされることに注意しましょう。インゴットを追加するスペースは平らにしておくことが推奨されます。インゴットは追加するごとに高くなっていき、現在の表面の「上に」追加されます。
「インゴットの着地点」を平らにすることに重点を置いた、最適な方法を下図に示します。ただし、この方法はインゴットを節約する最適な方法であり、石炭を節約する最適な方法ではないことに注意してください。
Start the crafting process by placing a heated iron ingot on the anvil - bronze or higher anvil tier is needed. Select the anvil base and start hammering. Note that for the base, a total of 5 ingots need to be added, and there is at maximum 14 voxels worth room for error. This process might be easier when starting with one iron plate as the base, and then adding 3 more ingots, one at a time.
To lessen the chance of wasting voxels - and thus ingots - it is necessary to add one ingot, flatten it out and only then add the next - and so forth. The space on which the next ingot will be added is always the same, and the player can make sure that this space is flat and below the maximum height limit of the recipe, which is 6 voxels, or 3 ingots stacked. Keep in mind that a new ingot added will only fill in the empty voxels in that specific space, so it is recommended to keep the ingot place as flat as possible. The ingot will however rise with the rest, meaning it will be added on top of the current surface.
An optimum way of smithing can be seen below, with the focus on keeping the "ingot landing space" as empty and flat as possible. However, keep in mind that this is the best way to save iron ingots, not the best way to save coal.
Protip:
作業台となる金床を高くすることで、ピクセルの欠けや置き間違いに気づきやすくなるかもしれません。金床を目線の高さに置くか、金床の周りに溝を掘りましょう。これにより、加工アイテムを横からチェックすることができます。Gキーで座るのも、同様の効果があります。 |
インゴット2個
インゴット3個
インゴット4個
インゴット5個


金床の土台には合計196ピクセル必要で、各層は以下のようになっています。
- 最初の層:80
- 二層と三層:それぞれ38
- 四層と五層:それぞれ20
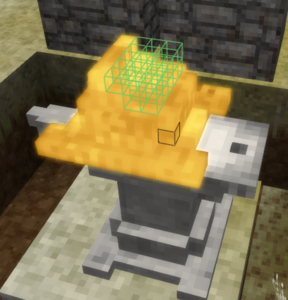
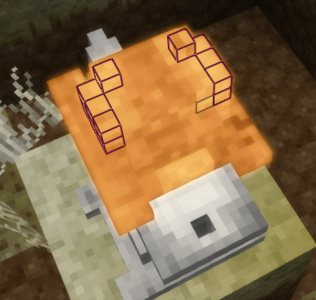
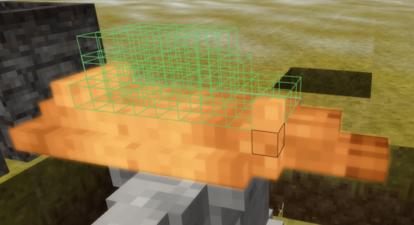
金床の上部
金床の上部も同じプロセスで作ります。しかしながら、1ピクセルも無駄にならないように注意して、慎重に鍛えるようにしましょう。ミスをする余地はなく、ピクセルを無駄にした場合は6個目のインゴットの追加する必要があります。上部は土台よりも細いため、プレートから始めることはできません。
For the anvil top, follow the same process. However, keep in mind that for the top part, not even one voxel should be wasted. This means there is no margin for error, and any wasted voxels will result in a sixth ingot added to finish the item. As the top part is rather slim, a plate is not helpful as the smithing base.
インゴット1個

インゴット2個
インゴット3個

インゴット4個
インゴット5個


金床の上部には合計210ピクセル必要で、各層は以下のようになっています。
- 最初の層:78
- 二層:48
- 三層:40
- 四層:24
- 五層:20
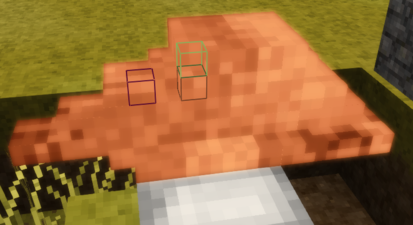
鍛接
土台と上部の両方が完成したら、両方を炉で熱します。熱したら、まず土台部分を地面に置きます。粉末のホウ砂を1回ぶん持ち、置いた土台にShiftキーを押しながら右クリックで塗り、次に上部を追加します。そして2つのパーツが鍛接されるまでハンマーで叩きます。12回ほど叩けば完成です。
After both the base and top are finished, heat both of them up in a forge. Once heated, first place the base part down on the ground. Take one portion of powdered borax and apply with a Shift+right click on the placed base, then add the top part. Hammer until both parts are welded together, this should take about 12 hits.
使い方
金床は、炉で熱したインゴットから金属の道具を鍛えるための作業台です。熱したインゴットを金床に置くとダイアログボックスが開き、クラフトするアイテムを選択することができます。銅や青銅のアイテムはどのような金床でも加工できますが、鉄のアイテムは青銅か鉄の金床でしか加工できず、鋼鉄のアイテムは鉄の金床でしか加工できません。
The anvil is the work surface used for smithing metal tools from ingots heated in a forge. When a heated ingot is placed on the anvil, a dialog box opens to allow the player to select the item to be crafted. Copper and Bronze items can be worked on any anvil, but iron items can only be worked on a bronze or iron anvil and steel items can only be worked on an iron anvil.
There is no need to craft steel anvils at this time, as there are no Tier 5 metals in the game.
特殊
金床を製錬して素材を回収することはできませんが、バージョン1.14から同じ金属のノミと金床をクラフトグリッドに入れると、8個のインゴットを回収できるようになりました。このプロセスで金床とノミの両方が破壊されるので、2個以上のインゴットが失われることに注意しましょう。
バージョン1.14から、落下した金床がプレイヤーやその他の存在に当たると、かなりのダメージを与えるようになりました。
An anvil cannot be smelted to recover the material used in creating the item, however since version 1.14, the player can use a chisel and anvil of the same metal type in the crafting grid to recover 8 ingots worth of metal. Keep in mind that both the anvil and the chisel will be destroyed in the process, meaning from the original 10 ingots, two will be permanently lost.
Since version 1.14, falling anvils do considerable damage when hitting a player or other entity.
ビデオチュートリアル
| 鉄の金床の鍛冶プロセスの詳細ガイド |
|---|
| Detailed guide through the iron anvil smithing process |
|---|
History
Notes
- While the metal tier matters for the anvil, it doesn't matter for the hammer or helve hammer.
- A copper hammer may be used to smith a steel ingot. But higher tiers are preferable for their higher durability (more uses before breaking).
- A bronze helve hammer may be used to smith a steel ingot. Helve hammers have no durability, and there's no reason to prefer higher tier metals.
- Though iron and meteoric iron anvils are both tier 3, you need an iron anvil in order to smith meteoric iron ingots.
Gallery
See also
References
| Ores, metals and minerals | |
|---|---|
| Guides | Ore Deposits • Metals |
| Metals | Copper • Iron • Meteoric iron • Gold • Silver • Lead • Tin • Zinc • Bismuth • Titanium (Ilmenite) |
| Alloys | Bronze (Tin bronze, bismuth bronze, black bronze) • Steel • Brass • Solder (Lead solder, Silver solder) • Molybdochalkos • Cupronickel • Electrum |
| Minerals | Alum • Borax • Cinnabar • Coal • Halite (Salt) • Lapis lazuli • Quartz • Saltpeter • Sulfur • Sylvite (Potash) |
| Tools | Pickaxe • Hammer • Prospecting Pick • Crucible • Forge • Ore blasting bomb • Quern • Anvil • Bloomery • Helve hammer • Pulverizer |
| Other | Gemstones |
| Related mechanics | Panning • Mining • Clay forming • Casting • Smithing • Steel making |
| Wiki Navigation | |
|---|---|
| Vintage Story | Guides • Frequently Asked Questions • Soundtrack • Versions • Controls |
| Game systems | Crafting • Knapping • Clay forming • Smithing • Cooking • Temperature • Hunger • Mining • Temporal stability • Mechanical power • Trading • Farming • Animal husbandry |
| World | World generation • Biomes • Weather • Temporal storms |
| Items | Tools • Weapons • Armor • Clothing • Bags • Materials • Food |
| Blocks | Terrain • Plants • Decorative • Lighting • Functional • Ore |
| Entities | Hostile entities • Animals • NPCs • Players |
| Miscellaneous | List of client commands • List of server commands • Creative Starter Guide • Bot System • WorldEdit • Cinematic Camera • Adjustable FPS Video Recording • ServerBlockTicking |