Survival Guide - Your first day

This page is outdated.
Reason: Not updated for the 1.18 worldgen presets
The content on this page is not up to date with the most recent game update. If you do wish to contribute, please request wiki edit access on the Discord.
Welcome to Vintage Story, an uncompromising wilderness survival sandbox game that emphasizes challenging gameplay. This page will guide you through the controls and the core mechanics that form the foundation of your survival journey: gathering resources, managing hunger, and finding shelter. This guide is a collaboration between many individuals and it may have old, outdated, or incorrect information. There is no guarantee regarding the accuracy of the content, and it is correct to the best of the author's knowledge.
World Creation
When creating a new world, the player can decide between different presets or customize them individually. It is recommended for new players to check the customization options for their first world or start with the Exploration template, as some of the difficulty settings of the Standard experience can be unforgiving.
Customization
If you choose to customize your world, some difficulty points that can be especially challenging for new players are as follows:
- Grace Timer for monster's appearing in the world (0-10 days)
- Death Punishment (Keep or drop inventory on death)
- Timer for items dropped on death (5-60 min)
- True winters (whether or not winters will damage crops, reduce animal spawn, etc.)
- Temporal Stability, Temporal Storms, Surface Stability and Rifts
- Climate Distribution (the distance between different "biomes" and whether these are distributed realistically around an equator, or randomly in patches)
- Surface Deposit frequency (both copper & tin, as they are both important starting metals)
Presets
The below table shows the available world presets. An in depth list of all customization options can be found on the World Configuration page.
| Preset | Important Aspects |
|---|---|
| Standard | The intended way to play. Despite its name, though, this might not necessarily be the best starting point for new players. It comes with the full assortment of enabled options which might increase the difficulty , such as temporal stability, hunger, temperature etc. Without customization, monsters will spawn from the first night on and inventory will be dropped on death. |
| Exploration | Most direct threats like creature hostility & temporal stability are turned off, natural difficulties like hunger and temperatures are reduced. The player will keep their inventory on death. |
| Wilderness Survival | Hard Mode - not recommended for new players. Standard Mode with additional challenges - inventory is dropped on death and the player will respawn in a random location in a 5k block radius. Player health points are reduced and creature strength is raised. |
| Homo sapiens | Turns off all lore features such as traders and ruins. Used to play as the "first human". |
| Creative Building | As the name implies, this is your typical flat building world with Creative Mode enabled from the start. If you'd rather like to build in a normal map, customize a different preset to start in Creative Mode instead of Survival Mode. |
Character Customization Screen
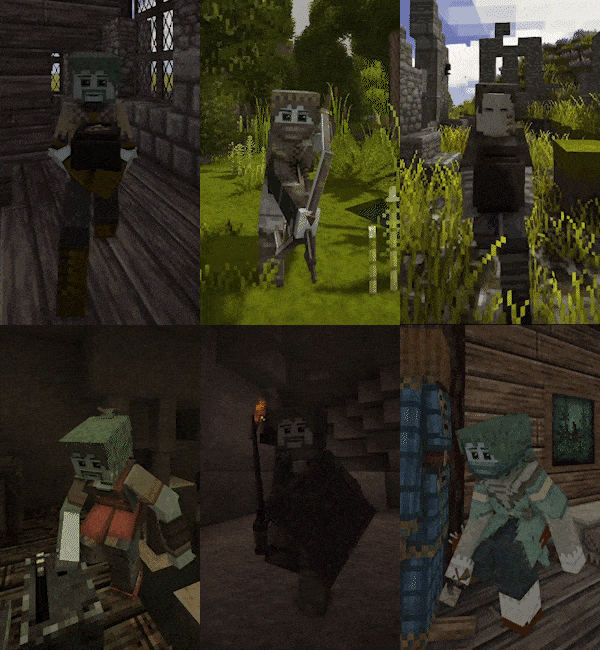
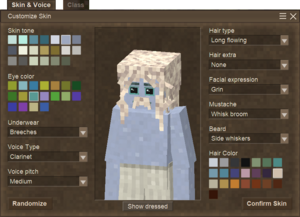
The first thing you will do after creating your world is to set your appearance and class. (If you accidentally close this window, it will reappear when you re-enter the world). You can choose from various hairstyles, facial hair, eye colors, and skin tones, as well as a voice tone, which are based on instruments. As of 1.19.8, there are 6 options for a player's class
- Commoner
- Hunter
- Malefactor
- Clockmaker
- Blackguard
- Tailor
Besides changing the avatar's starter clothing, class choice influences hunger rate, run speed, and more. See Classes If it's your first time playing the game and you're unsure which class to choose, it's recommended to select the Commoner class, as the others may have some negative attributes that can be difficult to manage if you are not familiar with them.
Controls
This is the default key bind, please keep in mind that when changing, for instance, the Shift key for sneaking to a different one, all combinations previously using the shift key will change to your new key choice as well.
| H | Survival Handbook - can also be used while hovering over an item in the inventory |
| M | Show/Hide worldmap |
| J | Show/Hide diary |
| Tab | Show/Hide chat overlay |
| T | Begin typing in the chat overlay |
| F4 | Show/Hide user interfaces |
| F6 | Show/Hide user minimap |
| Ctrl + B | Show/Hide block info |
| Shift + H | Survival Handbook while looking at a block or item in the world |
| Ctrl + N | Show/Hide block interaction help |
| Ctrl + V | Show/Hide coordinates |
| F12 | Take a screenshot |
| Esc | Exit/close any interface |
Your first day
Player Spawn
Players appear in the world around the "spawn location". If a player dies in the game, the player will reappear (respawn) near the initial spawn location until the player spawn point is reset (this can be done with a temporal gear, which can be found later in the game.) It's a good idea to set a marker for this spawn point when a player first appears in the world. Either use ![]() on the world map or through the command
on the world map or through the command /waypoint add [waypointcolor] [title]. This command adds a waypoint with given color (any .NET Color or a Hex Code) and text.
User Interfaces
Once you have spawned, you will see three indicators at the bottom of your screen: one red, one cyan and one green.
Health
The first red indicator, your health bar on the left, reflects the amount of damage your character can take before dying. Each subdivision in the bar represents 1 health point, of which you will have 15 by default. Lost health points can be recovered using healing items or through natural regeneration, which restores 0.1 health points every 10 seconds. However, this significantly increases the loss of satiety.
Temporal Stability
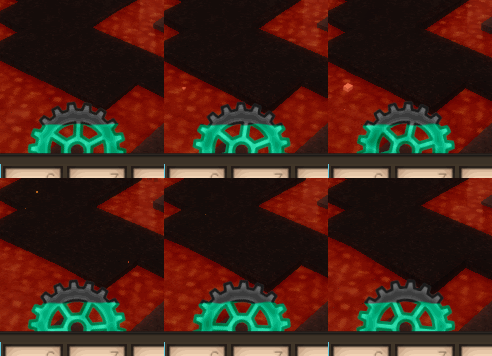
The second marker, represented by a cyan gear in the middle, is your temporal stability. This measures how stable the player is. The less cyan area there is, the more unstable the character will be. As it gradually decreases, you will see the gear spinning counterclockwise. If it completely runs out, you will enter the Rust World, which causes visual distortions, increases the spawn rate of monsters, and causes damage until some temporal stability can be recovered.
Draining temporal stability:
- Some surface areas are temporally unstable
- Caves, underground caverns, and places below surface level are generally more unstable than the surface of the world
- Temporal storms (occur at regular intervals)
- Being near a Temporal rift will rapidly drain temporal stability
Recovering temporal stability:
- Move to a location of high stability on the surface or at higher elevations in the world
- Transfer the temporal stability from a temporal gear: equip the gear in the left hand, a knife in the off hand, and hold
 to provide a 30% boost at the cost of some HP
 - Killing drifters recovers small amounts of your own temporal stability
Keep temporal stability in mind when picking a spot to building your home, as moving after settling down will be much harder.
Satiety
Satiety, represented by the green bar on the right, reflects how hungry the character is or how many calories remain to be burned. It has a maximum, default, value of 1500. Satiety decreases naturally over time, even when standing still, but some actions such as running, holding something in the off-hand, wearing armor, or certain conditions like cold temperatures or regenerating lost health will increase satiety consumption. If satiety falls to zero, the player will start to take hunger damage, leading to death. Eating food will restore as much satiety as shown in the item's description.
Player Inventory
Bellow the three indicators, you will see one empty slot on the left, 10 empty slots on the middle and 4 empty slots on the right. These are three different types of inventory slots.
- Off-hand slot Which can hold passive items such as torchers or lanterns.
- Main inventory Which holds 10 slots. Every slot is linked to a shortcut for quick access (default: keys 1 to 0).
- Backpack slots Which allow for portable containers to be added. Up to 4 containers can be used to expand the inventory further. These slots can be accessed through the inventory/crafting window E or by using Ctlr + 1 to 4.
Stone Age
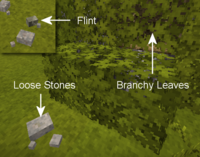
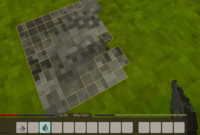
In order to start the Stone Age, you will need Stone Tools. For this we will need to use a mechanic called Stone knapping, which allows you to create primitive tools and weapons heads. The process involves:
- Find Flint or loose knappable stones (basalt, chert, granite, andesite, obsidian or peridotite).
- With the flint or stone in your active hotbar slot, place it (Shift +
 ) on solid ground to create a knapping surface. Only flint will immediately create a knapping surface. In order to use the other loose stones, you need to place it once, then target it (Shift +
  ) again with another loose stone.
 - Choose the tool to create from the menu. An axe and a knife are highly recommended as first tools.
- Using a stone in the active hand,
 on the orange boxes to remove them from the stone and shape the finished blade or tool head. When the last orange box is removed, the completed tool head will transfer to the player's hotbar. If an orange box (or group of them) becomes completely separated from the main tool, they will disappear as well.
 - Press E to open the inventory GUI and access the crafting grid. In the grid, combine the stone tool blade with a stick (handle) to create the finished tool.
Protip:
* Sticks can be collected from the ground or by breaking leafy branches using [[File:LMB.png|alt=Left mouse button|link=]]. |
Portable Containers
Now that you have a knife and can quickly gather reeds, you can collect 10 of them to craft a hand basket, needing 40 to fill all the backpack slots. Each hand basket adds 3 inventory slots, giving us 12 new spaces. It is important to note that backpacks can only be kept in the inventory while they are empty. Once they contain items, they can only be placed on the ground or in backpack slots.
Food
You can now fill all that extra inventory space with food! Here are some of the first day options:
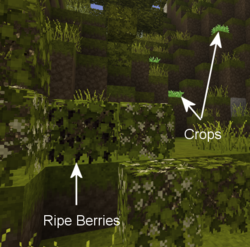
- Wild Crops can be found around the world. They spawn in varying states of growth, and are only harvestable when fully mature. In addition to food they are one of the main ways of acquiring seeds for farming along with ruins and trading. Wild crops can also be an easy way to acquire flax before you have a farm.
- Mushrooms can be harvested with a knife or empty hands. They will regrow at the exact spot, so marking mushroom clusters on the map can be advantageous. Make sure to check the mushroom with the Handbook to check for poisonous variants, as some mushrooms can drain your health or even kill you when consumed raw or cooked. They can be found on the ground or on trees, and are (mostly) found in forests.
- Ripe Berry Bushes can be harvested without tools, and then broken and replanted anywhere else. After a while they will start to bloom again.
- Cattail roots can be harvested using a knife and cooked over a fire as a source of early game forage. However, eating the roots gets rid of the plant, so it is best to try to avoid until you make all reed chests and baskets you plan to make.
- Most animals can be killed and harvested with a knife for nutritious meat and fat, as well as items useful later in the game like bones and hide. Bones can be gathered after exiting the menu by destroying the skeleton left behind. Sneak and hold the
 with a knife in hand to harvest animals. Meat must be cooked in a fire pit.
Refer to the page on wild foods for more information.
Clay
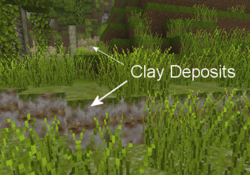
Clay is a required resource to progress through the ages, and in early game it can be used to build comparatively cheap stationary storage options and your first means to preserve food for a bit longer. It is also required to craft a cooking pot, which is necessary for advanced cooking. Clay items must be fired in a Pit kiln before they become useable.
Detailed information can be found in the Clay Forming page.
Light / Cooking
Once the sun sets, a player might want to create a firepit as a source of light and for cooking. Be aware though, rain will extinguish any uncovered fires or torches, so be sure to build a simple roof over any firepits.
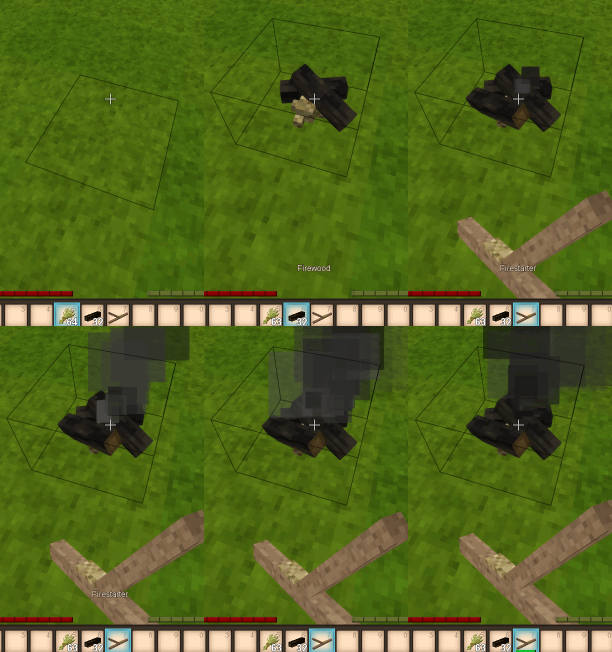
To make a firepit, gather the following resources:
- Dry grass:
 with a Knife in hand to gather Tall Grass.
 - Firewood:
 with an Axe in hand to cut Trees and harvest logs. Place the axe and logs in the crafting grid to create firewood.
Sneak and right click on solid ground with the dry grass in hand to place a fire pit. Next, sneak and right click with 4 firewood in hand to complete the fire pit. Then, light the fire using a firestarter (or a torch), hold ![]() with either item in hand and aim at the base of the firepit. (Optionally check the handbook H, to find out how to make a firestarter.)
with either item in hand and aim at the base of the firepit. (Optionally check the handbook H, to find out how to make a firestarter.)
Congratulations, meat can be cooked and new torches created by heating sticks! Be careful though, a torch in your off hand will cause you to take an increased hunger penalty, and torches held while taking a dip in water will get extinguished.
Combat
To defend against hostile creatures, craft stone age weapons by knapping or carving a club from a log. Different weapons have different ranges. Spears are the strongest long range weapon in the stone age, but break quickly. Create a stone spearhead by knapping, and combine with a stick (shaft) in the crafting grid to finish the spear. Wooden clubs are durable but have less damage and less range. Knives, axes, or just plain sticks can all be used as weapons, but these have shorter ranges than the spear. In an emergency, small stones can be thrown at mobs. For more information, see the main article on Combat.
Improvised body armor can be crafted from dry grass and firewood for some very basic protection. It will not protect your head or legs, but is better than nothing. Once more established in the world of Vintage Story, more advanced types of armor can be crafted.
Shelter
As the sun sets, Drifters will start to spawn. Drifters are hostile, and can be dangerous to players (especially if they have no armor or weapons), but can be easily avoided if players prepare a shelter beforehand. There are different blocks that you can use to make a shelter using the early resources you have available. Dry grass can be used to make a bed early on, or form hay blocks/cob for early building blocks. Soil is also a good building material, and can be used to form Mud Bricks. If you run out of time or don't have the resources to make a shelter, you can always hide in a Traders cart (remember, you will not be able to prepare tools or food for tomorrow as you can't modify the Traders cart. If there are no traders nearby, you can always make a skybase or bunker, just remember drifters can climb ladders!
Stationary Storage
- See Container's main article for detailed information.
For more storage, the player can craft two early game containers.
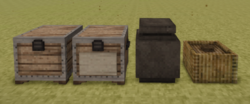
- Reed chests have 8 slots for items, however they require a total of 24 cattails and shouldn't be used to store food if possible.
- Storage Vessels have 12 slots. They require clay to craft and have the best spoilage rates in the game, which make them suitable for food storage. As with all clay items, they must be fired before they become useable.
- Chests have 16 slots, but require boards and Nails and strips , which also require access to smithing. You can also combine two chests into one trunk in the crafting grid, which takes up 2 blocks of space and has 36 slots, making it slightly more effective, but more bulky.
Temperature
- See Temperature for detailed information.
The player's body temperature needs to be kept around 37°C. Prolonged times with body temperature under this mark will result in shivering animations and even damage taken. Beware that dipping in water or being out in the rain will make your temperature drop faster. Standing near a lit campfire can warm the player up and the body temperature will stay up a while even after stepping away.
Advanced Game Mechanics
Once the basics are mastered, players can develop advanced technology: Survival Guide - Advanced tech
Tutorial Video: First Day
Thanks to Ashantin for creating and sharing with the VS community.
| Wiki Navigation | |
|---|---|
| Vintage Story | Guides • Frequently Asked Questions • Soundtrack • Versions • Controls |
| Game systems | Crafting • Knapping • Clay forming • Smithing • Cooking • Temperature • Hunger • Mining • Temporal stability • Mechanical power • Trading • Farming • Animal husbandry |
| World | World generation • Biomes • Weather • Temporal storms |
| Items | Tools • Weapons • Armor • Clothing • Bags • Materials • Food |
| Blocks | Terrain • Plants • Decorative • Lighting • Functional • Ore |
| Entities | Hostile entities • Animals • NPCs • Players |
| Miscellaneous | List of client commands • List of server commands • Creative Starter Guide • Bot System • WorldEdit • Cinematic Camera • Adjustable FPS Video Recording • ServerBlockTicking |

