Guida Sopravvivenza - Il tuo primo giorno
Questa guida è una collaborazione con molte persone e potrebbero esserci degli errori. Un membro eccezionale della comunità, copygirl, che ha contribuito al codice di Vintage Story, ha compilato una guida più concisa e facile da usare survival guide on her own page.
Controls
Questa è la combinazione di tasti predefinita, tieni a mente che quando cambi, il tasto Shift per la modalità furtiva ad uno differente, tutte le combinazioni precedenti useranno il tuo nuovo tasto shift scelto.
Personaggio
| W A S D | Per muoversi |
| Space | Salta |
| E | Inventario Zaino (Accesso alla Griglia della Creazione) |
| C | Inventario Personaggio (Vestiti ed altre Attrezzature) |
| Shift | Furtivo (usato per posizionare oggetti attivi su blocchi) |
| Ctrl + W | Correre |
| G | Sedersi |
| Q | Butta a terra l'oggetto in mano |
| F5 | Cicla le modalità camera (Prima persona, terza persona, sopra la testa) |
Interfaccia Utente
| tab | Mostra/Nascondi la chat |
| T | Per scrivere nella chat |
| F4 | Mostra/Nascondi interfaccia utente |
| F6 | Mostra/Nascondi la minimppa |
| B | Mostra/Nascondi informazioni blocco |
| H | Manuale Sopravvivenza - può essere usato mentre passi il muove su un oggetto nell'inventario |
| SHIFT + H | Manuale Sopravvivenza mentre guardi un blocco o oggetto nel mondo |
| M | Mostra/Nascondi worldmap |
| N | Mostra/Nascondi aiuto interazione blocco |
| V | Mostra/Nascondi coordinate |
| F12 | Fai uno screenshot |
| esc | Esci/Chiude qualsiasi interfaccia |
Creazione Mondo
Quando si crea un nuovo mondo, il giocatore può decidere tra differenti preimpostazioni oppure presonalizzare ognuna di queste individualmente.
Si consiglia per i nuovi giocatori di controllare le opzioni personalizzabili per il loro primo mondo oppure iniziare con un modello Esplorazione, perchè alcune impostazione configurate nella esperienza Standard possono essere altamente frustranti.
I principali punti di difficoltà che possono essere stremamente impegnativi per i nuovi giocatori sono i seguenti:
- Punizione per morte (Quando si muore mantiene o butta a terra l'inventario)
- Stabilità Temporale (Tempeste Temporali, Stabilità Superficie e Fratture)
- Distribuzione Climatica (La distanza tra differenti "biomi" e come questi siano distribuiti realisticamente intorno a l'equatore, oppure in maniera casuale a macchie)
- Frequenza diepositi superficie (Entrambi rame e stagno, loro sono entrambi importanti materiali di partenza)
La tabella sottostanze mostra le preimpostazioni del mondo disponibili, si consiglia di usare il pulsante Personalizza sotto la selezione preimpostazioni per presonalizzare ancora di più il mondo, dato che tutti gli aspetti della generazione del mondo e dell'esperienza del giocatore possono essere cambiati. Una lista approfondita delle opzioni di personalizzazione può essere trovata nella pagina World Configuration.
| Preimpostazione | Aspetti Importanti |
|---|---|
| Normale | nonostante il nome, questo non è il miglior punto di partenza per i nuovi giocatori. Questa impostazione a tutte le difficoltà cel gioco, significa che la stabilità temporale, fame, temperature ecc. sono tutte abilitate. Senza personalizzazione, i mostri saranno generati dalla prima notte e l'inventario sarà lasciato a terra dopo la morte. |
| Esplorazione | La maggior parte delle minacce come creature ostili e stabilità temporale sono disattivate, difficoltà naturali come la fame e le temperature sono ridotte. I giocatori manteranno l'inventario dopo la morte. |
| Sopravvivenza Selvaggia | modalità Difficile - non raccomandata per i nuovi giocatori. Mdalità Normale con sfide aggiuntive - l' inventario è lasciato a terra dopo la morte e il giocatore verrà generato in un luogo casuale nel raggio di 5k blocchi. I punti salute del giocatore sono ridotti e la forza delle creature è aumentata. |
| Costruzione in Creativa | Come suggerisce il nome, questo è il tipico mondo piatto con la Modalità Creativa abilitata fin dall'inizio. Se prefereisci costruire in una mappa normale, personalizza una differente preimpostazione per iniziare in Modalità Creativa invece che Modalità Sopravvivenza. |
Il tuo primo giorno
Generazione Giocatore
I giocarori appaiono nel mondo nel "luogo di generazione". Se un giocatore muore nel gioco, questi riapparirà (rigenerazione) nel punto iniziale del luogo di generazione fino a che il punto di generazione non sarà reimpostato (un modo per reimpostare il luogo di generazione del giocatore può essere trovato più avanti nel gioco.) E' una buona idea impostare un segnale per questo punto di generazione appena il giocatore appare nel mondo. Fai cllick con il pulsante destro del mouse sulla mappa del mondo oppure usa il comando /waypoint add [waypointcolor] [title]. Questo comando aggiunge un segnaposto con il testo e colore scelto (qualsiasi Colore .NET oppure un a Codice Hex).
Attrezzi di pietra
Per iniziare L'Età della Pietra , avrai bisogno di Attrezzi di Pietra, il processo di solito prevede quanto segue:
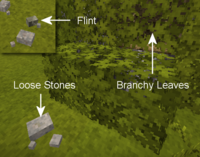
- Trova Selce o Pietre Sfuse (basalto, granito, andesite, ossidiana oppure peridotite).
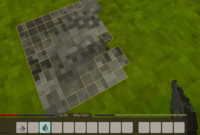
Furtivo + Click Destrosu un terreno solido per creare una superficie per Scolpire. (Solo la Selce creerà immediatamente una superficie per Scolpire. Per poter usare le altre pietre sfuse, devi posizionarle una volta, dopoFurtivo + Click Destrodi nuovo con un altra pietra sfusa.- Sceglil'attrezzo che vuoi creare dal menù. Una Ascia ed un Coltello sono altamente consigliati come prima attrezzatura.
- Usando una pietra nella mano,
Click Sinistrosui caselle arancioni per rimuovere dalla pietra e formare la lama oppure la testa dell'attrezzo. Quando l'ultima casella arancione è rimossa, la testa dell'attrezzo completata sarà trasferita nella barra rapida del giocatore. - Premi E per aprire la GUI dell'inventario ed accedere alla griglia di creazione. Nella griglia, combina la lama dell'attrezzo di pietra con un bastone (manico) per creare un attrezzo completo.
- Nota: I Bastoni possono essere raccolti dal terreno oppure rompendo le foglie dai rami usando
Click Sinistro.
Inventario Giocatore
Players have access to 3 types of inventory slots.
|
Food
Here are some of the first day options for food:
- Mushrooms can be harvested with a knife or empty hands. They will regrow at the exact spot, so marking mushroom clusters on the map can be advantageous. Make sure to check the mushroom with the Handbook to check for poisonous variants, as some mushrooms can drain your health or even kill you when consumed raw or cooked
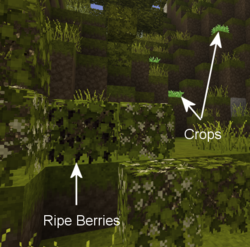
- Ripe Berry Bushes can be harvested without tools, and then broken and replanted anywhere else. After a while they will start to bloom again.
- Cattail roots can be harvested using a knife and cooked over a fire as a source of early game forage.
- Most animals can be killed and harvested with a knife for nutritious meat and fat. Hold
Sneak + Hold Right mouse buttonwith a knife in hand to harvest animals. Meat must be cooked in a fire pit.
Clay
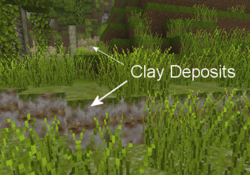
Clay is a required resource to progress through the ages, and in early game it can be used to build comparatively cheap stationary storage options and your first means to preserve food for a bit longer. It is also required to craft a cooking pot, which is necessary for advanced cooking.
Detailed information can be found in the Clay Forming page.
Light / Cooking
Once the sun sets, a player might want to create a firepit as a source of light and for cooking. Be aware though, rain will extinguish any uncovered fires or torches, so be sure to build a simple roof over any firepits.
Gather the following resources:
- Dry grass:
left clickwith a Knife in hand to gather Tall Grass. - Firewood:
left clickwith an Axe in hand to cut Trees and harvest logs. Place the axe and logs in the crafting grid to create firewood.
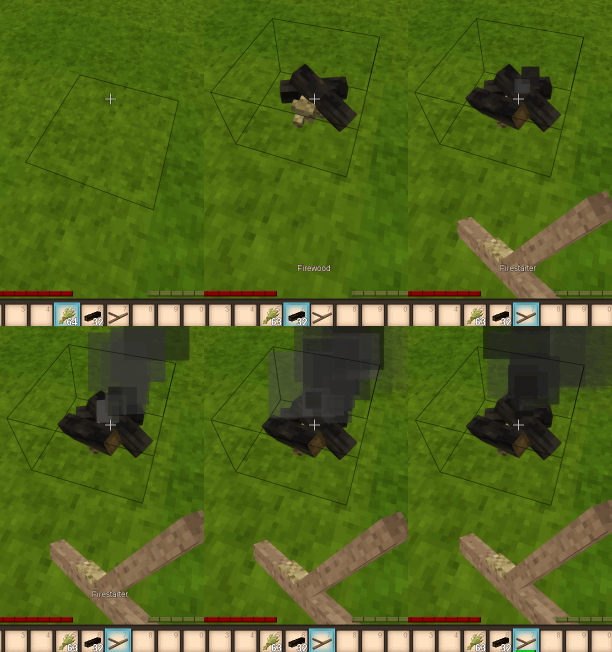
Hold Sneak + Right click on solid ground with the dry grass in hand to place a fire pit. Next, Sneak + Right click with 4 firewood in hand to complete the fire pit. Then, light the fire using a firestarter (or a torch), hold Right click with either item in hand and aim at the base of the firepit. (Optionally check the handbook, opened with H, to find out how to make a firestarter.)
Congratulations, meat can be cooked and new torches created by heating sticks! Be careful though, a torch in your off hand will cause you to take an increased hunger penalty, and torches held while taking a dip in water will get extinguished.
Combat
To defend against hostile creatures, craft stone age weapons by knapping or carving a club from a log. Different weapons have different ranges. Spears are the strongest long range weapon in the stone age, but break quickly. Create a stone spearhead by knapping, and combine with a stick (shaft) in the crafting grid to finish the spear. Wooden clubs are durable but have less damage and less range. Knives, axes, or just plain sticks can all be used as weapons, but these have shorter ranges than the spear. In an emergency, small stones can be thrown at mobs. For more information, see the main article on Combat
Improvised body armor can be crafted from dry grass and firewood for some very basic protection. It will not protect your head or legs, but is better than nothing. Once more established in the world of Vintage Story, more advanced types of armor can be crafted.
Shelter
Once the sun sets, a player might also like a shelter. There are different blocks that you can use to make a shelter using the early resources you have available. Dry grass can be used to make a bed early on, or form hay blocks/cob for early building blocks. Soil is also a good building material, and can be used to form Mud Bricks.
Stationary Storage
- See Container's main article for detailed information.
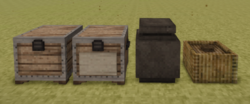
For more storage, the player can craft two early game containers.
- Baskets have 8 slots for items, however they require a total of 24 cattails and shouldn't be used to store food if possible.
- Storage Vessels have 12 slots. They require clay to craft and have the best spoilage rates in the game, which make them suitable for food storage.
- Chests have 16 slots, but require boards, which also require access to smithing.
Temperature
- See Temperature's main article for detailed information.
The player's body temperature needs to be kept around 37°C. Prolonged times with body temperature under this mark will result in freezing animations and even damage taken. Beware that dipping in water or being out in the rain will make your temperature drop faster. Standing near a lit campfire can warm the player up and the body temperature will stay up a while even after stepping away.
Temporal Stability
- See Temporal Stability's main article for detailed information.
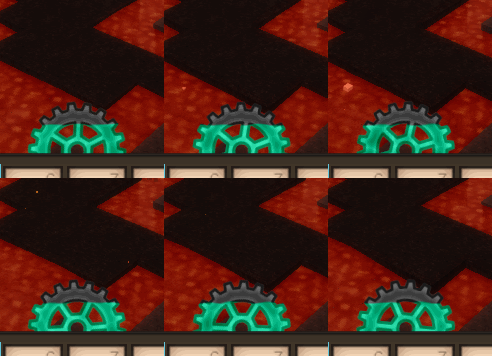
By now a player might be wondering about the cyan gear between the health and satiety bar. This is the temporal stability meter, the level of color in the gear indicates the player's current temporal stability. As a player's temporal stability reduces, the gear turns counter clockwise and the blue color in the gear decreases. When increasing, the gear's color returns as it turns clockwise. If temporal stability reaches zero, the player's vision will change drastically, and bad things tend to happen.
Draining temporal stability:
- Some surface areas are temporally unstable
- Caves, underground caverns, and places below surface level are generally more unstable than the surface of the world
- Temporal storms (occur at regular intervals)
Recovering temporal stability:
- Move to a location of high stability on the surface or at higher elevations in the world
- Transfer the temporal stability from a temporal gear: hold the gear in the left hand, a knife in the right hand, and hold
right mouse buttonto provide a 30% boost - Killing drifters recovers small amounts of your own temporal stability
Advanced Game Mechanics
Once the basics are mastered, players can develop advanced technology: Survival Guide - Advanced tech
Tutorial Video: First Day
Thanks to Ashantin for creating and sharing with the VS community.
| Wiki Navigation | |
|---|---|
| Vintage Story | Guides • Frequently Asked Questions • Soundtrack • Versions • Controls |
| Game systems | Crafting • Knapping • Clay forming • Smithing • Cooking • Temperature • Hunger • Mining • Temporal stability • Mechanical power • Trading • Farming • Animal husbandry |
| World | World generation • Biomes • Weather • Temporal storms |
| Items | Tools • Weapons • Armor • Clothing • Bags • Materials • Food |
| Blocks | Terrain • Plants • Decorative • Lighting • Functional • Ore |
| Entities | Hostile entities • Animals • NPCs • Players |
| Miscellaneous | List of client commands • List of server commands • Creative Starter Guide • Bot System • WorldEdit • Cinematic Camera • Adjustable FPS Video Recording • ServerBlockTicking |
