Beekeeping/es: Difference between revisions
(Created page with "Enjambrará en aprox. 9 días") |
(Updating to match new version of source page) |
||
| (21 intermediate revisions by one other user not shown) | |||
| Line 25: | Line 25: | ||
== Capturando de abejas silvestres == | == Capturando de abejas silvestres == | ||
Las abejas se capturan con una | Las abejas se capturan con una {{ll|skep|colmena artificial}}. Los jugadores pueden ver el tamaño de la colmena, el número de flores que hay y una estimación del número de días que faltan para que la colmena enjambre pulsando {{Keypress|B}} (bloque de información) y pasando el ratón por encima de la colmena. La colmena salvaje debe alcanzar una gran población antes de dividirse y poblar la colmena. | ||
=== Bloque de información === | === Bloque de información === | ||
| Line 44: | Line 44: | ||
|- | |- | ||
|6-7 | |6-7 | ||
| | |Enjambrará en aprox. 8 días | ||
|- | |- | ||
|8-9 | |8-9 | ||
| | |Enjambrará en aprox. 7 días | ||
|- | |- | ||
|10-11 | |10-11 | ||
| | |Enjambrará en aprox. 6 días | ||
|- | |- | ||
|12-13 | |12-13 | ||
| | |Enjambrará en aprox. 5 días | ||
|- | |- | ||
|14-15 | |14-15 | ||
| | |Enjambrará en aprox. 4 días | ||
|- | |- | ||
|16-17 | |16-17 | ||
| | |Enjambrará en aprox. 3 días | ||
|- | |- | ||
|18-19 | |18-19 | ||
| | |Enjambrará en aprox. 2 días | ||
|- | |- | ||
|20-21 | |20-21 | ||
| | |Enjambrará en aprox. un día | ||
|- | |- | ||
|22+ | |22+ | ||
| | |Enjambrará en menos de un día | ||
( | (Entre 15 horas y 1 hora) | ||
( | (Flores: 22 - 224 o más) | ||
|} | |} | ||
===Rellenar una colmena artificial vacía=== | |||
=== | |||
Coloca una {{ll|skep|colmena artificial vacía}} a menos de siete bloques de la colmena silvestre. Si no hay flores cerca de la colmena silvestre, la población no aumentará lo suficiente como para enjambrar. Para aumentar la población, las abejas necesitan al menos cinco {{ll|Flowers|flores}} en un radio de siete bloques de la colmena silvestre. Las abejas deben explorar su zona para localizar y alimentarse de las flores recién colocadas, pero las encontrarán con el tiempo. | |||
Cuantas más flores coloques, más rápido irá el proceso: por ejemplo, si colocas 100 flores en la vecindad de siete bloques, el enjambre sólo tardará unas tres horas dentro del juego. Ten en cuenta que esto no incluye el tiempo que necesitan las abejas para reconocer las flores. Puedes comprobarlo pasando el ratón por encima de la colmena para ver si las han encontrado. | |||
=== Transporte de una colmena llena === | |||
=== | |||
[[File:Carry Skep.PNG|500px|thumb|Las colmenas llenas ocupan un hueco en la mochila.]] | |||
[[File:Carry Skep.PNG|500px|thumb| | |||
Las colmenas llenas pueden transportarse en una de las cuatro ranuras para bolsas, en lugar de en una mochila o cesta. Una vez poblado, {{Using|recoger}} la colmena artificial. Llevar una colmena artificial hará que su población disminuya. Se colocará en la ranura de bolsa vacía y se podrá llevar a casa. | |||
{{Protip | {{Protip | ||
|Icon=BeeMob.png | |Icon=BeeMob.png | ||
| | |Romper la colmena artificial la destruirá y podría generar un enjambre de abejas furiosas.}} | ||
=== Colocando una colmena artificial llena=== | |||
=== | |||
Coloque la colmena artificial llena en un colmenar preparado. Primero, selecciona la colmena en la ranura de la mochila. Para ello, mantén pulsado {{Sprint|ctrl}} y desplázate o mantenlo pulsado y pulsa del 1 al 4 (para seleccionar la ranura vacía de la mochila). A continuación, {{Using|colocar}} la colmena artificial en un bloque sólido. | |||
{{Protip | {{Protip | ||
|Icon=raccoon.png | |Icon=raccoon.png | ||
| | |Asegúrate de construir una valla alrededor de tus colmenas para que la miel esté a salvo de esos traviesos mapaches. | ||
}} | }} | ||
| Line 147: | Line 131: | ||
<div lang="en" dir="ltr" class="mw-content-ltr"> | <div lang="en" dir="ltr" class="mw-content-ltr"> | ||
As the bee population increases, they produce honeycomb. Over time, the entrance of the skep will change from a dull yellow to a bright yellow as the skep fills. When a player examines the populated skep, the block information will show that the skep has become "harvestable". At this point, {{Breaking}} the skep will provide honeycomb and some of the cattails used to make the skep. Pick up the harvested items and move out of the area. | As the bee population increases, they produce [[honeycomb]]. Over time, the entrance of the skep will change from a dull yellow to a bright yellow as the skep fills. When a player examines the populated skep, the block information will show that the skep has become "harvestable". At this point, {{Breaking}} the skep will provide honeycomb and some of the cattails used to make the skep. Pick up the harvested items and move out of the area. | ||
</div> | </div> | ||
| Line 171: | Line 155: | ||
<div lang="en" dir="ltr" class="mw-content-ltr"> | <div lang="en" dir="ltr" class="mw-content-ltr"> | ||
Honeycomb can be processed into {{ll|honey|honey}} and {{ll|beeswax|beeswax}}. First, place an empty fired bowl or {{ll|Wooden_Bucket|bucket}} on the ground. Next, while holding the honeycomb, aim the cursor at the empty container and right click to "squeeze" the honey from the comb. This action will fill it with honey and the remaining wax will appear in the player's inventory. Each honeycomb yields 0. | [[Honeycomb]] can be processed into {{ll|honey|honey}} and {{ll|beeswax|beeswax}}. First, place an empty fired bowl or {{ll|Wooden_Bucket|bucket}} on the ground. Next, while holding the honeycomb, aim the cursor at the empty container and right click to "squeeze" the honey from the comb. This action will fill it with honey and the remaining wax will appear in the player's inventory. Each honeycomb yields 0.2 liters of honey and one wax. A bowl holds honey from 5 honeycomb portion, while a bucket holds honey from 50 honeycombs (10 liters), and a barrel holds 5 buckets (50 liters) of honey. | ||
</div> | </div> | ||
Latest revision as of 12:32, 15 January 2024
Las abejas proporcionan importantes recursos en Vintage Story. Con métodos sencillos, las abejas pueden ser cuidadas y sus productos cosechados. La apicultura produce productos útiles como miel y cera de abejas.
Buscando Abejas silvestres
Encontrar abejas silvestres puede ser difícil. Las abejas silvestres aparecen raramente en climas cálidos, pero no en climas demasiado áridos o húmedos. La mejor forma de encontrarlas es subir al máximo el sonido del juego y vagar por zonas boscosas. Las abejas suelen oírse antes de verse. Siga escuchando si hay abejas y compruebe los árboles de la zona. Las colmenas silvestres pueden estar dentro o suspendidas de un tronco.
Las colmenas aparecen en climas en los que se cruzan los tres valores de la siguiente tabla:
| Parameter | Min. value | Max. value |
|---|---|---|
| Temperature | 5 | 35 |
| Rainfall | 0.35 | 0.85 |
| Forest | 0.25 | 1.0 |
Capturando de abejas silvestres
Las abejas se capturan con una colmena artificial. Los jugadores pueden ver el tamaño de la colmena, el número de flores que hay y una estimación del número de días que faltan para que la colmena enjambre pulsando B (bloque de información) y pasando el ratón por encima de la colmena. La colmena salvaje debe alcanzar una gran población antes de dividirse y poblar la colmena.
Bloque de información
| Cantidad de Flores | Estimación |
|---|---|
| 0-2 | Ninguna |
| 3 | Enjambrará en aprox. 10 días |
| 4-5 | Enjambrará en aprox. 9 días |
| 6-7 | Enjambrará en aprox. 8 días |
| 8-9 | Enjambrará en aprox. 7 días |
| 10-11 | Enjambrará en aprox. 6 días |
| 12-13 | Enjambrará en aprox. 5 días |
| 14-15 | Enjambrará en aprox. 4 días |
| 16-17 | Enjambrará en aprox. 3 días |
| 18-19 | Enjambrará en aprox. 2 días |
| 20-21 | Enjambrará en aprox. un día |
| 22+ | Enjambrará en menos de un día
(Entre 15 horas y 1 hora) (Flores: 22 - 224 o más) |
Rellenar una colmena artificial vacía
Coloca una colmena artificial vacía a menos de siete bloques de la colmena silvestre. Si no hay flores cerca de la colmena silvestre, la población no aumentará lo suficiente como para enjambrar. Para aumentar la población, las abejas necesitan al menos cinco flores en un radio de siete bloques de la colmena silvestre. Las abejas deben explorar su zona para localizar y alimentarse de las flores recién colocadas, pero las encontrarán con el tiempo.
Cuantas más flores coloques, más rápido irá el proceso: por ejemplo, si colocas 100 flores en la vecindad de siete bloques, el enjambre sólo tardará unas tres horas dentro del juego. Ten en cuenta que esto no incluye el tiempo que necesitan las abejas para reconocer las flores. Puedes comprobarlo pasando el ratón por encima de la colmena para ver si las han encontrado.
Transporte de una colmena llena
Las colmenas llenas pueden transportarse en una de las cuatro ranuras para bolsas, en lugar de en una mochila o cesta. Una vez poblado, recoger la colmena artificial. Llevar una colmena artificial hará que su población disminuya. Se colocará en la ranura de bolsa vacía y se podrá llevar a casa.

|
Protip:
Romper la colmena artificial la destruirá y podría generar un enjambre de abejas furiosas. |
Colocando una colmena artificial llena
Coloque la colmena artificial llena en un colmenar preparado. Primero, selecciona la colmena en la ranura de la mochila. Para ello, mantén pulsado ctrl y desplázate o mantenlo pulsado y pulsa del 1 al 4 (para seleccionar la ranura vacía de la mochila). A continuación, colocar la colmena artificial en un bloque sólido.

|
Protip:
Asegúrate de construir una valla alrededor de tus colmenas para que la miel esté a salvo de esos traviesos mapaches. |
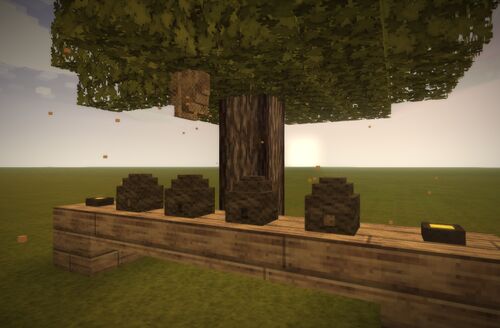
Apiary
Bees search for flowers in a seven block range, in all directions. To reach a large population, bees need [5+3X] flowers, where X is the number of other skeps within their search range. Well fed populations of bees will split to fill additional empty skeps.
Propagating bee populations
Additional skeps can be filled from the original, allowing players to increase the number of skeps available for harvesting. As the population of the original skep grows, the bees will divide to populate nearby empty skeps placed within 7 blocks of a filled skep by the same process that bees are captured from a wild hive.
Optimized Skep Layout
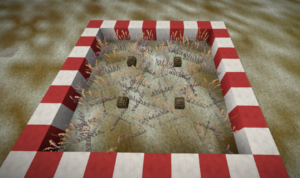
The simplest layout for ensuring each skep has enough flowers is to place skeps 2 tiles apart and surround them with flowers. This pattern can be repeated indefinitely and each skep will have enough flowers to reach a large population.
Harvesting skeps
As the bee population increases, they produce honeycomb. Over time, the entrance of the skep will change from a dull yellow to a bright yellow as the skep fills. When a player examines the populated skep, the block information will show that the skep has become "harvestable". At this point, breaking the skep will provide honeycomb and some of the cattails used to make the skep. Pick up the harvested items and move out of the area.
Temperature
Populations of bees will hibernate (stop swarming or producing honeycombs) at 0°C. Once the temperature reaches -10°C, all bee-related timers (swarm and production) will reset, and will only resume until the temperature rises above 0°C at the end of winter.
Angry Bees
Though bees can be collected from the wild, they cannot be domesticated. There is always a chance that breaking the skep will spawn an angry bee swarm. One technique to avoid attacks from the angry swarm is to place straw dummies near the hives so the bees attack the decoys instead of players. If a player remains in the area of an angry swarm, bees may still attack even if a straw dummy is present. Also, make sure the skeps are not placed near animal pens, as angry bees will attack any nearby living thing, including the animals players are currently domesticating.
Honey & Wax
Honeycomb can be processed into honey and beeswax. First, place an empty fired bowl or bucket on the ground. Next, while holding the honeycomb, aim the cursor at the empty container and right click to "squeeze" the honey from the comb. This action will fill it with honey and the remaining wax will appear in the player's inventory. Each honeycomb yields 0.2 liters of honey and one wax. A bowl holds honey from 5 honeycomb portion, while a bucket holds honey from 50 honeycombs (10 liters), and a barrel holds 5 buckets (50 liters) of honey.
When eaten, Honey restores 0.5 health points. Honey can also be used to make jam, added to meals like porridge, or to craft healing poultices. Wax (stacks to 32) can be used to seal food crocks for long term food preservation, and crafted into a candles by placing three wax in a column in the crafting grid. Candles never burn out and can be placed on top of solid blocks or in chandeliers. Up to 9 candles can be placed on the same block and each candle added to the block increases the light level. Candles are also used to craft lanterns.
Video Tutorials
How to raise a successful beekeeping.
| Wiki Navigation | |
|---|---|
| Vintage Story | Guías • Preguntas más frecuentes (FAQ) • Vintage Story Original Soundtrack • Versiones • Controles |
| Mecánicas de juego | Fabricación • Talla Lítica • Alfarería • Herrería • Cocina • Temperatura • Hambre • Minería • Estabilidad temporal • Energía mecánica • Comercio • Agricultura • Ganadería |
| Mundo | Generación del Mundo • Biomas • Clima • Tormentas temporales |
| Objetos | Herramientas • Armas • Armadura • Ropa • Mochilas • Materiales • Comida |
| Bloques | Terreno • Plantas • Decorativo • Iluminación • Functional • Minerales |
| Entidades | Entidades hostiles • Animales • NPCs • Jugadores |
| Miscellaneous | List of client commands • Lista de comandos del servidor • Guia de iniciación de Modo creativo • Bot System • Cómo utilizar Worldedit • Cinematic Camera • Adjustable FPS Video Recording • ServerBlockTicking |


