Pit kiln: Difference between revisions
(Marked this version for translation) |
(finished an incomplete sentence) |
||
| (9 intermediate revisions by 3 users not shown) | |||
| Line 1: | Line 1: | ||
{{GameVersion|1.19.8}} | |||
<languages/> | <languages/> | ||
<translate> | <translate> | ||
<!--T:16--> | <!--T:16--> | ||
A pit kiln is a | A '''pit kiln''' is a hole used to convert raw {{ll|Clay forming|clay items}} to usable crockery. | ||
[[File:Pit kiln isolated.png|100px|thumb|alt=Shows fuel atop sticks atop grass|3D cutaway glimpse of a pit kiln]] | |||
== Safety == | |||
[[File:Screenshot pitkiln disaster.png|thumb|alt=Shows log walls ablaze|Pit kilns quickly ignited nearby log walls]] | |||
Pit kilns can set surrounding items/creatures on fire - up to 2 blocks away from the pit horizontally, or 3 blocks vertically. | |||
Choose a spot at least 2 blocks away from your house or anything else flammable. Remove grass, bushes, and branches in a margin of at least two blocks; better yet, replace soil with {{ll|packed dirt|packed dirt}} or something else that cannot grow grass. | |||
Ideally, a pond or other water source block is near enough to douse yourself in when needed. | |||
Be careful where you put a pit kiln. | |||
</translate> | |||
[[File:Screenshot pitkiln spreadhorizontal.png|thumb|alt=Displays logs ignited if a margin of only 1 block of unflammables was between them and the pit kiln.|Embers from a pit kiln can easily reach flammable materials 1 block away.]] | |||
[[File:Screenshot_pitkiln_spreadvertical.png|300px|thumb|right|alt=Displays logs ignited if a margin of only 2 blocks of unflammables was between them and the pit kiln. This implies that embers rise but not sprad space in a |<translate>Embers from a pit kiln can easily reach flammable materials 2 blocks above.</translate>]] | |||
<translate> | |||
== | === Mitigation === | ||
* If you have an already-fired watering can that contains water, you can extinguish a small blaze. | |||
* Breaking a container (such as a wooden chest) will make it drop its contents. If you have space in your inventory, you can quickly pick up the items to drop a safe distance away. | |||
* Breaking a block that's currently burning can drop the log etc as well as prevent it igniting to nearby blocks. | |||
* Admin commands can be used to toggle AllowFireSpread in a server. | |||
== Creation == <!--T:17--> | |||
=== Materials === <!--T:21--> | |||
<!--T:3--> | <!--T:3--> | ||
Each | Each kiln requires: | ||
* | * 1 to 4 unfired pieces of pottery created by {{ll|Clay forming|clay forming}}. | ||
* 10 | * 10 {{ll|dry grass|dry grass}}: 5 layers of dry grass, 2 grass per layer. | ||
* 8 sticks: 2 layers of sticks | * 8 {{ll|stick|sticks}}: 2 layers of sticks, 4 sticks per layer | ||
* 4-8 pieces of fuel | * 4-8 pieces of {{ll|fuel|fuel}}. Note that your choice of fuel directly affects how long the pit kiln takes to finish. | ||
* Recommended: nonflammable blocks to build a roof over the kiln(s) | |||
=== Steps === | |||
In the Settings menu, you can toggle interact tips that show in detail what to do next. | |||
* A pit kiln is created by digging a hole 1 block deep surrounded by full blocks that are non-flammable. If you try to add tinder to a pit bordering a block that's flammable (such as peat), or that is less-than-full (such as a path block), you should see an error message at the bottom of the screen. | |||
** Many clay items are small enough that you can fit 4 in a single pit kiln. A pit kiln consumes the same amount of fuel and time whether containing a single item or 4 items, so maximize your resources by firing as many items as can fit. | |||
** If you want to bake more than 4 at a time, create a checkerboard pattern in the ground. If you place clay items in a hole wider than 1x1, you won't be able to proceed with adding tinder around the crockery. | |||
** Suggestions for your first pit kiln: 1 cooking pot, 2 bowls, 1 crock | |||
* {{Keypress|Sneak}} + {{RMB}} to place a {{ll|Clay forming|clayformed}} item on the ground. If it occupies the center of the block, no more clay items can be added; pick it up with {{RMB}} and aim for a corner. | |||
* The interact tips should show that {{ll|Dry grass|grass}} can now be added: with at least 2 pieces of grass in hand, {{Keypress|Sneak}} + {{RMB}} while aiming at the crockery. A layer of grasslike texture should appear in and around the crockery. Repeat 4 times. After a total of 10 grass have been added, no more will be accepted. | |||
** If you have only 1 piece of grass in hand, you cannot add it to a pit kiln; increments of 2 are required. | |||
** At this point, rightclicking will not remove components. But at any point, you can 'break' the kiln by hand to retrieve all items. | |||
* The interact tips should show that {{ll|Stick|sticks}} can now be added: with at least 4 sticks in hand, {{Keypress|Sneak}} + {{RMB}} while aiming at the grass layer. Repeat. After a total of 8 sticks have been added, no more will be accepted. | |||
** If you have only 1-3 sticks in hand, you cannot add them to a pit kiln. | |||
* The interact tips should show that {{ll|Fuel|fuel}} can now be added, with {{Keypress|Sneak}} + {{RMB}}. | |||
** Note that your choice of fuel directly affects how long the pit kiln takes to finish: a pit kiln fueled by {{ll|Firewood|firewood}} takes the longest to complete, while a pit kiln fueled by {{ll|Charcoal|charcoal}} completes fastest. The in-game Handbook specifies the time for each fuel type. | |||
** A pit kiln usually only needs 4 pieces of fuel, but a few larger items, such as {{ll|Containers|storage vessels}} require 2 layers of fuel to fully cover. | |||
* If the kiln has enough fuel, the interact tips should show that it can be ignited, with a {{ll|torch|torch}} or {{ll|firestarter|firestarter}}, using {{Keypress|Sneak}} + {{RMB}}. | |||
** Because {{ll|Rain|rain and snow}} can extinguish a pit kiln, some sort of nonflammable roof is recommended. Precipitation totally resets a pit kiln's progress: if 23 of 24 hours had elapsed when rain put out the fire, it will need 24 full hours when relit (assuming firewood as the fuel; other fuels can speed things up). | |||
</translate> | |||
[[File:Kiln.png|300px|thumb|right|<translate><!--T:62--> The various fill stages of a pit kiln for 4 cooking pots.</translate>]] | |||
[[File:Kiln container.png|300px|thumb|right|<translate><!--T:63--> The final two stages of a storage vessel's kiln setup. Note that the top layer is above ground.</translate>]] | |||
<translate> | |||
<!--T:18--> | <!--T:18--> | ||
* When the process is finished, the fire and smoke will stop. Additionally, the fuel items will disappear, leaving only the finished pottery items in the hole. Fired items appear darker than raw clay, and no longer have "raw" in front of their name in the block info overlay. | |||
</translate> | |||
<gallery> | |||
wateringcan-raw.png|Watering can before firing | |||
wateringcan-burned.png|Watering can after firing | |||
crucible-raw.png|Crucible before firing | |||
crucible-burned.png|Crucible after firing | |||
</gallery> | |||
<!--T: | <translate> | ||
== Fuel choice == <!--T:7--> | |||
<!--T:52--> | |||
The following table breaks down length of firing time from igniting the kiln to the finished product being available for {{Using|pick-up}}. | |||
</translate> | |||
{|class="wikitable sortable" | |||
! <translate><!--T:53--> Fuel type</translate> !! <translate><!--T:54--> Real life<br>(minutes) !! Game world (hours)</translate> | |||
|- | |||
| {{Item List|item=<translate><!--T:55--> Firewood</translate>|icon=Grid_Firewood|page=Firewood}} | style="text-align:center;" | 40 || 24 | |||
|- | |||
| {{Item List|item=<translate><!--T:56--> Peat brick</translate>|icon=Grid_Peatbrick|page=Peat Brick}} | style="text-align:center;" | 32 || 16 | |||
|- | |||
| {{Item List|item=<translate><!--T:57--> Brown coal</translate>|icon=Grid_Lignite|page=Coal}} | style="text-align:center;" | 28 || 12 | |||
|- | |||
| {{Item List|item=<translate><!--T:58--> Black coal</translate>|icon=Grid_Bituminous_coal|page=Coal}} | style="text-align:center;" | 24 || 12 | |||
|- | |||
| {{Item List|item=<translate><!--T:59--> Charcoal</translate>|icon=Charcoal|page=Charcoal}} | style="text-align:center;" | 20 || 10 | |||
|- | |||
| {{Item List|item=<translate><!--T:60--> Coke</translate>|icon=Coke|page=Coke}} | style="text-align:center;" | 20 | |||
|} | |||
<translate> | |||
== Fireable items == <!--T:19--> | |||
</translate> | |||
{| class="wikitable sortable" | {| class="wikitable sortable" | ||
|- | |- | ||
! Pottery Item !! | ! <translate><!--T:26--> Pottery Item</translate> !! <translate><!--T:27--> Quantity</translate> | ||
|- | |||
| {{ll|Bowl|<translate><!--T:28--> Bowl</translate>}} || style="text-align:center;" | 4 | |||
|- | |||
| {{ll|Cooking pot|<translate><!--T:29--> Cooking pot</translate>}} || style="text-align:center;" | 4 | |||
|- | |- | ||
| | | {{ll|Crock|<translate><!--T:30--> Crock</translate>}} || style="text-align:center;" | 4 | ||
|- | |- | ||
| | | {{ll|Storage vessel|<translate><!--T:31--> Storage vessel</translate>}} || style="text-align:center;" | 1 | ||
|- | |- | ||
| | | {{ll|Flowerpot|<translate><!--T:32--> Flowerpot</translate>}} || style="text-align:center;" | 4 | ||
|- | |- | ||
| | | {{ll|Jug|<translate><!--T:61--> Jug</translate>}} || style="text-align:center;" | 4 | ||
|- | |- | ||
| | | {{ll|Planter|<translate><!--T:33--> Planter</translate>}} || style="text-align:center;" | 1 | ||
|- | |- | ||
| | | {{ll|Watering can|<translate><!--T:34--> Watering can</translate>}} || style="text-align:center;" | 1 | ||
|- | |- | ||
| Shingle || 48 | | {{ll|Shingle|<translate><!--T:35--> Shingle</translate>}} || style="text-align:center;" | 48 | ||
|- | |- | ||
| | | {{ll|Crucible|<translate><!--T:36--> Crucible</translate>}} || style="text-align:center;" | 4 | ||
|- | |- | ||
| | | {{ll|Anvil mold|<translate><!--T:37--> Anvil mold</translate>}} || style="text-align:center;" | 1 | ||
|- | |- | ||
| | | {{ll|Falx blade mold|<translate><!--T:38--> Falx blade mold</translate>}} || style="text-align:center;" | 1 | ||
|- | |- | ||
| | | {{ll|Hoe mold|<translate><!--T:39--> Hoe mold</translate>}} || style="text-align:center;" | 1 | ||
|- | |- | ||
| | | {{ll|Shovel mold|<translate><!--T:40--> Shovel mold</translate>}} || style="text-align:center;" | 1 | ||
|- | |- | ||
| | | {{ll|Axe mold|<translate><!--T:41--> Axe mold</translate>}} || style="text-align:center;" | 1 | ||
|- | |- | ||
| | | {{ll|Pickaxe mold|<translate><!--T:42--> Pickaxe mold</translate>}} || style="text-align:center;" | 1 | ||
|- | |- | ||
| | | {{ll|Prospecting pick mold|<translate><!--T:43--> Prospecting pick mold</translate>}} || style="text-align:center;" | 1 | ||
|- | |- | ||
| | | {{ll|Hammer mold|<translate><!--T:44--> Hammer mold</translate>}} || style="text-align:center;" | 1 | ||
|- | |- | ||
| | | {{ll|Helve hammer mold|<translate><!--T:45--> Helve hammer mold</translate>}} || style="text-align:center;" | 1 | ||
|- | |- | ||
| | | {{ll|Ingot mold|<translate><!--T:46--> Ingot mold</translate>}} || style="text-align:center;" | 2 | ||
|- | |- | ||
| | | {{ll|Lamellae mold|<translate><!--T:47--> Lamellae mold</translate>}} || style="text-align:center;" | 1 | ||
|- | |- | ||
| Blue clay brick* || 12 | | {{ll|Blue clay brick|<translate><!--T:48--> Blue clay brick</translate>}}* || style="text-align:center;" | 12 | ||
|- | |- | ||
| Fire clay brick** || 12 | | {{ll|Fire clay brick|<translate><!--T:49--> Fire clay brick</translate>}}** || style="text-align:center;" | 12 | ||
|} | |} | ||
''* <translate><!--T:50--> Can only be made using blue clay.</translate>''<br> | |||
''** <translate><!--T:51--> Can only be made using fire clay.</translate>'' | |||
<translate> | |||
== History == | |||
Clay items used to be fired in a normal campfire. | |||
== Notes == | |||
* Pit kilns are the only fire hazard, other than a player using a torch/firestarter directly on a flammable block. A campfire for cooking/smelting can be constructed directly on wood. A lit torch cannot ignite anything above it. | |||
* To get sticks in bul, break every leaf block on a tree. Chopping a tree grants significantly lower rates of seeds. | |||
* To get grass in bulk, smith a scythe. In winter, a scythe might become less useful, as most grass might be covered by snow, which takes extra time/durability to remove. | |||
* For Wilderness Survival playstyle, there are fewer options for building materials that don't respond to gravity. Soil can be compacted into {{ll|Packed dirt|packed dirt}} that doesn't fall. Mudbrick looks nice but sometimes disintegrates rather than give the player the mudbrickblock. | |||
== Gallery == | |||
== | == See also == | ||
== Video Tutorials == | |||
< | </translate> | ||
{|class="wikitable | {| class="wikitable" | ||
|- | |- | ||
! <translate> Pit kiln guide in the Survival Handbook read aloud </translate> | |||
|- | |- | ||
| | | <youtube width="400" height="240">Ku7Rjm1587M</youtube> | ||
|} | |} | ||
<translate> | |||
== References == | |||
</translate> | </translate> | ||
{{ | <references /> | ||
{{-}} | |||
{{Game navbox}} | {{Game navbox}} | ||
[[Category:Game mechanics{{#translation:}}]] | |||
[[Category:Guides{{#translation:}}]] | |||
Latest revision as of 08:15, 13 August 2024
This page was last verified for Vintage Story version 1.19.8.
A pit kiln is a hole used to convert raw clay items to usable crockery.

Safety

Pit kilns can set surrounding items/creatures on fire - up to 2 blocks away from the pit horizontally, or 3 blocks vertically. Choose a spot at least 2 blocks away from your house or anything else flammable. Remove grass, bushes, and branches in a margin of at least two blocks; better yet, replace soil with packed dirt or something else that cannot grow grass. Ideally, a pond or other water source block is near enough to douse yourself in when needed.
Be careful where you put a pit kiln.


Mitigation
- If you have an already-fired watering can that contains water, you can extinguish a small blaze.
- Breaking a container (such as a wooden chest) will make it drop its contents. If you have space in your inventory, you can quickly pick up the items to drop a safe distance away.
- Breaking a block that's currently burning can drop the log etc as well as prevent it igniting to nearby blocks.
- Admin commands can be used to toggle AllowFireSpread in a server.
Creation
Materials
Each kiln requires:
- 1 to 4 unfired pieces of pottery created by clay forming.
- 10 dry grass: 5 layers of dry grass, 2 grass per layer.
- 8 sticks: 2 layers of sticks, 4 sticks per layer
- 4-8 pieces of fuel. Note that your choice of fuel directly affects how long the pit kiln takes to finish.
- Recommended: nonflammable blocks to build a roof over the kiln(s)
Steps
In the Settings menu, you can toggle interact tips that show in detail what to do next.
- A pit kiln is created by digging a hole 1 block deep surrounded by full blocks that are non-flammable. If you try to add tinder to a pit bordering a block that's flammable (such as peat), or that is less-than-full (such as a path block), you should see an error message at the bottom of the screen.
- Many clay items are small enough that you can fit 4 in a single pit kiln. A pit kiln consumes the same amount of fuel and time whether containing a single item or 4 items, so maximize your resources by firing as many items as can fit.
- If you want to bake more than 4 at a time, create a checkerboard pattern in the ground. If you place clay items in a hole wider than 1x1, you won't be able to proceed with adding tinder around the crockery.
- Suggestions for your first pit kiln: 1 cooking pot, 2 bowls, 1 crock
- Sneak +
 to place a clayformed item on the ground. If it occupies the center of the block, no more clay items can be added; pick it up with and aim for a corner.
 - The interact tips should show that grass can now be added: with at least 2 pieces of grass in hand, Sneak + while aiming at the crockery. A layer of grasslike texture should appear in and around the crockery. Repeat 4 times. After a total of 10 grass have been added, no more will be accepted.
- If you have only 1 piece of grass in hand, you cannot add it to a pit kiln; increments of 2 are required.
- At this point, rightclicking will not remove components. But at any point, you can 'break' the kiln by hand to retrieve all items.
- The interact tips should show that sticks can now be added: with at least 4 sticks in hand, Sneak + while aiming at the grass layer. Repeat. After a total of 8 sticks have been added, no more will be accepted.
- If you have only 1-3 sticks in hand, you cannot add them to a pit kiln.
- The interact tips should show that fuel can now be added, with Sneak + .
- Note that your choice of fuel directly affects how long the pit kiln takes to finish: a pit kiln fueled by firewood takes the longest to complete, while a pit kiln fueled by charcoal completes fastest. The in-game Handbook specifies the time for each fuel type.
- A pit kiln usually only needs 4 pieces of fuel, but a few larger items, such as storage vessels require 2 layers of fuel to fully cover.
- If the kiln has enough fuel, the interact tips should show that it can be ignited, with a torch or firestarter, using Sneak + .
- Because rain and snow can extinguish a pit kiln, some sort of nonflammable roof is recommended. Precipitation totally resets a pit kiln's progress: if 23 of 24 hours had elapsed when rain put out the fire, it will need 24 full hours when relit (assuming firewood as the fuel; other fuels can speed things up).


- When the process is finished, the fire and smoke will stop. Additionally, the fuel items will disappear, leaving only the finished pottery items in the hole. Fired items appear darker than raw clay, and no longer have "raw" in front of their name in the block info overlay.
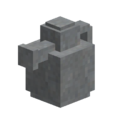
Watering can before firing
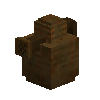
Watering can after firing
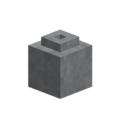
Crucible before firing
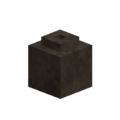
Crucible after firing


Fuel choice
The following table breaks down length of firing time from igniting the kiln to the finished product being available for pick-up.
| Fuel type | Real life (minutes) |
Game world (hours) |
|---|---|---|
| 40 | 24 | |
| 32 | 16 | |
| 28 | 12 | |
| 24 | 12 | |
| 20 | 10 | |
| 20 |
Fireable items
| Pottery Item | Quantity |
|---|---|
| Bowl | 4 |
| Cooking pot | 4 |
| Crock | 4 |
| Storage vessel | 1 |
| Flowerpot | 4 |
| Jug | 4 |
| Planter | 1 |
| Watering can | 1 |
| Shingle | 48 |
| Crucible | 4 |
| Anvil mold | 1 |
| Falx blade mold | 1 |
| Hoe mold | 1 |
| Shovel mold | 1 |
| Axe mold | 1 |
| Pickaxe mold | 1 |
| Prospecting pick mold | 1 |
| Hammer mold | 1 |
| Helve hammer mold | 1 |
| Ingot mold | 2 |
| Lamellae mold | 1 |
| Blue clay brick* | 12 |
| Fire clay brick** | 12 |
* Can only be made using blue clay.
** Can only be made using fire clay.
History
Clay items used to be fired in a normal campfire.
Notes
- Pit kilns are the only fire hazard, other than a player using a torch/firestarter directly on a flammable block. A campfire for cooking/smelting can be constructed directly on wood. A lit torch cannot ignite anything above it.
- To get sticks in bul, break every leaf block on a tree. Chopping a tree grants significantly lower rates of seeds.
- To get grass in bulk, smith a scythe. In winter, a scythe might become less useful, as most grass might be covered by snow, which takes extra time/durability to remove.
- For Wilderness Survival playstyle, there are fewer options for building materials that don't respond to gravity. Soil can be compacted into packed dirt that doesn't fall. Mudbrick looks nice but sometimes disintegrates rather than give the player the mudbrickblock.
Gallery
See also
Video Tutorials
| Pit kiln guide in the Survival Handbook read aloud |
|---|
References
| Wiki Navigation | |
|---|---|
| Vintage Story | Guides • Frequently Asked Questions • Soundtrack • Versions • Controls |
| Game systems | Crafting • Knapping • Clay forming • Smithing • Cooking • Temperature • Hunger • Mining • Temporal stability • Mechanical power • Trading • Farming • Animal husbandry |
| World | World generation • Biomes • Weather • Temporal storms |
| Items | Tools • Weapons • Armor • Clothing • Bags • Materials • Food |
| Blocks | Terrain • Plants • Decorative • Lighting • Functional • Ore |
| Entities | Hostile entities • Animals • NPCs • Players |
| Miscellaneous | List of client commands • List of server commands • Creative Starter Guide • Bot System • WorldEdit • Cinematic Camera • Adjustable FPS Video Recording • ServerBlockTicking |