Modding:Basic Block
This page was last verified for Vintage Story version 1.19.
Please read about the Asset System first, if you haven't done it already. This tutorial should introduce you into the basic of adding a block to the game using JSON files. If you want to add a block with functionality you should check out the tutorial for Advanced Blocks. There is a full list of all properties which can be defined inside the json file here.
A Simple Block
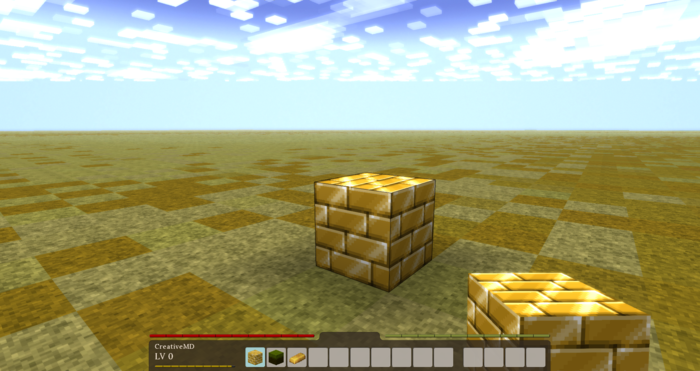
To get started let's create something simple. In our example we will add an ordinary gold block to the game (will be for decorative use only). So let's call this mod MyGoldBlock.
Workspace
First of all it is useful to create a new folder to keep everything nice and clean. Inside this workspace we will create the mod itself, and later on put it into a zip file, so we can test it and distribute it to other people.
The Texture
We will use this texture for our block: ![]() .
.
(To create your own textures, you can use programs like PaintDotNet(free), Piskel(free), or Aseprite(free open source, or pay for precompiled))
Now we need to put the texture at the right place so we can use it later on. Therefore you have to rename the texture to mygoldtexture.png and put it inside assets/mygoldblock/textures/block/ in your workspace (you have to create those folders first). mygoldblock will be our domain.
The Block File
The next thing we are going to need is a json file which will determine the properties of the block. For now we will keep it simple and will work with simple properties only. If you want to do some more advanced stuff you can take a look at the Block Properties Overview.
Now you need to create a new json file in your editor (we recommend to use an editor with syntax highlighting, such as Notepad++ or Sublime Text. If you are going to have many json files or some C#, then Visual Studio Code is also a good pick).
{
	"code": "mygoldblock",
	"creativeinventory": { "general": ["*"] },
	"blockmaterial": "Stone",
	"drawtype": "Cube",
	"textures": {
		"all": { "base": "block/mygoldtexture" }
	},
	"resistance": 3.5,
	"sounds": {
		"place": "game:block/anvil",
		"walk": "game:walk/stone"
	}
}
Short explanation of each line:
- code: A unique identifier for your block.
- creativeinventory: The creative inventory tabs the block should be shown in (currently only 1 tab available)
- shape: Which model the block should use
- drawtype: Determines the drawing system, e.g. use 'cube' for normal full cubes or 'json' for custom created shapes.
- textures: What textures to apply. For simple blocks you can define one single texture for 'all' faces or define one for every facing ('north', 'east', 'west', 'south', 'up', 'down')
- resistance: How many seconds of real life time it takes to break the block without tools
- sounds: The sounds to be played when placing/breaking or walking on the block. The prefix
gamehas to be added, since our block has the domainmygoldblock. Otherwise it would try to find those sounds inside our domain.
Now save the file in your workspace inside assets/mygoldblock/blocktypes/ and name it mygoldblock.json.
Naming the Block
To give the block a proper name, we need to create another json file and save it with the following path: assets/mygoldblock/lang/en.json
{
	"block-mygoldblock": "Block of Gold"
}
Testing/ Distribution
The last thing we need to do is to create a zip file of the assets folder inside our workspace. Either you use an external program (such as WinRAR or 7Zip) or you right-click the assets folder and hit Send To -> Compressed (zipped) folder. Eventually you can rename the zip file to MyGoldBlockMod.zip. The zip file can be either used for testing purposes or you can send it to other people so they can use it as well.
Furthermore you need to add a modinfo.json file, check out this tutorial.
To install the mod, navigate to the VintagestoryData folder and place it inside the mods folder.
Hint: Use the client command .tfedit if you want to adjust the block position, rotation and scale in Hands, in GUI, when dropped on the ground or in third person mode.
Advanced Properties
Now we do some more advanced stuff with our lovely gold block. We will add random textures, different variants and custom shapes. So let's get started.
Random Textures
So first of all we need some more textures. I have created some variants of the gold block ![]()
![]()
![]()
![]() .
To keep the name of the textures simple I added a number to each texture name (
.
To keep the name of the textures simple I added a number to each texture name (mygoldtexture.png,mygoldtexture1.png,mygoldtexture2.png,mygoldtexture3.png)
Now we need to add those new textures to the json file.
	"textures": {
		"all": {
			"base": "block/mygoldtexture",
			"alternates": [{"base": "block/mygoldtexture1" }, {"base": "block/mygoldtexture2" }, {"base": "block/mygoldtexture3" }],
		},
	},
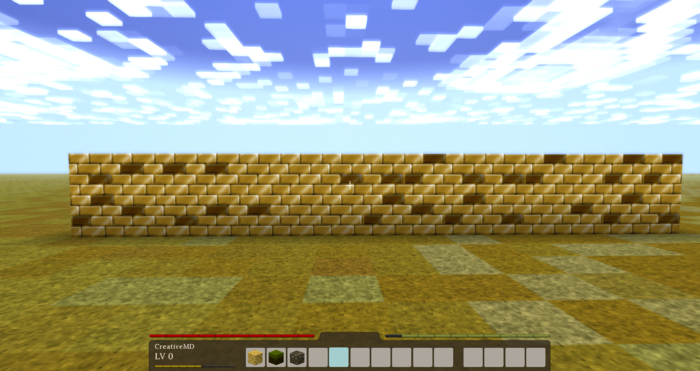
Eventually save it and run Vintagestory again. Now you should see a result like this:
Of course you can add more texture if you would like to.
Variants
Gold is the best, but iron is awesome too ... so what shall we do? Let's add another variant of this block, because we all love iron.
You could duplicate the blocktype file and rename silver to gold in all the places, or you can simply add another variant to the existing blocktype.
Variantgroup: Type
So first of all we need some new textures again: ![]()
![]()
![]()
![]()
Now we need to change a few things in our json file. We can add all kinds of different groups, but for now we keep it simple. We are adding a variant group called type, with the states gold and iron. You can use any group code you want.
	"variantgroups": [
		{ "code": "type", "states": ["gold", "iron"] }
	],
The next thing we need to do is set textures by type. So we remove our texture property and replace it with a new property texturesbytype, which will allow us to set different textures for each type.
	"texturesbytype": {
		"*-gold": {
			"all": {
				"base": "block/mygoldtexture",
				"alternates": [{"base": "block/mygoldtexture1" }, {"base": "block/mygoldtexture2" }, {"base": "block/mygoldtexture3" }],
			},
		},
		"*-iron": {
			"all": {
				"base": "block/myirontexture",
				"alternates": [{"base": "block/myirontexture1" }, {"base": "block/myirontexture2" }, {"base": "block/myirontexture3" }],
			},
		}
	},
Every group will be added after each other to the blocks code myblockname-mygroup-mysecondgroup. In our example we can save ourselves writing a few extra letters by using the wild card *.
You can also use a more compact definition. Due to way we named our textures we can use the placeholder {type} to determine the texture name, so instead of handling every case individually we can write it like this:
	"textures": {
		"all": {
			"base": "block/my{type}texture",
			"alternates": [{"base": "block/my{type}texture1" }, {"base": "block/my{type}texture2" }, {"base": "block/my{type}texture3" }],
		},
	},
The full blocktype definition could then look like this:
{
	"code": "myshinyblock",
	"creativeinventory": { "general": ["*"] },
	"variantgroups": [
		{ "code": "type", "states": ["gold", "iron"] }
	],
	"blockmaterial": "Stone",
	"drawtype": "cube",
	"textures": {
		"all": {
			"base": "block/my{type}texture",
			"alternates": [{"base": "block/my{type}texture1" }, {"base": "block/my{type}texture2" }, {"base": "block/my{type}texture3" }],
		},
	},
	"resistance": 3.5,
	"sounds": {
		"place": "game:block/anvil",
		"walk": "game:walk/stone"
	}
}
Variantgroup: Condition
Let's at another group to our block, which will determine the condition of this block. There will be two states good and used. We can add this group by adding another property inside variantgroups[].
	"variantgroups": [
		{ "code": "type", "states": ["gold", "iron"] },
		{ "code": "condition", "states": ["good", "used"]}
	],
To finish implementing this second group we need to take care of every case. We want the good blocks to only use the base texture and the used blocks to also use their random textures:
	"texturesbytype": {
		"*-good": {
			"all": {
				"base": "block/my{type}texture",
			},
		},
		"*-used": {
			"all": {
				"base": "block/my{type}texture",
				"alternates": [{"base": "block/my{type}texture1" }, {"base": "block/my{type}texture2" }, {"base": "block/my{type}texture3" }],
			},
		},
	},
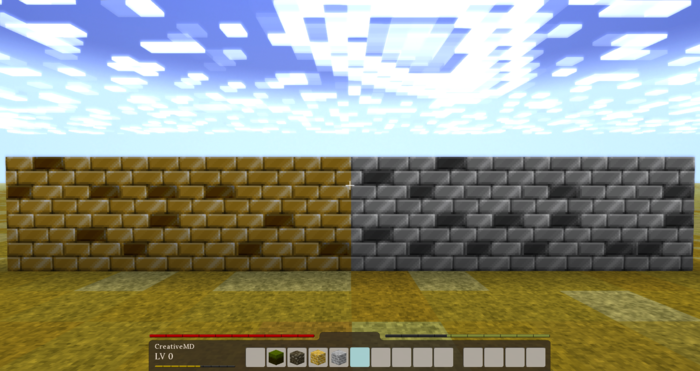
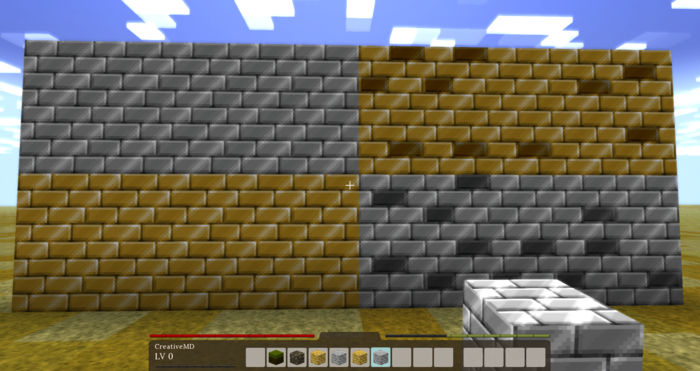
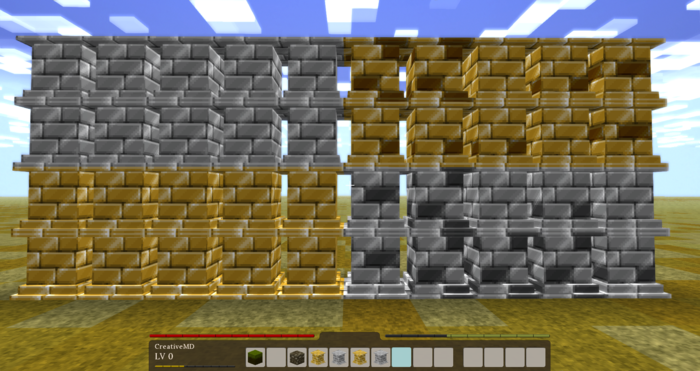
The blocks in a good condition or on the left side, while the used ones are on the right:
Custom Shapes
In order to use a custom shape we need to create one first. The engine only supports the model/shape format that's created by the VS Model Creator.
Once you have created your own shape you need to export it as a json file, create a new folder assets/myshinyblock/shapes/block/ and save the file in there. In our example we will use this model Myshinymodel.json and move it to assets/myshinyblock/shapes/block/myshinymodel.json.
Now we need to specify the model inside our block type json file.
Therefore we will change the drawtype from cube to json:
"drawtype": "json",
and the shape to myshinymodel
"shape": { base: "block/myshinymodel" },
Although this would be enough theoretically, we also should determine this block as being non-solid, to prevent graphical glitches.
	"sidesolid": {
		"all": "false"
	},
	"sideopaque": {
		"all": "false"
	},
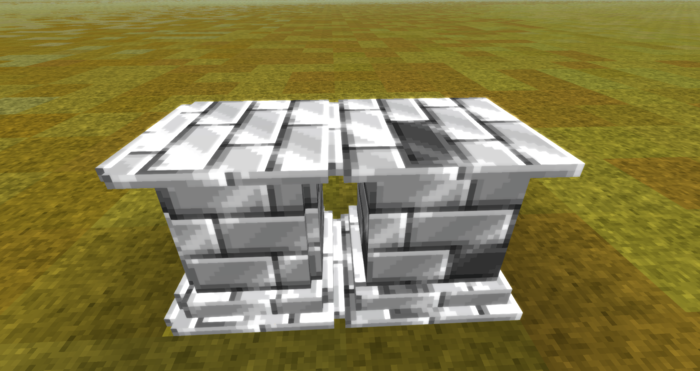
So let's run the game. This is how it should look like:
Variants of Custom Shapes
I created another model for the blocks in good condition (myshinymodel1.json), because they should look more awesome, than the ones in used conditions. Therefore we need to copy the json file to assets/myshinyblock/shapes/block/ as well.
In order to specify the shape by type we need to remove the property shape and replace it with shapebytype:
	"shapebytype": {
		"*-good": {
			"base": "block/myshinymodel1",
		},
		"*-used": {
			"base": "block/myshinymodel",
		},
	},
Mod Download
You can find the complete mod here for reference:
Moving Forward
The example shown here, while seemingly complex, only scratches the surface of what blocktypes are capable of in Vintage Story. It's highly suggested that you experiment with or at least familiarize yourself with all the known block properties before moving onto code mods. The best way to do this is to peruse the Block Properties page, which contains an ongoing list of all the usable JSON block properties currently incorporated into the game. Most properties in the list also have referenced files you can search for in the Vintage Story Assets folder. If you don't know where this is, you can find tutorials for each operating system at the Asset System page.
If you haven't yet, it's suggested you also check out the Basic Item and Basic Entity pages to learn how simple JSON items and entities are added to the game.
However, if you're feeling like making the jump to code mods then you'll want to start by setting up your Development Environment.
Tutorial Video: How make mod without programming (in Russian)
Thanks to ZigTheHedge for great detailed video
| Content Modding | |||||||||
|---|---|---|---|---|---|---|---|---|---|
| Basics | Content Mods • Developing a Content Mod • Packaging & Release | ||||||||
| Tutorials |
|
||||||||
| Concepts | Modding Concepts • Modinfo • Variants • Domains • Patching • Remapping • World Properties | ||||||||
| Moddable Assets |
|
||||||||
| Uncategorized |
|
||||||||
Wondering where some links have gone?
The modding navbox is going through some changes! Check out Navigation Box Updates for more info and help finding specific pages.
| Modding | |
|---|---|
| Modding Introduction | Getting Started • Theme Pack |
| Content Modding | Content Mods • Developing a Content Mod • Basic Tutorials • Intermediate Tutorials • Advanced Tutorials • Content Mod Concepts |
| Code Modding | Code Mods • Setting up your Development Environment |
| Property Overview | Item • Entity • Entity Behaviors • Block • Block Behaviors • Block Classes • Block Entities • Block Entity Behaviors • Collectible Behaviors • World properties |
| Workflows & Infrastructure | Modding Efficiency Tips • Mod-engine compatibility • Mod Extensibility • VS Engine |
| Additional Resources | Community Resources • Modding API Updates • Programming Languages • List of server commands • List of client commands • Client startup parameters • Server startup parameters Example Mods • API Docs • GitHub Repository |
