Как использовать WorldEdit
Эта страница проверялась в последний раз для версии Vintage Story 1.15.
World Edit — это набор инструментов для Vintage Story, который предлагает мощные инструменты для трехмерного рисования с помощью блоков. Набор инструментов доступен с помощью текстовых команд, но им также можно в значительной степени управлять с помощью графического интерфейса, который по умолчанию вызывается =X&ved=0ahUKEwi18sX_s_TVAhXjbZoKHSJuB0kQ_AUICigB&biw=1920&bih=946 тильдой.
Вступительное видео
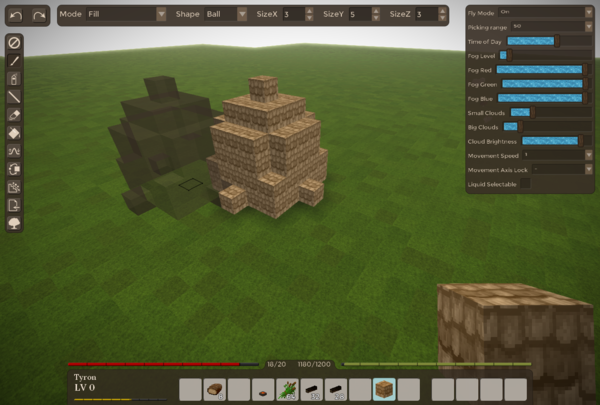
Графический интерфейс
Графический интерфейс активируется с помощью клавиши тильды (`), она находится над клавишей Tab. Если это не работает, проверьте управление клавиатурой в настройках. Вы должны быть в творческом режиме, чтобы использовать его.
Этот пользовательский интерфейс использует тот же набор функций, что и команды редактирования мира (он буквально просто отправляет команды редактирования мира на сервер для вас), однако он еще не поддерживает все команды, например, выбор и изменение области еще не добавлены к графическому интерфейсу
Кроме того, правильные окна настроек позволяют использовать некоторые дополнительные настройки, некоторые из которых недоступны через worldedit.
Консольный интерфейс
Некоторые команды позволяют задавать десятичные числа, для их ввода может потребоваться использовать запятую (,) вместо точки (.).
Совет
- Любая команда или последовательность команд могут быть сопоставлены клавише клавиатуры с помощью менеджера макросов, который вы можете открыть с помощью горячей клавиши CTRL+M.
- Есть два метода импорта схем в игру - с помощью "базовых команд worldedit" и через инструмент импорта.
-
.movespeed [dec. number]
Позволяет точно контролировать скорость вашего движения.
-
.lockfly [0-3]
Блокирует ось движения в полёте. Это можно использовать, например. парить над землей на фиксированной высоте с помощью .lockfly 2
0 = No lock
1 = X-Axis Lock
2 = Y-Axis Lock
3 = Z-Axis Lock
-
.liquidselectable
Включает/выключает возможность выбора жидкостей, как и любых других блоков
Диапазон настройки
-
/we range [dec. number]
Устанавливает диапазон, на котором ваш персонаж может размещать или удалять блоки (по умолчанию 4,5).
Вы можете установить это значение на 99 или подобное, чтобы иметь возможность рисовать издалека.
Предварительный просмотр выбора блока
-
/we hp
Скрывает предварительный просмотр выбора блока, используемый командой /we ms+me, кистью и инструментом импорта
-
/we sp
Снова показывает предварительный просмотр выбора блока (по умолчанию)
Отмена / Повтор
-
/we undo
Отменяет последнюю операцию кисти, заливки или очистки. Добавьте число, чтобы отменить несколько шагов одновременно. -
/we redo
Повторить последнюю операцию кисти, заливки или очистки. Добавьте число, чтобы отменить несколько шагов одновременно.
Выбрать, Импортировать, Экспортировать, Очистить, Заполнить
-
/we ms
Отмечает ваше текущее положение как начальную точку ("mark start")
-
/we me
Отмечает ваше текущее положение как конечную точку ("mark end")
-
/we mc
Отменить отметку начальной и конечной позиции("mark clear")
-
/we mex [filename]
Экспортирует область, определяемую начальной и конечной точкой, в виде файла json в папке данных винтажной истории. ("marked export")
-
/we imp [filename] [origin]
Импортирует предоставленный файл json в заданную начальную точку. Если параметр origin указан- 0 = Использует начальную точку в качестве нижнего левого переднего угла (по умолчанию)
- 1 = Использует начальную точку в качестве нижнего центраr
-
2 = Использует начальную точку как верхнюю центральную точку
-
/we impr [0, 90, 180 or 270]
При импорте данных блока с помощью /we imp импортированные данные блока будут сначала повернуты на заданный угол.
-
/we impflip
При импорте данных блока с помощью /we imp импортированные данные блока сначала будут перевернуты по вертикали
-
/we impres [on|off]
Режим разрешения импорта элементов/блоков. Выключите его, чтобы создавать структуры такими, какие они есть. Например, в этом режиме вместо торговцев будут спауниться их мета-спавнеры.
-
/we mfill
Заполняет отмеченную область, определяемую начальной и конечной точкой, блоком в выбранном слоте панели быстрого доступа. ("marked fill")
-
/we mclear
Очищает отмеченную область, определяемую начальной и конечной точкой ("marked clear")
-
/we mcopy
Копирует отмеченную область.
-
/we mpaste
Вставляет ранее скопированную область в заданную начальную точку.
-
/we mm[u,d,n,e,s,w] [length]
Перемещает содержимое внутри отмеченной области в заданном направлении на указанную длину (по умолчанию 1). Примеры:
/we mmu - Перемещает отмеченную область вверх на 1 блок
/we mms 5 - Перемещает отмеченную область на юг на 5 блоков.
-
/we mmby [x] [y] [z]
Перемещает содержимое внутри отмеченной области на заданную длину x/y/z. Пример:
/we mmby 5 1 -2 - Перемещает отмеченную область на 5 блоков по оси x, на 1 блок вверх и на -2 блока по оси z.
-
/we mr [90|180|270]
Поворачивает содержимое внутри отмеченной области на заданный угол.
-
/we clear [width&length] [height]
Удаляет все блоки внутри прямоугольного параллелепипеда вокруг игрока, разделенные заданными параметрами размера
-
/we sm[n/e/s/w/u/d] [length]
Перемещает только выделение, а не содержимое отмеченной области. Пример:
/we smn 5 — перемещает текущий выбор на 5 блоков к северу.
-
/we smby x y z
Перемещает только выделение, а не содержимое отмеченной области. Пример:
/we 3 1 -2 — перемещает текущий выбор на 3 блока по оси x, на 1 блок по оси y и на 2 блока по оси z. -
/we block
Ставит блок под ноги. Использует блок, активно выбранный на панели быстрого доступа.
-
/we sovp [0-1]
Отключить/включить server overload protection. Эта защита предотвращает определенные действия, которые могут привести к остановке сервера, поэтому ее не рекомендуется отключать.
-
/we g[u,d,n,e,s,w] [length]
Увеличивает текущий выбор заданной длины (по умолчанию 1). Примеры:
/we gu - Увеличивает выделение на 1 блок
/we gn -3 - Уменьшает выделение с северной стороны
-
/we mmir[u,d,n,e,s,w] [|gn|sn]
Отражает отмеченную область в заданном направлении. Если установлен второй параметр, текущая выделенная область будет изменена для выбора вновь созданной области (sn) для расширения выделения, включающего как старую, так и новую область (gn ). Примеры:
/we mmire - Отражает отмеченную область в направлении на восток
/wemmiru sn - Отражает отмеченную область в направлении вверх и выберите отмеченные блоки.
-
/we mrep[u,d,n,e,s,w] [count] [|gn|sn]
Повторяет (копирует) отмеченную область в заданном направлении count раз (по умолчанию 1). Если установлен третий параметр, текущая отмеченная область будет изменена, чтобы выбрать вновь созданную область (sn) to, чтобы увеличить выделение, включив в него как старую, так и новую область (gn). Примеры:
/we mreps – повторяет отмеченную область один раз в южном направлении;
/we mrepu 5 – повторяет отмеченную область 5 раз в направление вверх
/we mrepw 1 sn - повторяет отмеченную область один раз в направлении на юг и отмечает вновь размещенные блоки.
Console interface - Tools
-
/we on
Enables the use of tools. This causes additional blocks to be placed/removed when you place/remove blocks with your mouse
-
/we off
Disables the use of tools. You can normally place/remove single blocks again
-
/we t [0-7 or first letter]
Select a tool- 0 = Paint Brush Tool: For placing balls/cubes/cylinders of blocks
- 1 = Raise and Lower tool: For raising or lowering terrain
- 2 = Air Brush Tool: For placing scattered bunches of blocks on the surface
- 3 = Erode Tool: To even out terrain
- 4 = Import Tool: Import previously exported block data at the currently targeted block
- 5 = Eraser Tool: Same as Paint Brush but for removing blocks
- 6 = Grow/Shrink Tool: Grows/Shrinks all blocks in a selected area of blocks in all directions
- 7 = Line Tool: Draws lines of blocks
- 8 = Lake Tool: Flood fill a single layer with selected block
-
9 = TreeGen Tool: Places a randomly generated tree using the engines procedural tree generator
-
/we tom [0-1]
Sets the Tools Offset Mode. Affected tools: Paint Brush and Eraser- 0 = Center: The blocks to be drawn are centered around your selected position
-
1 = Attach: To blocks to be drawn are offseted so they will all be drawn right besides your selected block
- For all tools that allow defining a radius using /we tr you can use the commands /we tgr and /we tsr to grow or shrink the radius by a value of 1
Each tool has it's own set of commands to configure it. The tool has to be selected in order to be able to configure it.
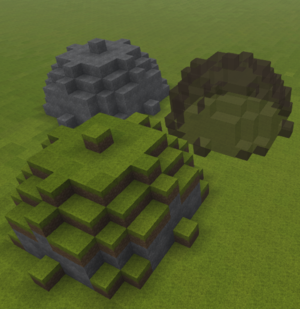
Paint Brush Tool
Left mouse click: No effect
Right mouse click: Places blocks in given shape of currently selected block in your hotbar
-
/we tr (dec. number) [dec. number] [dec. number]
Sets the radius or length in x, y and z direction. The 2nd and 3d value is optional.
-
/we tm [0-4]
Sets the paint brushes mode- 0 = Fill: Places a ball of blocks ignoring anything previously placed
- 1 = Replace Non Air: Replaces only existing blocks
- 2 = Replace Air: Does not replace any existing blocks
-
3 = Replace Selected: Replaces only the currently targeted block type
-
/we tdl [0-4]
Sets the paint bush depth replacement limit- 0 = Replace everything within the full brush dimensions
- 1 - 4 = Replace only the top 1-4 layers
-
/we tcr (dec. number) [dec. number] [dec. number]
Sets the cutout radius or length in x, y and z direction. The 2nd and 3d value is optional. Setting this radius to 0 gives you a normal brush, setting it to a non-zero value lets you create hollow shapes.
-
/we ts [0-8]
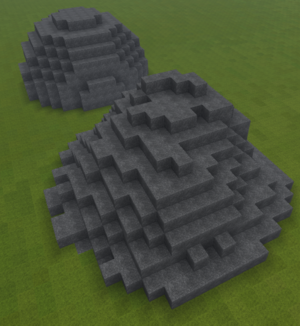
Sets the paint brushes shape- 0 = Ball / Ellipsoid
- 1 = Cube / Cuboid
- 2 = Cylinder / Elliptic Cylinder
- 3 = Half Ball Up
- 4 = Half Ball Down
- 5 = Half Ball North
- 6 = Half Ball East
- 7 = Half Ball South
- 8 = Half Ball West
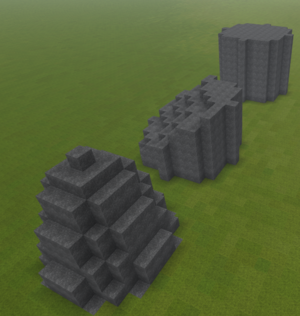
Raise and Lower Tool
Left mouse click: Lower Terrain
Right mouse click: Raise Terrain (will place the block you have currently selected in your hotbar)
-
/we tr (dec. number)
Sets the tools radius
-
/we tdepth (number)
Sets the raise/lower depth, or by how many blocks the terrain should be raised or lowerd
-
/we tm [0-3]
Set the tools draw mode- 0 = Uniform: Evenly raise/lower terrain within given radius (cylinder shape)
- 1 = Pyramid: Raise/Lower terrain within given radius using linear decline of depth (cone shape)
- 2 = Gaussian: Raise/Lower terrain within given radius using a gauss curve to modify the depth value (eroded cone shape)
-
3 = Perlin: Raise/Lower terrain by a 2-octave, fixed frequency perlin noise generator
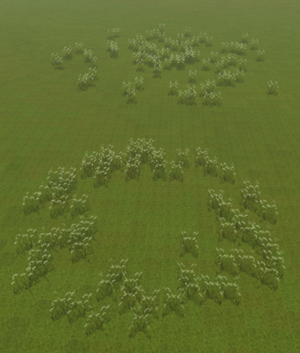
Air brush Tool
Left mouse click: Randomly remove a bunch of blocks within a given radius, only works in draw mode 'Replace'
Right mouse click: Randomly place a bunch of blocks within a given radius
-
/we tr (dec. number)
Sets the air brushes radius in which to randomly place blocks
-
/we tq (number)
Sets the quantity of blocks to be placed in given radius
-
/we ta [0-1]
Sets the tools apply mode.- 0 = Apply operation on any block side
-
1 = Apply operation on the selected block side
-
/we tm [0-1]
Sets the tools draw mode- 0 = Replace: Causes the air brush to only replace existing blocks
-
1 = Add: Adds in front of of existing blocks
Erode Tool
Left mouse click: No effect
Right mouse click: Erode an area by averaging the height of the terrain
-
/we tr (number)
Sets the tools radius of the area to be eroded (default 10)
-
/we tkr (number)
Sets the erode kernel radius over which to average the terrain height (the kernel size of the box blur, default 2)
Please not that high values are very costly and will take some time to calculate.
-
/we ti (number)
Sets the number of iterations - or how many times to apply the effect. -
/we tusb (0 or 1)
"Use selected block". When set to 1, any placed block will be the one held in hands. When set to 0 any placed block will be the one found below the given location.
Import Tool
Left mouse click: No effect
Right mouse click: Import one of the supplied blockdata files at the selected position
Drag&Drop Schematic file into the game window: Sets the source file that should be imported
-
/we imc
Tells the tool to use the block data from previously copied data using /we mcopy
-
/we ims
Sets the import source - the file(s) is should import. If more than one is supplied it will randomly select one each time. May use * as a wildcard. Alternatively, drag and drop the file into the game window
Examples:- /we ims rock* boulder*
- /we ims tree1 tree2
-
/we ims tree*
-
/we imo [0-2]
Sets the import origin point of the file to be imported- 0 = Uses the start point as the bottom left front corner point
- 1 = Uses the start point as the bottom center point (default)
-
2 = Uses the start point as the top center point
-
/we imr [0, 90, 180 or 270]
Sets the imported block data rotation - all subsequent placement commands will place all blocks rotate by given degrees.
-
/we imrrand [off or on]
Enables/Disables the imported rotation randomizer. If enabled, it will randomly select one of the 4 available angles every time block data is imported.
-
/we imflip
Toggles upside down placement of the block data.
-
/we tm
Sets the import tools replace mode- 0 = Replaceable: Uses the blocks Replaceable value to check if it should replace a block or not
- 1 = ReplaceAll: Places all the blocks completely ignoring any previously existing blocks
- 2 = ReplaceAir: Places only blocks where previously there was no blocks
Eraser Tool
Left mouse click: Removes blocks in given shape of currently selected block in your hotbar
Right mouse click: No effect
-
All commands are the same as with the paint brush tool
Grow / Shrink Tool
Left mouse click: Shrinks all shapes inside given radius
Right mouse click: Grows all shapes inside given radius
-
/we tr (dec. number)
Sets the tools radius of the area to grown/shrunk
-
/we tm [0-1]
Sets the tools draw mode- 0 = Grow/Shrink any block shape
-
1 = Grow/Shrink all block shape that has the same block as the selected one
Line Tool
Left mouse click: Marks the select position as the start point of the line
Right mouse click: Draws the line from chosen start point to selected point
-
/we tm [0-1]
Sets the tools mode.- 0 = Single Origin - All lines will be drawn from the selected start point
-
1 = Line Strip - Everytime a line is drawn, it is selected as the start point for the next line
-
/we tremove [0-1]
Sets the tool to either draw or erase blocks. 0 = place, 1 = erase
TreeGen Tool
Left mouse click: No effect
Right mouse click: Places a tree at given selected position (a placeable block should be selected in hotbar)
-
/we tsize [dec.number] [dec.number]
Sets the trees minimum size multiplier (default 0.7) and random additional size (default 0.6)
E.g. /tsize 1 0.5 will place trees of size 1 till 1.5
Any trees larger than size 3 might be slow to generate
-
/we tv [name]
Sets the tree variant. Currently available is: dwarfbirch, englishoak, fir, himalayanbirch, japanesemaple, kapok, mountainmaple, mountainpine, oldenglishoak, oldkapok, pricklymoses, riverbirch, scotspine, silverbirch, sugarmaple, sugarmaplesmall and truemulga.
You can also add your own tree variant by adding a new tree generator config in assets/worldgen/tree/
Flood Fill Tool
Left mouse click: No effect
Right mouse click: Tries to flood fill selected area within given radius
-
/we tr [number]
Sets the search radius on how far the flood fill should reach
-
/we trl [0-9999]
Sets the replaceable level (default 6000). If set to 9000, water will not be replaced
-
/we tce [on/off]
Check enclosed flag. If set to on, the flood fill action will do nothing if it wasn't able to find an enclosed area within given search radius
-
/we tm [2-3]
2D or 3D Mode. If set to 2D it will work only flood fill flat discs of blocks. In 3D Mode it also fills in the vertical direction within given search radius.
Wondering where some links have gone?
The modding navbox is going through some changes! Check out Navigation Box Updates for more info and help finding specific pages.
| Modding | |
|---|---|
| Modding Introduction | Getting Started • Пакет тем |
| Content Modding | Content Mods • Developing a Content Mod • Basic Tutorials • Intermediate Tutorials • Advanced Tutorials • Content Mod Concepts |
| Code Modding | Code Mods • Setting up your Development Environment |
| Property Overview | Item • Entity • Entity Behaviors • Block • Block Behaviors • Block Classes • Block Entities • Block Entity Behaviors • Collectible Behaviors • World properties |
| Workflows & Infrastructure | Modding Efficiency Tips • Mod-engine compatibility • Mod Extensibility • VS Engine |
| Additional Resources | Community Resources • Modding API Updates • Programming Languages • List of server commands • List of client commands • Client startup parameters • Server startup parameters Example Mods • API Docs • GitHub Repository |
