Modding:Content Tutorial Block Variants
This page was last verified for Vintage Story version 1.19.7.
Introduction
Objective
The variant system has an extensive amount of uses. In this tutorial, we will create a set of blocks with independent textures, using two separate variant groups. These blocks will show you how you can mix variant groups together to create a huge number of new assets.
Assets
Before starting, it is recommended you download the workspace and assets for this tutorial. The completed files can also be found here.
This tutorial starts with the following assets:
- Mod Setup & Folder Structure
- Template advanced shiny block file
- Completed lang file
- Block texture files
Prerequisites
This tutorial will assume you understand the following topics:
It is recommended to have completed the following tutorials:
- 3. Simple Block - The simple block made in this tutorial is the basis for this tutorial.
- 5. Item Variants - This tutorial gives a good beginning stage for creating variants. These tutorials will also be formatted very similarly.
It is recommended, but not necessary, to understand the following concept:
Using the downloaded workspace, have a look at the mod assets that currently exist.
- blocktypes/advancedshinyblock.json - This blocktype file is from the finished Simple Block tutorial.
- lang/en.json - This already contains the entries needed for the tutorial.
- textures/block/shiny... - The four texture files for our blocks. Notice that we are using gold and iron textures, and both have 'damaged' states.
Defining Variants
All work in this tutorial will be done in the blocktypes/advancedshinyblock.json file. Open it in your IDE and you can get started.
Firstly, the item's code is still set to "simplegoldblock". Change this to "advancedshinyblock".
Before you can utilize any variant systems, you will need to define the variants for your block. To do this, use the "variantGroups" property. This is usually placed directly below the code property, but it would work anywhere in the object.
For this block, we are going to create two variant groups.
"variantgroups": [
	{
		"code": "type",
		"states": [ "gold", "iron" ]
	},
	{
		"code": "condition",
		"states": [ "good", "used" ]
	}
],
This example creates two variant groups - Named "type" and "condition". When you use more than one variant group, the game will create block codes using every permutation of those two groups.
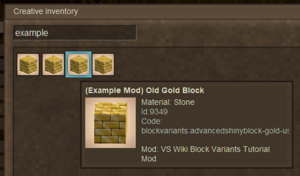
If you were to test the mod now, you will see that there exists four block objects with the codes:
- advancedshinyblock-gold-good
- advancedshinyblock-gold-used
- advancedshinyblock-iron-good
- advancedshinyblock-iron-used
Notice that the order your variant groups are defined affects the order they appear in the ID. When using variants, especially when using wildcards, this is important to remember.
As you probably expected by now, these blocks do not have the appropriate textures.
Variant-Based Textures
As explained in the Item Variants tutorial, there are two ways of using variants - ByType and Substitution. In this tutorial, you're going to use both methods. Before continuing, it may be a good idea to refresh yourself about how both methods work in the item variants tutorial.
This is the current texture property:
"textures": {
	"all": { "base": "block/shinygoldtexture" }
},
This blocktype has a total of four variants - That's not many. Although you could create a byType entry for each variant code, it is a good idea to understand how you can use a mixture of the two methods. Keep in mind, similar to the item variants, there are a number of ways to achieve the final result. Feel free to experiment with other methods, variants are a complex but beautiful subject when used effectively. Using the ByType suffix, you can split the texture by the condition variant:
"texturesbytype": {
	"*-good": {
		"all": { "base": "block/shinygoldtexture" }
	},
	"*-used": {
		"all": { "base": "block/shinygoldtexture" }
	}
},
A quick reminder of wildcards may be in order. When using the ByType suffix, each object's resolved code will start at the first key ("*-good") listed and go down the list. If the resolved code matches with the given string, if will then use that key's property. Using an asterisk ( * ) in a key tells the game that any string can go here. So, in this example, here is the list of matching objects:
| "*-good" | "advancedshinyblock-gold-good", "advancedshinyblock-iron-good" |
|---|---|
| "*-used" | "advancedshinyblock-gold-used", "advancedshinyblock-iron-used" |
Although not used in this example, you can simply use an asterisk as a byType key to match everything. This is useful when you wish to specify a value for a single object, but have every other object use a different value.
| Why can't you use "*-gold" as a key? |
| Remember that the order of the variant groups is important when using wildcards. In every example where wildcards have been used, it has always been to specify the final variant. The ID of, for example, "advancedshinyblock-gold-good" does not fit within the wildcard "*-gold", as "gold" is not the final part of the code.
As such, you would have to use "*-gold-*". This will accept any string before "-gold-" as well as any string after it. |
Anyway, back to the code.
The given code sample doesn't actually specify a different texture for each type. Replace each texture property with a specific variant substitution.
"texturesbytype": {
	"*-good": {
		"all": { "base": "block/shiny{type}texture" }
	},
	"*-used": {
		"all": { "base": "block/shiny{type}texture-damaged" }
	}
},
As you can see, this uses the {type} to substitute "gold" or "iron" into the texture path. If you follow the code, you end up with these resolved texture paths:
| Block ID | Resolved Texture Path |
|---|---|
| advancedshinyblock-gold-good | block/shinygoldtexture |
| advancedshinyblock-gold-used | block/shinygoldtexture-damaged |
| advancedshinyblock-iron-good | block/shinyirontexture |
| advancedshinyblock-iron-used | block/shinyirontexture-damaged |
If you are having issues getting any textures to work, it is often a good idea to create a table like this. For every ID, work out the resolved texture path, and ensure it exists.
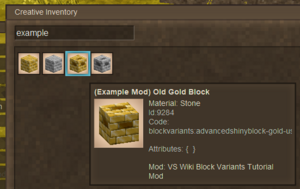
If you now test your mod, you'll see your blocks working as expected!
Conclusion
Congratulations, you now have four variants of a single block, all within one file! After this tutorial, you should have more of an understanding of how variants can be grouped together, and how to get the most out of them.
Next Steps...
If you want to test your knowledge, consider doing the tasks under the Going Further section below.
Variants are pretty nifty, but they can get even better. Take a look at the next tutorial, Complex Grid Recipes for a demonstration on how to use variants inside recipes.
Going Further
Want to make some additional changes to this mod? Try and achieve the following things!
Make the 'used' blocks destroy faster than the 'good' blocks.
| To achieve this... | ||
Replace the resistance property with resistanceByType. Specify two wildcard keys, namely "*-good" and "*-used" to specify values of 3.5 and 2 respectively.
|
Remove texturesByType, and achieve the same result using just variant substitution. (Hint: You will have to rename texture files)
| To achieve this... | ||||||||||||
| There are a number of similar methods to achieve this. Here is my method:
Firstly, revert the "texturesByType" to a "textures" property. Change the base property to be "block/shiny{type}texture-{condition}". This will result in the following ID to Texture table:
You will now have to rename the texture files to match those in the resolved texture path column.
|
| Content Modding | |||||||||
|---|---|---|---|---|---|---|---|---|---|
| Basics | Content Mods • Developing a Content Mod | ||||||||
| Tutorials |
|
||||||||
| Concepts | Modding Concepts • Variants • Domains • Patching • Remapping • World Properties | ||||||||
| Uncategorized |
|
||||||||
Wondering where some links have gone?
The modding navbox is going through some changes! Check out Navigation Box Updates for more info and help finding specific pages.
| Modding | |
|---|---|
| Modding Introduction | Getting Started • Theme Pack |
| Content Modding | Content Mods • Developing a Content Mod • Basic Tutorials • Intermediate Tutorials • Advanced Tutorials • Content Mod Concepts |
| Code Modding | Code Mods • Setting up your Development Environment |
| Property Overview | Item • Entity • Block • Block Behaviors • Block Classes • Block Entities • Block Entity Behaviors • World properties |
| Workflows & Infrastructure | Modding Efficiency Tips • Mod-engine compatibility • Mod Extensibility • VS Engine |
| Additional Resources | Community Resources • Modding API Updates • Programming Languages • List of server commands • List of client commands • Client startup parameters • Server startup parameters Example Mods • API Docs • GitHub Repository |

