Modding:Content Tutorial Further Recipes
This page was last verified for Vintage Story version 1.19.7.
Introduction
Objective
Vintage Story doesn't just use the grid for recipes. In this tutorial, you will learn how to create items or blocks by using barrels, clayforming, knapping and smithing. This tutorial will also give some information on alloy and cooking recipes, however these work in a somewhat more complex way to the others.
Assets
Before starting, it is recommended you download the workspace and assets for this tutorial. The completed files can also be found here.
Note: This tutorial is split into different sections for the recipes. If you are using the setup assets, this tutorial mod will error and cannot be tested until all the recipes are complete. Sorry about that. There will be a fix for the setup assets coming soon.
This tutorial starts with the following assets:
- Mod Setup & Folder Structure
- Incomplete 'agedlog' Barrel Recipe
- Incomplete 'bricks' Clayforming Recipe
- Incomplete 'stone-brick' Knapping Recipe
- Incomplete 'metalsheets' Smithing Recipe
Prerequisites
This tutorial will assume you understand the following topics:
It is recommended to understand the following concept:
This tutorial only contains recipe assets. You will be creating recipes for a number of objects that are already in game. Take a look at the following files:
- assets/recipes/barrel/agedlog.json
- assets/recipes/clayforming/bricks.json
- assets/recipes/knapping/stone-brick.json
- assets/recipes/smithing/metalsheets.json
Barrel Recipes
Upon opening the barrel recipe (agedlog.json), you will see the following unfinished code:
{
  "output": {
    "type": "block",
    "code": "game:log-placed-aged-ud",
    "quantity": 1
  }
}
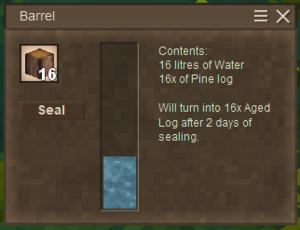
This recipe should convert any log into an aged log by using the barrel. The code given gives the output for the aged log.
Barrel Basics
The first thing that needs to be added to the recipe is the code property. This simply works as an identifier for the recipe.
"code": "aged-log",
Although properties can be listed in any order, they should generally be listed in a logical order - In the case of recipes, it is usually the basics, then ingredients, then the output. So, in this case, place the code property at the top of your recipe file, above the output. The next property, which is specific to barrel recipes, is the sealHours property. This is an optional property that tells the game how long the ingredient must be sealed for before the output is created.
"sealHours": 48,
If seal hours is not set, or set to 0, then the recipe will be processed as soon as the ingredients are correct.
Ingredients
Next, the ingredients need to be added. Above the output, you can add the following 'ingredients' property.
"ingredients": [
    {
      "type": "block",
      "code": "game:log-placed-*-ud",
	  "name": "wood",
      "quantity": 1
    }
  ],
This should also be fairly standard by now. The ingredient is a single log of any type, hence the wildcard. Although not used, the name property is simply for readability. The quantity can be changed here to adjust the number of logs that are needed in the barrel.
Liquid Ingredients
Barrel recipes can accept a maximum of two ingredients - One solid, and one optional liquid. Add the following to the ingredients array, above or below the log ingredient.
{
  "type": "item",
  "code": "game:waterportion",
  "litres": 1,
  "consumeLitres": 1
},
There exists a number of liquids in the game, most of which can be found in the vanilla game assets at assets/survival/itemtypes/liquid. The code given uses the waterportion liquid, which, as it sounds, is the liquid representation of water. Note that instead of quantity, this ingredient uses litres. Barrels can hold a total of 50 litres of liquid. In general, litres and consumeLitres are the same amount, however these can be different.
Liquids can also be included in the output in an identical fashion to the above example. This will automatically place the liquid output in the barrel.
The following is the full code for the agedlog barrel recipe.
| agedlog.json |
|---|
{
  "code": "aged-log",
  "sealHours": 48,
  "ingredients": [
    {
      "type": "item",
      "code": "game:waterportion",
      "litres": 1,
      "consumeLitres": 1
    },
    {
      "type": "block",
      "code": "game:log-placed-*-ud",
	  "name": "wood",
      "quantity": 1
    }
  ],
  "output": {
    "type": "block",
    "code": "game:log-placed-aged-ud",
    "quantity": 1
  }
}
|
Clayforming Recipes
Clayforming recipes are quite simple. If you open the bricks.json file in the clayforming folder, you will see the start of a recipe, including ingredients and output.
{
  "ingredient": {
    "type": "item",
    "code": "game:clay-*",
    "name": "type",
    "allowedVariants": [ "blue", "fire" ]
  },

  "output": {
    "type": "item",
    "code": "game:rawbrick-{type}",
    "stacksize": 12
  }
}
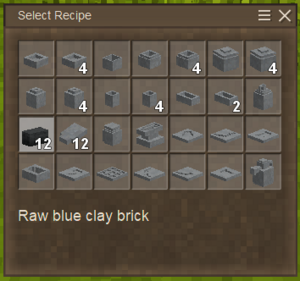
Clayforming recipes only have one input and one output, and luckily the input is always clay. You can specify the allowed types of clay using the allowedVariants property. When finished, this recipe will allow you to make 12 clay bricks by using clayforming.
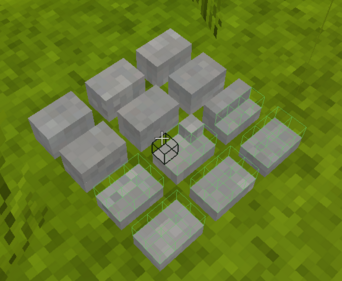
The interesting part of this recipe type (as well as some others) is the pattern property. This property is an array of string arrays, essentially offering us a 2D-text representation of the 3D voxel pattern.
Sometimes, these patterns are hard to visualize. Paste the following between the ingredient and output properties.
| Clayforming pattern property... |
"pattern": [
    [
      "###_###_###",
      "###_###_###",
      "___________",
      "###_###_###",
      "###_###_###",
      "___________",
      "###_###_###",
      "###_###_###",
      "___________",
      "###_###_###",
      "###_###_###"
    ],
    [
      "###_###_###",
      "###_###_###",
      "___________",
      "###_###_###",
      "###_###_###",
      "___________",
      "###_###_###",
      "###_###_###",
      "___________",
      "###_###_###",
      "###_###_###"
    ]
  ],
|
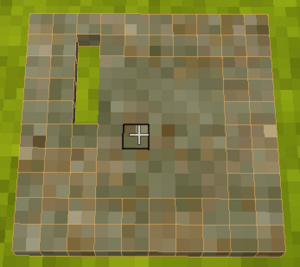
It's a rather bulky bit of code, but see if you can visualize how this will look in 3D. Each array (contained by [ ]) is an individual height layer for the clayforming. Note that we use an underscore ( _ ) for an empty space, and a hash sign (#) for a filled voxel.
Clayforming recipes must be between 16x16, and have a maximum height of 16. If a recipe is less than these dimensions, it will be automatically centered during creation.
After adding the pattern, the clayforming recipe is complete!
| bricks.json |
|---|
{
  "ingredient": {
    "type": "item",
    "code": "game:clay-*",
    "name": "type",
    "allowedVariants": [ "blue", "fire" ]
  },
  "pattern": [
    [
      "###_###_###",
      "###_###_###",
      "___________",
      "###_###_###",
      "###_###_###",
      "___________",
      "###_###_###",
      "###_###_###",
      "___________",
      "###_###_###",
      "###_###_###"
    ],
    [
      "###_###_###",
      "###_###_###",
      "___________",
      "###_###_###",
      "###_###_###",
      "___________",
      "###_###_###",
      "###_###_###",
      "___________",
      "###_###_###",
      "###_###_###"
    ]
  ],
  "name": "rawbrick",
  "output": {
    "type": "item",
    "code": "game:rawbrick-{type}",
    "stacksize": 12
  }
}
|
Knapping Recipes
Knapping recipes are like clayforming recipes, but even simpler since there's only one level of height to worry about. In the knapping folder, open the stone-brick.json file and you'll see the following code:
{
  "ingredient": {
    "type": "item",
    "code": "game:stone-*",
    "name": "rock",
    "allowedVariants": [ "chert", "granite", "andesite", "basalt", "peridotite" ]
  },

  "output": {
    "type": "item",
    "code": "game:stonebrick-{rock}"
  }
}
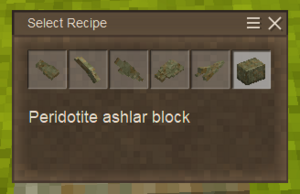
It should be evident as to what this code is doing. The ingredient for knapping recipes is always a single rock, and we're only allowing a few variants for the harder types of stone. Our output is a single stone brick, made from that rock. Similar to the clayforming recipe, you need to add a pattern property. Although knapping recipes are always one height, this is also stored as an array of arrays. Add the following property between the ingredient and output properties.
"pattern": [
    [
      "_#####_",
      "_#####_",
      "_#####_",
      "_#####_",
      "_#####_",
      "_#####_"
    ]
  ],
Similarly to the clayforming recipes, an underscore is a gap, and a hash sign is a filled voxel. In this example, the pattern is a simple 5x6 rectangle.
All knapping recipes are a maximum size of 10x10. If a recipe is less than these dimensions, it will be automatically centered. In the case of the example given above, the underscores surrounding each row are actually unnecessary, and can be removed, however is sometimes helps with visualization.
After adding the pattern property, the stone knapping recipe is complete!
| stone-brick.json |
|---|
{
  "ingredient": {
    "type": "item",
    "code": "game:stone-*",
    "name": "rock",
    "allowedVariants": [ "chert", "granite", "andesite", "basalt", "peridotite" ]
  },
  "pattern": [
    [
      "_#####_",
      "_#####_",
      "_#####_",
      "_#####_",
      "_#####_",
      "_#####_"
    ]
  ],
  "name": "Brick",
  "output": {
    "type": "item",
    "code": "game:stonebrick-{rock}"
  }
}
|
Smithing Recipes
Smithing recipes are, once again, similar to both clayforming and knapping recipes. If you open the metalsheets.json file in the smithing recipe folder, you will see the following code:
{
  "ingredient": {
    "type": "item",
    "code": "game:ingot-*",
    "name": "metal",
    "allowedVariants": [ "copper", "brass", "tinbronze", "bismuthbronze", "blackbronze", "silver", "gold", "iron", "lead", "tin", "zinc", "bismuth", "chromium", "electrum", "platinum", "titanium", "molybdochalkos", "meteoriciron", "steel" ]
  },

  "output": {
    "type": "block",
    "code": "game:metalsheet-{metal}-down",
    "quantity": 4
  }
}
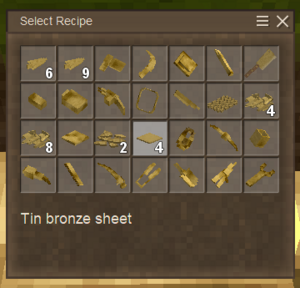
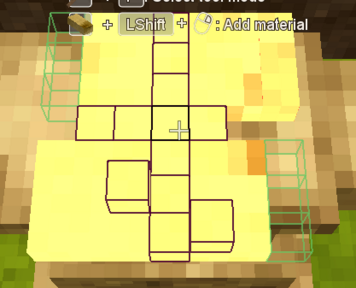
Smithing recipes will always start with an ingot as their ingredient, however you can specify what ingots can be used by using allowedVariants. In this example, the recipe will create 4 metal sheets (an unused block) on an anvil. You need to define a pattern for the recipe. Between the ingredient and output properties, add the following pattern:
"pattern": [
    [
      "###_###",
      "###_###",
      "###_###",
      "_______",
      "###_###",
      "###_###",
      "###_###"
    ]
  ],
Smithing recipes accept patterns similar to clayforming. As always, an underscore is blank and a hash sign is a full voxel. Each array (defined inside [ ]) counts as a single voxel layer, starting from the bottom. This example only uses a single layer.
Smithing recipes can be 16x16 in width and length, and a maximum of 6 voxels high. Each ingot provides a total of 42 voxels to manipulate, so you can use this to calculate how many ingots your item will need to create. This example, although difficult to craft, can be made using a single ingot.
When the pattern is added, the smithing recipe can be tested in game.
Conclusion
Congratulations, you have created a load of new recipes without using the crafting grid! You should know how to create barrel, clayforming, knapping, and smithing recipes now, as well as understanding how variants can be used within all types of recipes.
Next Steps...
If you want to test your knowledge, consider doing the tasks under the Going Further section below.
With the knowledge in the completed tutorials, you should be well on your way to knowing how to create detailed and in-depth content mods! From here on, tutorials may start getting more specific. When you're ready, consider moving on to 9. Simple World Generation.
Going Further
Not much here this time! Perhaps try to design and make your own new recipes.
| Content Modding | |||||||||
|---|---|---|---|---|---|---|---|---|---|
| Basics | Content Mods • Developing a Content Mod | ||||||||
| Tutorials |
|
||||||||
| Concepts | Modding Concepts • Variants • Domains • Patching • Remapping • World Properties | ||||||||
| Uncategorized |
|
||||||||
Wondering where some links have gone?
The modding navbox is going through some changes! Check out Navigation Box Updates for more info and help finding specific pages.
| Modding | |
|---|---|
| Modding Introduction | Getting Started • Theme Pack |
| Content Modding | Content Mods • Developing a Content Mod • Basic Tutorials • Intermediate Tutorials • Advanced Tutorials • Content Mod Concepts |
| Code Modding | Code Mods • Setting up your Development Environment |
| Property Overview | Item • Entity • Block • Block Behaviors • Block Classes • Block Entities • Block Entity Behaviors • World properties |
| Workflows & Infrastructure | Modding Efficiency Tips • Mod-engine compatibility • Mod Extensibility • VS Engine |
| Additional Resources | Community Resources • Modding API Updates • Programming Languages • List of server commands • List of client commands • Client startup parameters • Server startup parameters Example Mods • API Docs • GitHub Repository |
