How to use WorldEdit
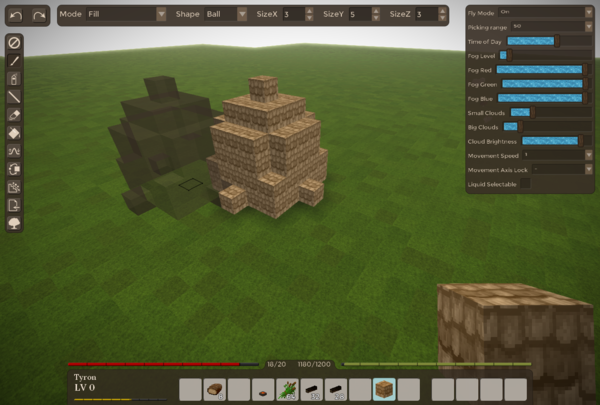
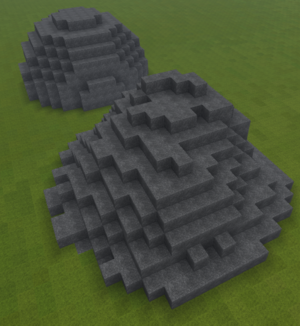
World Edit is a tool set for Vintage Story that offers powerful tools to paint three dimensionally with blocks. The tool set is available through textual commands but can also be controlled to a large extend through a graphical interface invoked by default by the Tilde key.
Video Intro
Graphical interface
The graphical interface is activated using the tilde (`) key, it's above the Tab key. If it doesn't work, check your keyboard controls in the settings. You have to be in creative mode to use it.
This UI makes use of the same feature set as the world edit commands (it literally just sends world edit commands to the server for you), however it does not support all of the commands yet, for example Area selection and modification has yet to added to the GUI
In addition the right settings windows allow some extra settings, some of which are not available through worldedit.
Console interface
Some commands allow setting decimal numbers, you might need to use a comma (,) instead of dot (.) for entering those.
Hint
- Any command, or sequence of commands may be mapped onto a keyboard key using the macro manager, which you can open with the hotkey CTRL+M
- There are two methods of importing schematics into the game - using "core worldedit commands" and through the import tool
-
.movespeed [dec. number]
Allows precise control over your movement speed.
-
.lockfly [0-3]
Locks a movement axis while flying. This can be used e.g. to hover over the ground at a fixed height using .lockfly 2
0 = No lock
1 = X-Axis Lock
2 = Y-Axis Lock
3 = Z-Axis Lock
-
.liquidselectable
Toggles on/off whether you can select liquids like any other blocks
Setting Range
-
/we range [dec. number]
Sets the range on how far away your character can place or remove blocks (default is 4.5)
You might want to set this to 99 or similar to be able to draw from far away.
Block Selection Preview
-
/we hp
Hides the block selection preview used by /we ms+me, the paint brush and the import tool
-
/we sp
Shows the block selection preview again (default)
Undo / Redo
-
/we undo
Undos the last brush, fill or clear operation. Add a number to undo serveral steps at once. -
/we redo
Redos the last brush, fill or clear operation. Add a number to redo serveral steps at once.
Select, Import, Export, Clear, Fill
-
/we ms
Marks your current position as the start point ("mark start")
-
/we me
Marks your current position as the end point ("mark end")
-
/we mc
Un-Mark start and end position ("mark clear")
-
/we mex [filename]
Exports the area defined by the start and end point as json file in the vintage story data folder ("marked export")
-
/we imp [filename] [origin]
Imports supplied json file at the defined start point. If the origin parameter is supplied with- 0 = Uses the start point as the bottom left front corner point (default)
- 1 = Uses the start point as the bottom center point
-
2 = Uses the start point as the top center point
-
/we impr [0, 90, 180 or 270]
When importing block data using /we imp the imported block data will first be rotated by given angle.
-
/we impflip
When importing block data using /we imp the imported block data will first be vertically flipped
-
/we mfill
Fills the marked area defined by the start and end point with the block in your currently selected hotbar slot ("marked fill")
-
/we mclear
Clears the marked area defined by the start and end point ("marked clear")
-
/we mcopy
Copies the marked area.
-
/we mpaste
Pastes the previously copied area to the defined start point.
-
/we mm[u,d,n,e,s,w] [length]
Moves the contents inside marked area in given direction by given length (default 1). Examples:
/we mmu - Moves the marked area up by 1 block
/we mms 5 - Moves the marked area south by 5 blocks
-
/we mmby [x] [y] [z]
Moves the contents inside marked area by given x/y/z length. Example:
/we mmby 5 1 -2 - Moves the marked area 5 blocks in x-direction, 1 block up and -2 blocks in z-direction
-
/we mr [90|180|270]
Rotates the contents inside marked area by given angle.
-
/we clear [width&length] [height]
Deletes all blocks inside a cuboid around the player, delimited by supplied size arguments
-
/we sm[n/e/s/w/u/d] [length]
Moves only the selection and not the contents of the marked area. Example:
/we smn 5 - Moves the current selection 5 blocks north
-
/we smby x y z
Moves only the selection and not the contents of the marked area. Example:
/we 3 1 -2 - Moves the current selection 3 blocks in x-direction, 1 block in y-direction and -2 blocks in z-direction -
/we block
Places a block under your feet. Uses the block actively selected in your hotbar.
-
/we sovp [0-1]
Disable/Enable server overload protection. This protection prevents certain actions that are likely to kill the server, so it is not recommended to turn it off.
-
/we g[u,d,n,e,s,w] [length]
Grows the current selection given length (default 1). Examples:
/we gu - Grows the selection up by 1 block
/we gn -3 - Shrinks the selection from the north side
-
/we mmir[u,d,n,e,s,w] [|gn|sn]
Mirrors the marked area in given direction. If the second parameter is set, the current marked area will be modified to select the newly created area (sn) to to grow the selection to include both the old and new area (gn). Examples:
/we mmire - Mirrors the marked area to direction east
/wemmiru sn - Mirrors the marked area to direction up and will select the mark placed blocks.
-
/we mrep[u,d,n,e,s,w] [count] [|gn|sn]
Repeats (copies) the marked area in given direction for count times (default 1). If the third parameter is set, the current marked area will be modified to select the newly created area (sn) to to grow the selection to include both the old and new area (gn). Examples:
/we mreps - Repeats the marked area once to direction south
/we mrepu 5 - Repeats the marked area 5 times to direction up
/we mrepw 1 sn - Repeats the marked area once to direction south and will mark the newly placed blocks.
Console interface - Tools
-
/we on
Enables the use of tools. This causes additional blocks to be placed/removed when you place/remove blocks with your mouse
-
/we off
Disables the use of tools. You can normally place/remove single blocks again
-
/we t [0-7 or first letter]
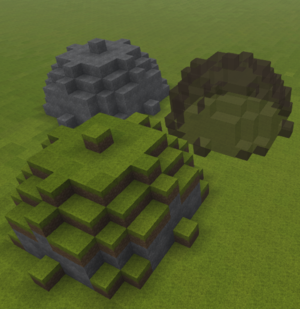
Select a tool- 0 = Paint Brush Tool: For placing balls/cubes/cylinders of blocks
- 1 = Raise and Lower tool: For raising or lowering terrain
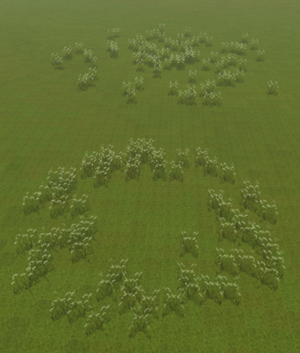
- 2 = Air Brush Tool: For placing scattered bunches of blocks on the surface
- 3 = Erode Tool: To even out terrain
- 4 = Import Tool: Import previously exported block data at the currently targeted block
- 5 = Eraser Tool: Same as Paint Brush but for removing blocks
- 6 = Grow/Shrink Tool: Grows/Shrinks all blocks in a selected area of blocks in all directions
- 7 = Line Tool: Draws lines of blocks
- 8 = Lake Tool: Flood fill a single layer with selected block
-
9 = TreeGen Tool: Places a randomly generated tree using the engines procedural tree generator
-
/we tom [0-1]
Sets the Tools Offset Mode. Affected tools: Paint Brush and Eraser- 0 = Center: The blocks to be drawn are centered around your selected position
-
1 = Attach: To blocks to be drawn are offseted so they will all be drawn right besides your selected block
- For all tools that allow defining a radius using /we tr you can use the commands /we tgr and /we tsr to grow or shrink the radius by a value of 1
Each tool has it's own set of commands to configure it. The tool has to be selected in order to be able to configure it.
Paint Brush Tool
Left mouse click: No effect
Right mouse click: Places blocks in given shape of currently selected block in your hotbar
-
/we tr (dec. number) [dec. number] [dec. number]
Sets the radius or length in x, y and z direction. The 2nd and 3d value is optional.
-
/we tm [0-4]
Sets the paint brushes mode- 0 = Fill: Places a ball of blocks ignoring anything previously placed
- 1 = Replace Non Air: Replaces only existing blocks
- 2 = Replace Air: Does not replace any existing blocks
-
3 = Replace Selected: Replaces only the currently targeted block type
-
/we tdl [0-4]
Sets the paint bush depth replacement limit- 0 = Replace everything within the full brush dimensions
- 1 - 4 = Replace only the top 1-4 layers
-
/we tcr (dec. number) [dec. number] [dec. number]
Sets the cutout radius or length in x, y and z direction. The 2nd and 3d value is optional. Setting this radius to 0 gives you a normal brush, setting it to a non-zero value lets you create hollow shapes.
-
/we ts [0-8]
Sets the paint brushes shape- 0 = Ball / Ellipsoid
- 1 = Cube / Cuboid
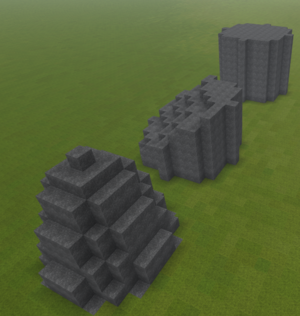
- 2 = Cylinder / Elliptic Cylinder
- 3 = Half Ball Up
- 4 = Half Ball Down
- 5 = Half Ball North
- 6 = Half Ball East
- 7 = Half Ball South
- 8 = Half Ball West
Raise and Lower Tool
Left mouse click: Lower Terrain
Right mouse click: Raise Terrain (will place the block you have currently selected in your hotbar)
-
/we tr (dec. number)
Sets the tools radius
-
/we tdepth (number)
Sets the raise/lower depth, or by how many blocks the terrain should be raised or lowerd
-
/we tm [0-3]
Set the tools draw mode- 0 = Uniform: Evenly raise/lower terrain within given radius (cylinder shape)
- 1 = Pyramid: Raise/Lower terrain within given radius using linear decline of depth (cone shape)
- 2 = Gaussian: Raise/Lower terrain within given radius using a gauss curve to modify the depth value (eroded cone shape)
-
3 = Perlin: Raise/Lower terrain by a 2-octave, fixed frequency perlin noise generator
Air brush Tool
Left mouse click: Randomly remove a bunch of blocks within a given radius, only works in draw mode 'Replace'
Right mouse click: Randomly place a bunch of blocks within a given radius
-
/we tr (dec. number)
Sets the air brushes radius in which to randomly place blocks
-
/we tq (number)
Sets the quantity of blocks to be placed in given radius
-
/we ta [0-1]
Sets the tools apply mode.- 0 = Apply operation on any block side
-
1 = Apply operation on the selected block side
-
/we tm [0-1]
Sets the tools draw mode- 0 = Replace: Causes the air brush to only replace existing blocks
-
1 = Add: Adds in front of of existing blocks
Erode Tool
Left mouse click: No effect
Right mouse click: Erode an area by averaging the height of the terrain
-
/we tr (number)
Sets the tools radius of the area to be eroded (default 10)
-
/we tkr (number)
Sets the erode kernel radius over which to average the terrain height (the kernel size of the box blur, default 2)
Please not that high values are very costly and will take some time to calculate.
-
/we ti (number)
Sets the number of iterations - or how many times to apply the effect. -
/we tusb (0 or 1)
"Use selected block". When set to 1, any placed block will be the one held in hands. When set to 0 any placed block will be the one found below the given location.
Import Tool
Left mouse click: No effect
Right mouse click: Import one of the supplied blockdata files at the selected position
Drag&Drop Schematic file into the game window: Sets the source file that should be imported
-
/we imc
Tells the tool to use the block data from previously copied data using /we mcopy
-
/we ims
Sets the import source - the file(s) is should import. If more than one is supplied it will randomly select one each time. May use * as a wildcard. Alternatively, drag and drop the file into the game window
Examples:- /we ims rock* boulder*
- /we ims tree1 tree2
-
/we ims tree*
-
/we imo [0-2]
Sets the import origin point of the file to be imported- 0 = Uses the start point as the bottom left front corner point
- 1 = Uses the start point as the bottom center point (default)
-
2 = Uses the start point as the top center point
-
/we imr [0, 90, 180 or 270]
Sets the imported block data rotation - all subsequent placement commands will place all blocks rotate by given degrees.
-
/we imrrand [off or on]
Enables/Disables the imported rotation randomizer. If enabled, it will randomly select one of the 4 available angles every time block data is imported.
-
/we imflip
Toggles upside down placement of the block data.
-
/we tm
Sets the import tools replace mode- 0 = Replaceable: Uses the blocks Replaceable value to check if it should replace a block or not
- 1 = ReplaceAll: Places all the blocks completely ignoring any previously existing blocks
- 2 = ReplaceAir: Places only blocks where previously there was no blocks
Eraser Tool
Left mouse click: Removes blocks in given shape of currently selected block in your hotbar
Right mouse click: No effect
-
All commands are the same as with the paint brush tool
Grow / Shrink Tool
Left mouse click: Shrinks all shapes inside given radius
Right mouse click: Grows all shapes inside given radius
-
/we tr (dec. number)
Sets the tools radius of the area to grown/shrunk
-
/we tm [0-1]
Sets the tools draw mode- 0 = Grow/Shrink any block shape
-
1 = Grow/Shrink all block shape that has the same block as the selected one
Line Tool
Left mouse click: Marks the select position as the start point of the line
Right mouse click: Draws the line from chosen start point to selected point
-
/we tm [0-1]
Sets the tools mode.- 0 = Single Origin - All lines will be drawn from the selected start point
-
1 = Line Strip - Everytime a line is drawn, it is selected as the start point for the next line
-
/we tremove [0-1]
Sets the tool to either draw or erase blocks. 0 = place, 1 = erase
TreeGen Tool
Left mouse click: No effect
Right mouse click: Places a tree at given selected position (a placeable block should be selected in hotbar)
-
/we tsize [dec.number] [dec.number]
Sets the trees minimum size multiplier (default 0.7) and random additional size (default 0.6)
E.g. /tsize 1 0.5 will place trees of size 1 till 1.5
Any trees larger than size 3 might be slow to generate
-
/we tv [name]
Sets the tree variant. Currently available is: dwarfbirch, englishoak, fir, himalayanbirch, japanesemaple, kapok, mountainmaple, mountainpine, oldenglishoak, oldkapok, pricklymoses, riverbirch, scotspine, silverbirch, sugarmaple, sugarmaplesmall and truemulga.
You can also add your own tree variant by adding a new tree generator config in assets/worldgen/tree/
Flood Fill Tool
Left mouse click: No effect
Right mouse click: Tries to flood fill selected area within given radius
-
/we tr [number]
Sets the search radius on how far the flood fill should reach
-
/we trl [0-9999]
Sets the replaceable level (default 6000). If set to 9000, water will not be replaced
-
/we tce [on/off]
Check enclosed flag. If set to on, the flood fill action will do nothing if it wasn't able to find an enclosed area within given search radius
-
/we tm [2-3]
2D or 3D Mode. If set to 2D it will work only flood fill flat discs of blocks. In 3D Mode it also fills in the vertical direction within given search radius.
Wondering where some links have gone?
The modding navbox is going through some changes! Check out Navigation Box Updates for more info and help finding specific pages.
| Modding | |
|---|---|
| Modding Introduction | Getting Started • Theme Pack |
| Content Modding | Content Mods • Developing a Content Mod • Basic Tutorials • Intermediate Tutorials • Advanced Tutorials • Content Mod Concepts |
| Code Modding | Code Mods • Setting up your Development Environment |
| Property Overview | Item • Entity • Entity Behaviors • Block • Block Behaviors • Block Classes • Block Entities • Block Entity Behaviors • Collectible Behaviors • World properties |
| Workflows & Infrastructure | Modding Efficiency Tips • Mod-engine compatibility • Mod Extensibility • VS Engine |
| Additional Resources | Community Resources • Modding API Updates • Programming Languages • List of server commands • List of client commands • Client startup parameters • Server startup parameters Example Mods • API Docs • GitHub Repository |
