Guide de survie - Le premier jour
Ce guide est l’œuvre de la collaboration entre plusieurs personnes et peut présenter des erreurs. Copygirl, membre de la communauté et contribuant au code de Vintage Story, a compilé un guide sur sa page personnel plus concis et potentiellement plus accessible. A l'image de ce wiki, il n'y a pas de garantie quant à le précision des informations apportées et le contenu n'est correct qu'à l'égard des connaissances de l'auteur.
Contrôles
Personnage
| W A S D | Se déplacer. Vous pouvez changer en Z,Q,S,D. |
| Space | Sauter |
| E | Inventaire et sac à dos (accès à la grille de craft) |
| C | Inventaire du personnage (vêtements et autres équipements) |
| Shift | S'accroupir (Utilisé pour placer des items sur les blocks) |
| Ctrl + W/Z | Courir |
| G | S'asseoir |
| Q | Lâcher l'item en main |
| F5 | Alterner entre les caméras (première personne, troisième personne, libre) |
User Interface
| tab | Afficher/cacher l'interface de chat |
| T | Taper dans l'interface de chat |
| F4 | Afficher/cacher l'interface utilisateur |
| F6 | Afficher/cacher la minimap |
| B | Afficher/cacher les informations de block |
| H | Guide de survie (la plupart des items) |
| M | Afficher/cacher la carte du monde |
| N | Afficher/cacher les interactions avec les blocks et les entités |
| V | Afficher/cacher les coordonnées |
| F12 | Prendre une capture d'écran |
| esc | Fermer ou quitter l'interface |
Le premier jour
Apparition du joueur
Vous apparaissez dans le monde au niveau du point d'apparition. Si vous mourrez, vous réapparaitrez ici jusqu'à ce que vous le changiez (il existe un moyen de le faire, mais il faut pour cela progresser dans le jeu). Vous pouvez marquer sur la carte le point d'apparition en faisant clic droit sur le menu de la carte ou en tapant la commande waypoint.
Outils en pierre
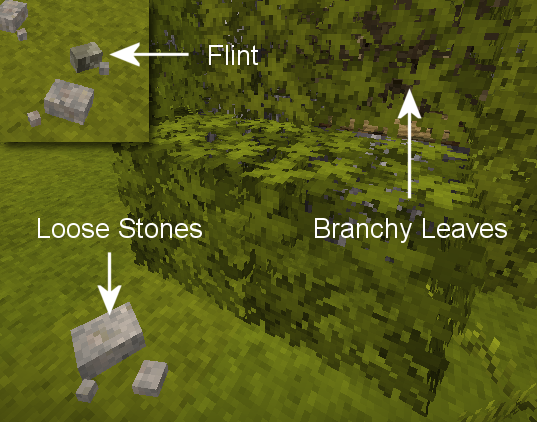
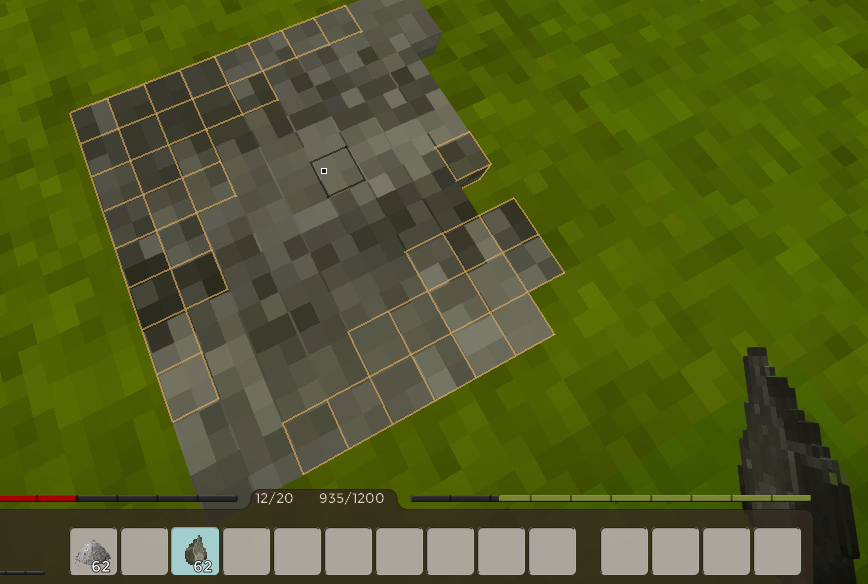
Commencez par chercher du silex ou des pierres (basalte, granit, andésite, obsidienne ou péridotite). Shift + Clic droit sur un sol solide pour créer une surface de taillage. Choisissez l'outil que vous voulez créer. Il est recommandé de créer une hache et un couteau avant tout.
Player Inventory
Players have 3 types of slots
- The left hand slot can hold passive items such as torches
- 10 hand slots
- 4 container slots that allow players to expand inventory.
To begin expanding player inventory, crafting hand baskets is the first option. Harvest reeds, which can usually be found near lakes. Press H and search for basket to see the grid crafting recipe.
Food
Here are some of the first day options for food:
- Mushrooms can be harvested with a knife or empty hands. Harvesting the tops with a knife will allow the mushrooms to regrow over time.
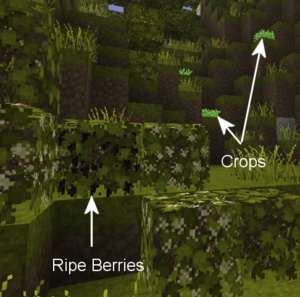
- Ripe Berry Bushes can be harvested without tools, and then broken and replanted anywhere else. After a while they will start to bloom again.
- Cattail roots can be harvested using a knife and cooked over a fire as a source of early game forage.
- Most animals can be killed and harvested with a knife for nutritious meat and fat. Hold
Sneak + Hold Right mouse buttonwith a knife in hand to harvest animals. Meat must be cooked in a fire pit.
Clay
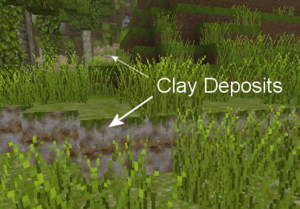
Clay is a required resource to progress through the ages, and in early game it can be used to build comparatively cheap stationary storage options and your first means to preserve food for a bit longer. It is also required to craft a cooking pot, which is necessary for advances cooking.
Light / Cooking
Once the sun sets, a player might want to create a firepit as a source of light and for cooking. Be aware though, rain will extinguish any uncovered fires or torches, so be sure to build a simple roof over any firepits.
Gather the following resources:
- Dry grass:
left clickwith a knife in hand to gather tall grass - Firewood:
left clickwith an axe in hand to cut trees and harvest logs. Place the axe and logs in the crafting grid to create firewood.
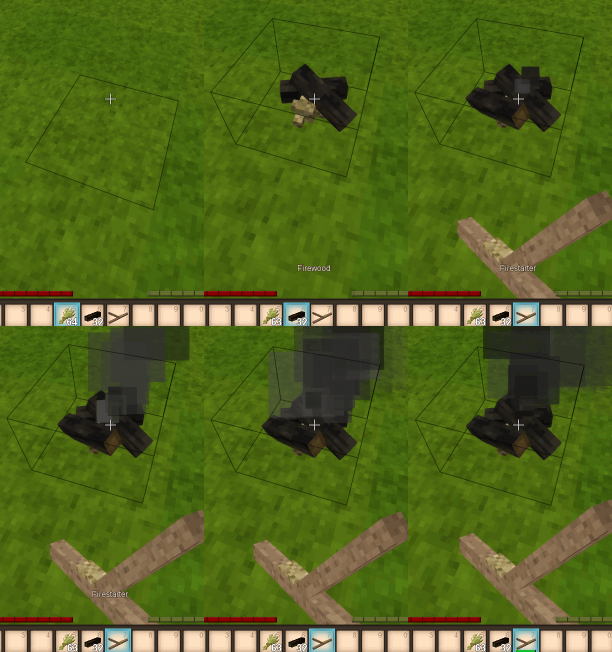
Hold Sneak + Right click on solid ground with the dry grass in hand to place a fire pit. Next, Sneak + Right click with 4 firewood in hand to complete the fire pit. Then, light the fire using a firestarter (or a torch), hold Right click with either item in hand and aim at the base of the firepit. (Optionally check the handbook, opened with H, to find out how to make a firestarter.)
Congratulations, meat can be cooked and new torches created by heating sticks! Be careful though, a torch in your off hand will cause you to take an increased hunger penalty, and torches held while taking a dip in water will get extinguished.
Combat
To defend against hostile creatures, craft stone age weapons by knapping or carving a club from a log. Different weapons have different ranges. Spears are the strongest long range weapon in the stone age, but break quickly. Create a stone spearhead by knapping, and combine with a stick (shaft) in the crafting grid to finish the spear. Wooden clubs are durable but have less damage and less range. Knives, axes, or just plain sticks can all be used as weapons, but these have shorter ranges than the spear. In an emergency, small stones can be thrown at mobs. For more information, see the main article on Combat
Improvised armor can be crafted from dry grass and firewood for some very basic protection. It will not protect your head or legs, but is better than nothing. Once more established in the world of Vintage Story, more advanced types of armor can be crafted.
Shelter
Once the sun sets, a player might also like a shelter. There are different blocks that you can use to make a shelter using the early resources you have available. Dry grass can be used to make a bed early on, or form hay blocks/cob for early building blocks. Soil is also a good building material, and can be used to form Mud Bricks.
Stationary Storage
For more storage, the player can craft two early game containers.
- The basket has 8 slots for items, however it requires 24 cattails and should not be used to store food if possible.
- The clay storage vessel has 12 slots, requires clay to craft and has the best spoilage rates in the game, which makes it suitable for food storage.
Temperature
The player's body temperature needs to be kept around 37°C. Prolonged times with body temperature under this mark will result in freezing animations and even damage taken. Beware that dipping in water or being out in the rain will make your temperature drop faster. Standing near a lit campfire can warm the player up and the body temperature will stay up a while even after stepping away.
Temporal Stability
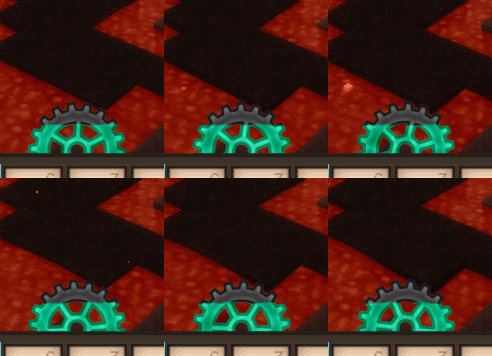
By now a player might be wondering about the cyan gear between the health and satiety bar. This is the temporal stability meter, the level of color in the gear indicates the player's current temporal stability. As a player's temporal stability reduces, the gear turns counter clockwise and the blue color in the gear decreases. When increasing, the gear's color returns as it turns clockwise. If temporal stability reaches zero, the player's vision will change drastically, and bad things tend to happen.
Draining temporal stability:
- Some surface areas are temporally unstable
- Caves, underground caverns, and places below surface level are generally more unstable than the surface of the world
- Temporal storms (occur at regular intervals)
Recovering temporal stability:
- Move to a location of high stability on the surface or at higher elevations in the world
- Transfer the temporal stability from a temporal gear: hold the gear in the left hand, a knife in the right hand, and hold
right mouse buttonto provide a 30% boost - Killing drifters recovers small amounts of your own temporal stability
Advanced Game Mechanics
Once the basics are mastered, players can develop advanced technology: Survival Guide - Advanced tech
Tutorial Video: First Day
Thanks to Ashantin for creating and sharing with the VS community.
| {{{title}}} | |
|---|---|
