Survival Guide - Your first day/ru: Difference between revisions
Monolithys (talk | contribs) (Created page with "=== Каменные инструменты ===") |
Monolithys (talk | contribs) (Created page with "thumb|right|300px|Время собирательства! thumb|right|300px|Скалываение Найдите креме...") |
||
| Line 66: | Line 66: | ||
=== Каменные инструменты === | === Каменные инструменты === | ||
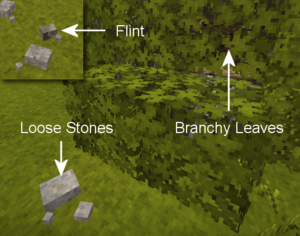
[[File:Stonesbranches.png|thumb|right|300px| | [[File:Stonesbranches.png|thumb|right|300px|Время собирательства!]] | ||
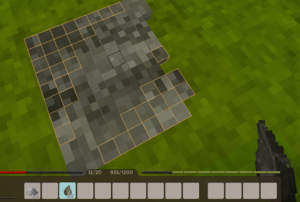
[[File:Knapping.png|thumb|right|300px| | [[File:Knapping.png|thumb|right|300px|Скалываение]] | ||
Найдите кремень или разбросанные камни (базальт, гранит, обсидиан или перидотит).<code>Красться + Правый клик</code> на твердой поверхности чтобы создать [[Knapping/ru]] поверхность. Используйте меню выбора для создания предмета. ''Мы рекомендуем [[Axe/ru]] и [[Knife]].'' Используйте камень в активной руке, <code>левый клик</code> на оранжевых кубиках что бы убрать лишнее и придать форму конечному лезвию или оголовью инструмента. Когда последний оранжевый кубик будет убран, законченное оголовье будет помещено в панель быстрого доступа игрока. Нажмите <code>E</code> что бы открыть интерфейс инвентаря и доступ к панели создания предметов. На панели, соедините каменное оголовье с палкой (рукояткой) что бы создать инструмент. Палки могут быть подобраны с земли или получены путём ломания лиственных кустов используя <code>левый клик</code>. | |||
=== Player Inventory === | === Player Inventory === | ||
Revision as of 19:33, 14 October 2020
Это руководство является результатом работы многих людей, и может содержать некоторые ошибки. Замечательный член сообщества, copygirl, которая помогает в написании кода Vintage Story, составила более краткое и потенциально более удобное для пользователя руководство по выживанию, на своей собственной странице.. Как и в случае с вики, нет никаких гарантий относительно точности содержания, и оно является правильным, насколько считает автор.
Управление
Персонаж
| W A S D | Двигаться |
| Space | Прыгать |
| E | Инвентарь рюкзаков |
| C | Инвентарь персонажа (одежда и прочее снаряжение) |
| Shift | Пригнуться, красться (используется для складывания предметов на блоки) |
| Ctrl + W | Бежать |
| G | Сесть |
| Q | Выкинуть вещь, которую держите |
| F5 | Режимы камеры (от первого лица, от третьего, свободная камера) |
Интерфейс игрока
| tab | Показать/скрыть чат |
| T | Начать печатать в чате |
| F4 | Показать/скрыть интерфейс |
| F6 | Показать/скрыть мини-карту |
| B | Показать/скрыть информацию о блоке |
| Shift + H | Показать информацию о блоке, на который смотрите |
| H | Открыть справочник по выживанию (если держать курсор на предмете в инвентаре, откроется описание о нём) |
| M | Показать/скрыть карту мира |
| N | Показать/скрыть подсказки о взаимодействии с блоками |
| V | Показать/скрыть координаты |
| F12 | Снимок экрана |
Ваш первый день
Рождение игрока
Игроки появляются в мире на «локации возрождения». Если игрок умирает в игре, он снова появится (возродится) в начальной точке появления, пока точка появления игрока не будет изменена. (Способ изменить место появления игрока можно найти позже в игре.) Настоятельно рекомендуется установить маркер для этой точки возрождения, когда игрок впервые появляется в мире. Щелкните правой кнопкой мыши на карте мира или выполните команду / waypoint add [цвет точки пути] [описание] . Эта команда добавит путевую точку с заданным цветом (любым цветом из набора .NET или его шестнадцатеричным кодом) и текстом.
Каменные инструменты
Найдите кремень или разбросанные камни (базальт, гранит, обсидиан или перидотит).Красться + Правый клик на твердой поверхности чтобы создать Knapping/ru поверхность. Используйте меню выбора для создания предмета. Мы рекомендуем Axe/ru и Knife. Используйте камень в активной руке, левый клик на оранжевых кубиках что бы убрать лишнее и придать форму конечному лезвию или оголовью инструмента. Когда последний оранжевый кубик будет убран, законченное оголовье будет помещено в панель быстрого доступа игрока. Нажмите E что бы открыть интерфейс инвентаря и доступ к панели создания предметов. На панели, соедините каменное оголовье с палкой (рукояткой) что бы создать инструмент. Палки могут быть подобраны с земли или получены путём ломания лиственных кустов используя левый клик.
Player Inventory
Players have 3 types of slots
- The left hand slot can hold passive items such as torches
- 10 hand slots
- 4 container slots that allow players to expand inventory.
To begin expanding player inventory, crafting hand baskets is the first option. Harvest reeds, which can usually be found near lakes. Press H and search for basket to see the grid crafting recipe.
Food
Here are some of the first day options for food:
- Mushrooms can be harvested with a knife or empty hands. Harvesting the tops with a knife will allow the mushrooms to regrow over time.
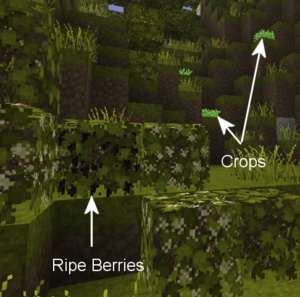
- Ripe Berry Bushes can be harvested without tools, and then broken and replanted anywhere else. After a while they will start to bloom again.
- Cattail roots can be harvested using a knife and cooked over a fire as a source of early game forage.
- Most animals can be killed and harvested with a knife for nutritious meat and fat. Hold
Sneak + Hold Right mouse buttonwith a knife in hand to harvest animals. Meat must be cooked in a fire pit.
Light / Cooking
Once the sun sets, a player might want to create a firepit as a source of light and for cooking. Be aware though, rain will extinguish any uncovered fires or torches, so be sure to build a simple roof over any firepits.
Gather the following resources:
- Dry grass:
left clickwith a knife in hand to gather tall grass - Firewood:
left clickwith an axe in hand to cut trees and harvest logs. Place the axe and logs in the crafting grid to create firewood.
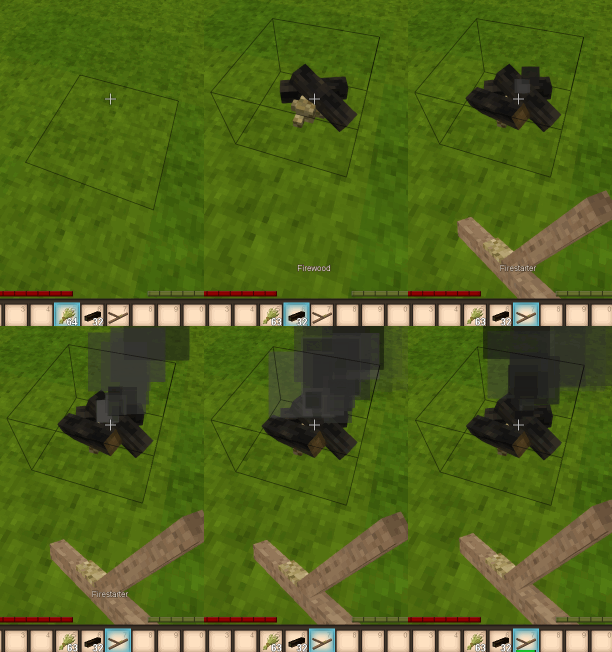
Hold Sneak + Right click on solid ground with the dry grass in hand to place a fire pit. Next, Sneak + Right click with 4 firewood in hand to complete the fire pit. Then, light the fire using a firestarter (or a torch), hold Right click with either item in hand and aim at the base of the firepit. (Optionally check the handbook, opened with H, to find out how to make a firestarter.)
Congratulations, meat can be cooked and new torches created by heating sticks!
Combat
To defend against hostile creatures, craft stone age weapons by knapping or carving a club from a log. Different weapons have different ranges. Spears are the strongest long range weapon in the stone age, but break quickly. Create a stone spearhead by knapping, and combine with a stick (shaft) in the crafting grid to finish the spear. Wooden clubs are durable but have less damage and less range. Knives, axes, or just plain sticks can all be used as weapons, but these have shorter ranges than the spear. In an emergency, small stones can be thrown at mobs. For more information, see the main article on Combat
Improvised armor can be crafted from dry grass and firewood for some very basic protection. It will not protect your head or legs, but is better than nothing. Once more established in the world of Vintage Story, more advanced types of armor can be crafted.
Temporal Stability
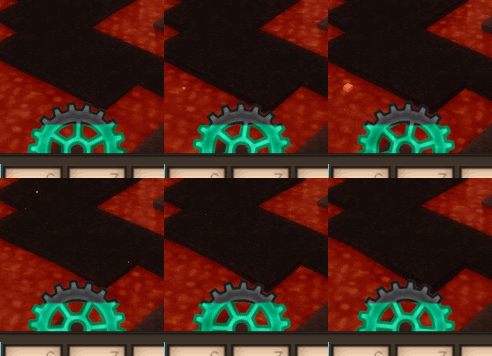
By now a player might be wondering about the cyan gear between the health and satiety bar. This is the temporal stability meter, the level of color in the gear indicates the player's current temporal stability. As a player's temporal stability reduces, the gear turns counter clockwise and the blue color in the gear decreases. When increasing, the gear's color returns as it turns clockwise. If temporal stability reaches zero, the player's vision will change drastically, and bad things tend to happen.
Draining temporal stability:
- Some surface areas are temporally unstable
- Caves, underground caverns, and places below surface level are generally more unstable than the surface of the world
- Temporal storms (occur at regular intervals)
Recovering temporal stability:
- Move to a location of high stability on the surface or at higher elevations in the world
- Transfer the temporal stability from a temporal gear: hold the gear in the left hand, a knife in the right hand, and hold
right mouse buttonto provide a 30% boost - Killing drifters releases small amounts of temporal stability
Advanced Game Mechanics
Once the basics are mastered, players can develop advanced technology: Survival Guide - Advanced tech
Tutorial Video: First Day
Thanks to Ashantin for creating and sharing with the VS community.
| {{{title}}} | |
|---|---|
