Survival Guide - Your first day/de: Difference between revisions
(Created page with "Spieler haben drei Slot-Arten") |
(Created page with "* Die linke Hand (1 Slot) kann passive Gegenstände wie Fackeln halten * 10 Hand-Slots * 4 Container-Slots, um das Inventar zu erweitern") |
||
| Line 73: | Line 73: | ||
Spieler haben drei Slot-Arten | Spieler haben drei Slot-Arten | ||
* | * Die linke Hand (1 Slot) kann passive Gegenstände wie Fackeln halten | ||
* 10 | * 10 Hand-Slots | ||
* 4 | * 4 Container-Slots, um das Inventar zu erweitern | ||
To begin expanding player inventory, crafting [[Crafting_Recipes#Portable_Containers|hand baskets]] is the first option. Harvest [[Cooper's_Reed_(Cattail)|reeds]], which can usually be found near lakes. Press <code>H</code> and search for basket to see the grid crafting recipe. | To begin expanding player inventory, crafting [[Crafting_Recipes#Portable_Containers|hand baskets]] is the first option. Harvest [[Cooper's_Reed_(Cattail)|reeds]], which can usually be found near lakes. Press <code>H</code> and search for basket to see the grid crafting recipe. | ||
Revision as of 16:23, 11 February 2021
Dieser Leitfaden ist ein Gemeinschaftsprojekt vieler Einzelpersonen und kann Fehler enthalten.
Bedienung
Spieler
| W A S D | Bewegen |
| Leertaste | Springen |
| E | Rucksack öffnen (und Crafting-Menü) |
| C | Charakter Inventar öffnen (Kleidung und weitere Gegenstände) |
| Shift | Schleichen (und ausgewählten Gegenstand auf Blöcken platzieren) |
| Strg + W | Rennen |
| G | Hinsetzen |
| Q | Ausgewählten Gegenstand fallenlassen |
| F5 | Kameramodus wechseln (Erste Person, Dritte Person, über Kopf) |
Anzeigen
| Tab | Chat ein-/ausblenden |
| T | Im Chat schreiben |
| F4 | Anzeigen ein-/ausblenden |
| F6 | Minimap ein-/ausblenden |
| B | Blockinformationen ein-/ausblenden |
| H | Überlebenshandbuch im Spiel einblenden |
| M | Weltkarte ein-/ausblenden |
| N | Interaktionsinformationen ein-/ausblenden |
| V | Koordinaten ein-/ausblenden |
| F12 | Screenshot machen |
| esc | Aktive Anzeige schließen |
Dein erster Tag
Spieler Spawn
Spieler starten in der Welt am „Spawnpunkt“. Wenn ein Spieler stirbt, kehrt er an den ursprünglichen Spawnpunkt zurück, bis der Punkt verlegt wird. (Später im Spiel kann der Spawnpunkt verlegt werden.) Es ist eine gute Idee, den Spawnpunkt beim Start auf der Weltkarte zu markieren. Mit einem Rechtsklick auf der Weltkarte oder dem Befehl /waypoint add [waypointcolor] [title] kann ein Wegpunkt gesetzt werden. Der Befehl fügt den Wegpunkt in der gewählten Farbe (jede .NET Farbe oder Hexfarbcode) und Text hinzu.
Steinwerkzeuge
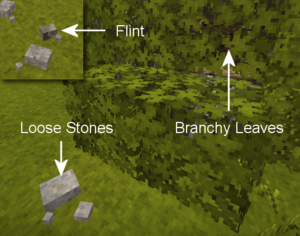
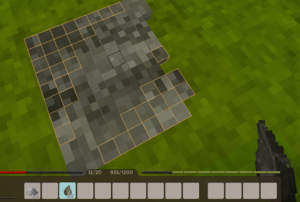
Finde Feuerstein oder andere herumliegende Steine (Basalt, Granit, Andesit, Obsidian oder Peridotit). Schleichen + Rechtsklick mit dem Stein auf einem festen Untergrund startet die Steinbearbeitung. Wähle im Menü aus, was du herstellen willst. Wie empfehlen eine Axt und ein Messer. Klicke links mit einem weiteren Stein in der Hand auf die orangenen Kästchen, um diese vom Stein zu trennen und die Klinge oder den Werkzeugkopf herzustellen. Wenn das letzte orangene Kästchen entfernt ist, landet das Produkt im Inventar des Spielers. Drücke E, um dein Inventar und das Crafting-Menü zu sehen. Kombiniere den Werkzeugkopf mit einem Stock (als Griff) im Crafting-Menü, um das Werkzeug herzustellen. Stöcke kannst du lose auf dem Boden finden oder von Ästen mit Linksklick abbrechen.
Inventar
Spieler haben drei Slot-Arten
- Die linke Hand (1 Slot) kann passive Gegenstände wie Fackeln halten
- 10 Hand-Slots
- 4 Container-Slots, um das Inventar zu erweitern
To begin expanding player inventory, crafting hand baskets is the first option. Harvest reeds, which can usually be found near lakes. Press H and search for basket to see the grid crafting recipe.
Nahrung
Here are some of the first day options for food:
- Mushrooms can be harvested with a knife or empty hands. Harvesting the tops with a knife will allow the mushrooms to regrow over time.
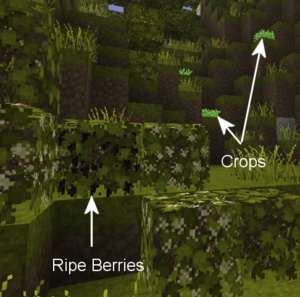
- Ripe Berry Bushes can be harvested without tools, and then broken and replanted anywhere else. After a while they will start to bloom again.
- Cattail roots can be harvested using a knife and cooked over a fire as a source of early game forage.
- Most animals can be killed and harvested with a knife for nutritious meat and fat. Hold
Sneak + Hold Right mouse buttonwith a knife in hand to harvest animals. Meat must be cooked in a fire pit.
Licht / Kochen
Once the sun sets, a player might want to create a firepit as a source of light and for cooking. Be aware though, rain will extinguish any uncovered fires or torches, so be sure to build a simple roof over any firepits.
Gather the following resources:
- Dry grass:
left clickwith a knife in hand to gather tall grass - Firewood:
left clickwith an axe in hand to cut trees and harvest logs. Place the axe and logs in the crafting grid to create firewood.
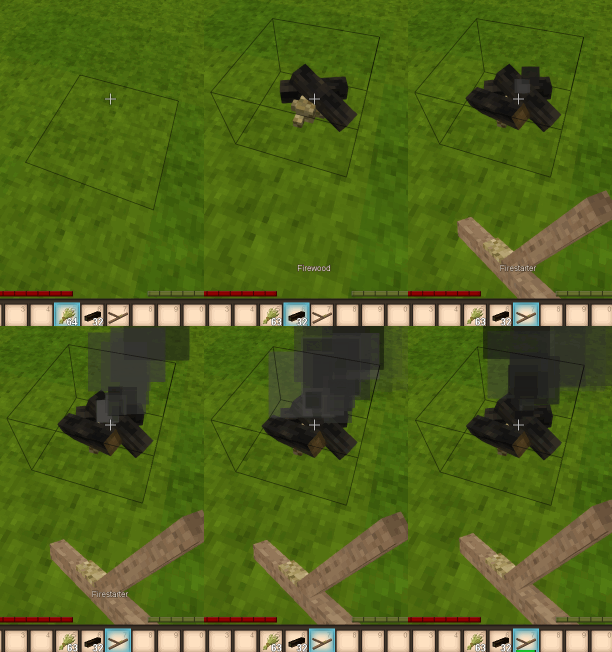
Hold Sneak + Right click on solid ground with the dry grass in hand to place a fire pit. Next, Sneak + Right click with 4 firewood in hand to complete the fire pit. Then, light the fire using a firestarter (or a torch), hold Right click with either item in hand and aim at the base of the firepit. (Optionally check the handbook, opened with H, to find out how to make a firestarter.)
Congratulations, meat can be cooked and new torches created by heating sticks! Be careful though, a torch in your off hand will cause you to take an increased hunger penalty.
Kampf
To defend against hostile creatures, craft stone age weapons by knapping or carving a club from a log. Different weapons have different ranges. Spears are the strongest long range weapon in the stone age, but break quickly. Create a stone spearhead by knapping, and combine with a stick (shaft) in the crafting grid to finish the spear. Wooden clubs are durable but have less damage and less range. Knives, axes, or just plain sticks can all be used as weapons, but these have shorter ranges than the spear. In an emergency, small stones can be thrown at mobs. For more information, see the main article on Combat
Improvised armor can be crafted from dry grass and firewood for some very basic protection. It will not protect your head or legs, but is better than nothing. Once more established in the world of Vintage Story, more advanced types of armor can be crafted.
Unterschlupf
Once the sun sets, a player might also like a shelter. There are different blocks that you can use to make a shelter using the early resources you have available. Dry grass can be used to make a bed early on, or form hay blocks/cob for early building blocks. Soil is also a good building material, and can be used to form Mud Bricks.
Temporal Stability
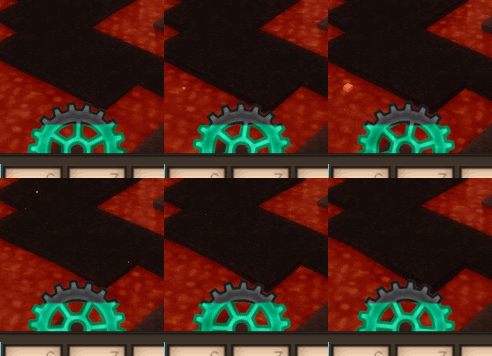
By now a player might be wondering about the cyan gear between the health and satiety bar. This is the temporal stability meter, the level of color in the gear indicates the player's current temporal stability. As a player's temporal stability reduces, the gear turns counter clockwise and the blue color in the gear decreases. When increasing, the gear's color returns as it turns clockwise. If temporal stability reaches zero, the player's vision will change drastically, and bad things tend to happen.
Draining temporal stability:
- Some surface areas are temporally unstable
- Caves, underground caverns, and places below surface level are generally more unstable than the surface of the world
- Temporal storms (occur at regular intervals)
Recovering temporal stability:
- Move to a location of high stability on the surface or at higher elevations in the world
- Transfer the temporal stability from a temporal gear: hold the gear in the left hand, a knife in the right hand, and hold
right mouse buttonto provide a 30% boost - Killing drifters recovers small amounts of your own temporal stability
Advanced Game Mechanics
Once the basics are mastered, players can develop advanced technology: Survival Guide - Advanced tech
Tutorial Video: First Day
Thanks to Ashantin for creating and sharing with the VS community.
| {{{title}}} | |
|---|---|
