Survival Starter Guide: Difference between revisions
(→Light) |
(→Light) |
||
| Line 56: | Line 56: | ||
Your second priority should probably be to ensure a source of light because the nights can get pretty dark. | Your second priority should probably be to ensure a source of light because the nights can get pretty dark. | ||
* Fire pit: Temporary lighting solution, useful for cooking, let's you create torches from sticks | * '''Fire pit''': Temporary lighting solution, useful for cooking, let's you create torches from sticks | ||
* Torch: Provides good lighting at a low cost, but only lasts for 3 days when placed | * '''Torch''': Provides good lighting at a low cost, but only lasts for 3 days when placed | ||
* Oil Lamp: Provides not so good lighting, but lasts forever | * '''Oil Lamp''': Provides not so good lighting, but lasts forever | ||
* Lantern: Provides strong lighting, lasts forever, but at the cost of copper ingot | * '''Lantern''': Provides strong lighting, lasts forever, but at the cost of copper ingot | ||
===Making a fire pit=== | ===Making a fire pit=== | ||
Revision as of 11:43, 28 February 2018
Controls
The default key mappings are as follows (you can change these in the settings)
- WASD Keys to move around
- E for Inventory
- B for Block Info (shows you what you currently look at)
- V for Coordinates
- Shift to sneak
- L-Ctrl to run
- T to open the chat dialog
- Left Mouse break stuff
- Right Mouse place/use stuff
Some other useful key mappings:
- F4 Hide all guis for making pretty screenshots
- F5 Switch between 1st and 3rd person mode
- F12 Take a screenshot (they will land in your "My Pictures" folder)
Your First Tools
There are no hard jobs, only inadequate tools
Once you've mastered the controls, it's time to get geared up! Go get those juicy sticks and rocks!
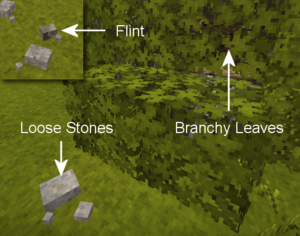
- First of all, acquire a hand full of flint/rock. You'll need one flint/rock each to make a basic stone tools, which are a hatchet, a knife, a shovel and a spear.
- Hatchets let you break logs to get fire
- Knifes let you gather dry grass, which is useful for starting fires and for crafting thatch blocks
- Shovels helps you dig up charcoal, clay, peat and other resources
- Spears are a useful means of self defense. They have a long attack range and can be thrown.
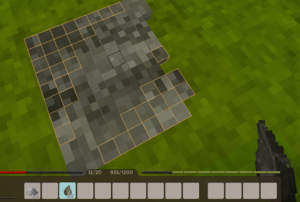
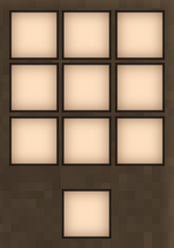
- Once you have some flint/rock, hold left Shift to sneak and right click on solid ground with the flint/rock in your hands. It offer you a small dialog where you can select what you want to craft. Use a second flint/rock to chip away all voxels marked in orange. Don't worry about making mistakes, the game prevents you from breaking the parts you need.
- Hint: Simple stones can also be thrown for minor damage
Protip

Other players can help you knap if they also are holding the same material you are. Remember if you are knapping flint you need flint and if you are knapping rocks you need rocks
Food
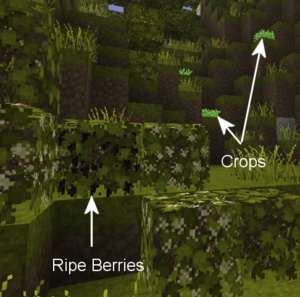
Most importantly you will probably want to explore wide and far for crops and berry bushes to secure your food situation.
- Crops can be planted on any soil after tilling it with a hoe, but grows best on high fertility soil. Crops also require a nearby water source.
- Ripe Berry Bushes can be harvested and afterwards broken+replanted anywhere else. After a while they will start to bloom again.
Hold on to the seeds and berry bushes until you found a place to settle down.
Protip

Berries bushes can be planted without metal tools, don't need nutrients, and can heal 1 hp per berry.
Light
Your second priority should probably be to ensure a source of light because the nights can get pretty dark.
- Fire pit: Temporary lighting solution, useful for cooking, let's you create torches from sticks
- Torch: Provides good lighting at a low cost, but only lasts for 3 days when placed
- Oil Lamp: Provides not so good lighting, but lasts forever
- Lantern: Provides strong lighting, lasts forever, but at the cost of copper ingot
Making a fire pit
A firepit will allow you to still see something when the sun sets, cook meat and create torches by igniting sticks in it.
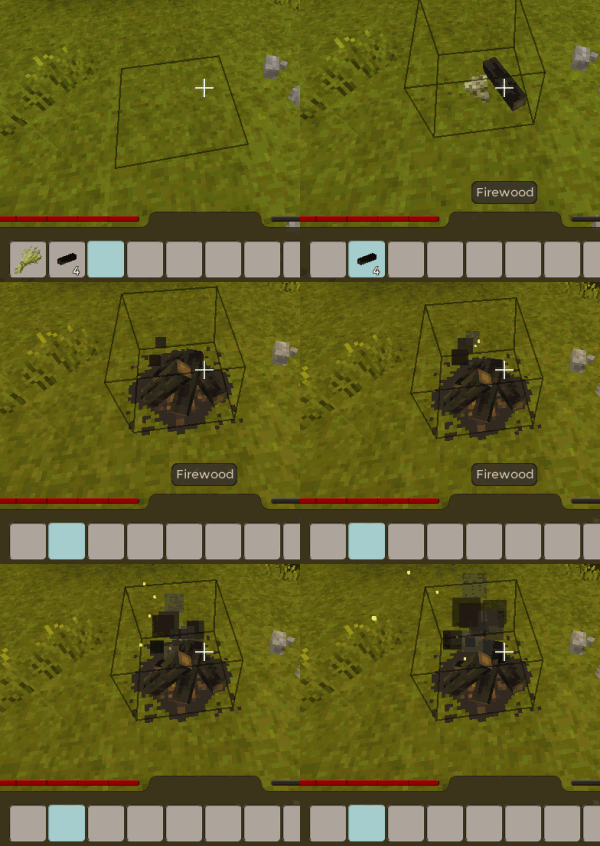
- Collect some Dry Grass. It can be made by breaking tall grass with a knife
- Put an axe and a wood log in your crafting window to acquire at least 4 firewood
- Put dry grass in your active hand, then sneak + right click on the ground, then add firewood with the same method.
- Different Fuels burn at different temperatures and durations.
- In a burning firepit you can add sticks in the top left slot to turn them into torches, or meat to have it cooked.
Protip

When items are cooking in the firepit they all heat up and when an item finishes the rest of the stack instantly cools off and has to warm up again. To significantly save on fuel put the full stack on and wait till it starts progressing. At that point pull the entire stack off the firepit and start feeding the items in one at a time. The items don't have to warm up and can instantly start progressing. The stack of items will slowly cool so occasionally throw the entire stack back on to warm it up and repeat the process. Can add up to a significant reduction in fuel.
Inventory Space
Did you survive the first night? Congratulations! By now you might be wondering why you can only hold 10 items at any given time. The 4 extra slots on the right are container slots, these let you expand your inventory by crafting mobile containers. There's currently 3 types in the game
- 2 extra slots: A hand basket crafted from cat tails, these drop from reeds that grow near lakes
- 4 extra slots: A linen sack crafted with linen cloth which is made from flax, a crop that is scattered in the world
- 6 extra slots: A backpack crafted from leather which drops from wolves and bighorn sheeps when killed
Entering the Early Copper Age
For acquiring metal you need 3 main ingredients: Fuel, Metal Ore and Molds
Acquiring High Temperature Fuel
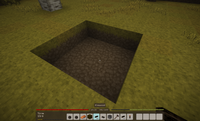
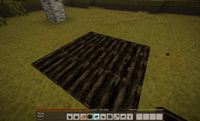
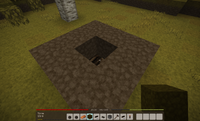
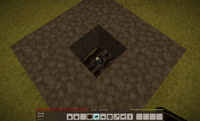
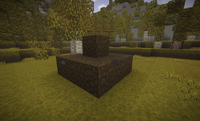
As long as you don't have your first pickaxe, your only way to reach ore smelting temperatures is by burning charcoal. To create charcoal craft an axe, chop down some trees and turn them into firewood. Dig out a small ditch on the ground and fill up the hole with firewood. Cover it up with non-combustible blocks, except for the one in the middle. Place a firepit there and quickly cover it up. After 18 ingame hours the pit will stop smoking and the firewood will have converted to charcoal. Your ditch can be of any shape, just be sure that all sides are covered up, i.e. you can also make pyramid shaped pile on the surface and cover it with dirt if you like.
Careful: After the fire pit is placed you have 15 seconds to completely cover up the pit, otherwise your firewood will burn down to ash and not yield any charcoal, thus it is recommended to have all sides covered before placing the fire pit.
Note: You can place the fire pit only on solid surfaces, so at least one pile of firewood has to completely fill the block
Acquiring Metal Ore
Again, until you have a pickaxe you will have to scavenge the surfaces for loose pieces of copper ore. Once you collected a few dozens you are ready to leave the stone age.
Note: Surface ores are always an indicator of near surface deposits. If you dig down just below where the surface pieces were you are very likely to find a deposit.
Acquiring Molds
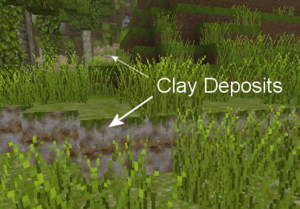
Clay deposits are commonly found in temperate climates. Go ahead and dig up a bunch. You can also craft a flint shovel to speed up the process. For molds you can use any kind of clay.
1. Select clay in your hotbar
2. Look at the top of a solid block and press Shift->Right Click to open the clay molding menu
3. Select the recipe for crucible, and you will see the clay molding grid appear. To craft you you must fill (right mouse click) in all the green marked voxels to place clay and remove (left mouse click) any clay blocks outside of the grid, which are marked orange. It's helpful to press 'G' to sit on the ground while crafting with clay molds. Also, you can press 'F' while crafting to access the tool menu that will allow you to place more or less blocks with each click. The last option in the tool menu also allows you to quickly duplicate layers of clay. We recommend you try and acquire also pickaxe and a sword mold.
4. Bake the crucible and molds. Put your raw clay crafts on the top left slot of the firepit, add more fuel to the bottom slot if required. Place your baked molds on the ground via Shift+Right click
5. Once the crucible is baked, move it back from the right slot to the left slot inside the firepit. This will extend the dialog by 4 additional slots. These 4 slots can now hold your ores for smelting and alloying, once placed the ores will begin to heat up, and if the smelting temperature is reached, smelt. The smelting process is complete once the crucible jumped into the right slot.
6. Pour your molten mix into the molds. Once the molten metal has cooled to below 20% it's melting point (usually around 200°C) you can take out your tools or ingots.
7. Repeat this process for the tool mold of your desire. Later on you might want to acquire a hammer and and axe.
Here is a video of the clay forming and smelting process
Protip

Other players can help you craft clay objects as long as they are also holding clay just like knapping. It also works for smithing with hammers.
Using the 3x3 to place clay off the grid or on already placed clay doesn't use up any clay.
The anvil mold takes a lot of clay and anvils can't be melted down. Furthermore, anvils only work for one metal tier higher so save yourself the work until you want to enter the iron age or want to craft saws, shears and scythes, which can't be cast.
Entering the Late Copper Age
Early copper age tool casting is easy and fun but prevents you from creating some of the more advanced tools and weapons, such as the saw, shears or the metal version of the spear.
1. Again using the clayforming mechanic, build some ingot molds and a hammer mold and an anvil mold and burn them as before
2. Cast yourself a copper hammer, a copper anvil and some ingots
3. Craft a forge
4. Fill the forge with bituminous coal, lignite or charcoal and your desired metal ingots holding shift + right mouse click. Ignite with a torch.
5. Once the metal is over 60% its melting point it can be worked. Take it from the forge and place it on the anvil. This will open up a dialog allowing you to choose what to tool/weapon to craft
6. Your goal is now to fill in the empty blue squares with metal. Hit 'F' with a hammer in your hand to see your tool modes. The first mode spreads metal in all directions, the next 4 in a single direction and the last one removes a piece of metal. If your work item cools down too much you will need to reheat it on the forge.
7. The axe currently requires 2 ingots, you can see the available amount of spreadable metal in the block info. Place another hot ingot on top of the work item for refilling.
Here is a video of a complete smithing process
Protip

Some anvil recipes like the axe and shovel take more than one ingot if you smith it but only one if you cast it.
Entering the bronze age
Creating bronze works in the same way as when you create copper, however you will have to find some extra ingredients to create one of these 3 alloys. Mix them inside the crucible according to these ratios. Be aware that some ores contain fewer units of metal than others, as shown in the tooltip information.
You will need to find the right ores, the prospecting pick can help you with that, see below.
- Tin bronze: 88-92% copper, 8-12% tin. Has double durability than copper and quite strong
- Bismuth bronze: 50-70% copper, 20-30% zinc and 10-20% bismuth. Is slightly higher durability than tin bronze but somewhat weaker (slightly less damage on swords, slightly less mining speeds)
- Black bronze: 70-84% copper, 8-16% gold, 8-16% silver. Has the highest durability and strength of all bronze alloys.
No worries though, you don't need to remember these numbers, you can also guess your way to them just by trial&error in the crucible. The firepit dialog will tell you if you got a valid combination.
Note1: 1.5.0.4 has black bronze copper ratio range 70-90% in game assets, but actually possible ratio is 70-84%. In the next release the ratio is planned to be 68-84%.
Note2: 1.5.0.4 doesn't allow most alloys to use some border values, e.g. bismuth bronze to use the max 70% copper, only a little less amount. Is fixed in the next release.
Entering the iron age
Iron tools will give you again a significant boost in strength and durability.
- Make sure you have a bronze anvil, as you won't be able to smith iron tools on a copper anvil.
- You will need to gather fire clay, make fire bricks, burn the firebricks in a fire pit and then build a bloomery base and chimney
- Place the base anywhere and the chimney on top
- Sneak + Right click the base to add fuel and ore. It won't accept fuel whose burning temperature is too low. Bloomeries can smelt any ore actually, at a higher temperature than the fire pit, but cost significant quantities of fuel. It is currently the only method to smelt iron ore and quartz.
- Sneak + Right click the base with a torch in hands to ignite the bloomery. Once the bloomery stopped smoking you have to break it to pieces in order to get to the goodies.
Here's a video tutorial of it:
Using A Prospecting Pick
See the prospecting pick page.
| {{{title}}} | |
|---|---|
