Modding:Basic Item: Difference between revisions
CreativeMD (talk | contribs) No edit summary |
CreativeMD (talk | contribs) |
||
| Line 4: | Line 4: | ||
= A Simple Item = | = A Simple Item = | ||
So, the first thing we going to need is an idea. What does this game need | So, the first thing we going to need is an idea. What does this game need? Wait i got it ... the game needs an overpowered wand. Let's call this mod '''MyWandMod'''. | ||
== Workspace == | == Workspace == | ||
Revision as of 07:31, 9 August 2017
Please read the tutorial Getting Started first, if you haven't done it already. This tutorial should introduce you into the basic of adding an item to the game using JSON files. If you want to add a item with functionality you should check out the tutorial for Advanced Items. There is a full list of all properties which can be defined inside the json file Item Json Properties. Adding a block to the game is rather similar, so if you have done that already most of the following steps should be familiar to you.
A Simple Item
So, the first thing we going to need is an idea. What does this game need? Wait i got it ... the game needs an overpowered wand. Let's call this mod MyWandMod.
Workspace
First of all I suggested to create a new folder to keep everything nice and clean. Inside this workspace we will create the mod itself and later on put it into a zip file, so we can test it and distribute it to other people.
The Texture
This is the texture we gonna use ![]() . Now we need to create the following folders inside our workspace
. Now we need to create the following folders inside our workspace assets/mywandmod/textures/items/, copy the texture in there and rename it to wand.png.
The Item File
To create the actual wand need to create a json file inside assets/mywandmod/itemtypes/ in your workspace. In this example we name it wand.json. This file contains the basic properties of your item.
The content of this json file should look as it follows:
{
	code: "wand",
	creativeinventory: { "general": ["*"] },
	texture: { base: "wand" }
}
- code: A unique identifier for your item.
- creativeinventory: The creative inventory tabs the itemshould be shown in (currently only 1 tab available)
- textures: What textures to apply.
Naming the Block
To give the block a proper name, we need to create another json file and save it inside a new created folder assets/mywandmod/lang/en.json
{
	"item-wand": "Wand"
}
Testing/ Distribution
There is only one thing left. We need to create a zip file of the assets folder inside your workspace. Either you use an external program (such as WinRAR or 7Zip) or you right-click the assets folder and hit Send To -> Compressed (zipped) folder. Eventually you can rename the zip file to MyWandMod.zip. The zip file can be either used for testing purposes or you can send it to other people so they can use it as well.
To install the mod, navigate to the VintageStory Folder and place it inside the mods folder.
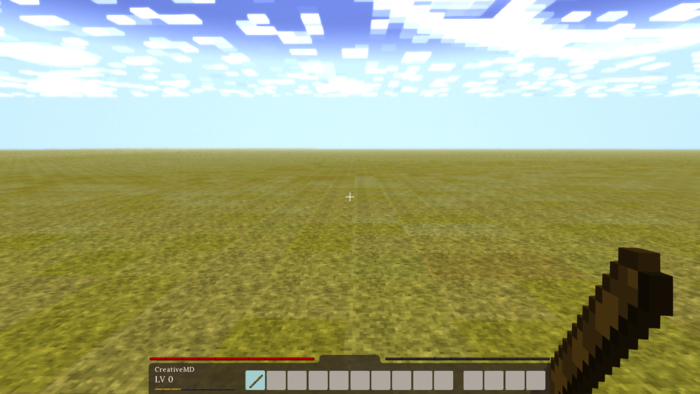
Now we got everything ready to run our first test. You should be able to find the added item in the creative inventory.
Advanced Properties
Mining Properties
Our wand is still rather useless, so it might be a good idea to add our wand some mining functionality. How it works? We the property "miningspeedbytype" we can define the mining speed for each material. Here is a list of all block materials.
The number indicates how fast the tool is able to mine the block, while 1 is the default value. time to mine = block resistance / miningspeed. Meaning a speed of 2 is twice as fast the default speed of one. So our tool is seven times faster than using the hand.
A pickaxe looks like this:
	miningspeedbytype: {
		"*": {
			"stone": 7,
			"metal": 7
		},
	},
Although the tool is working already, we should add some kind of durability. Therefore we need to define what can damage our tool and the durability itself.
Our tool can be damaged by breaking a block, or using it for an weapon. The property damagedby allows us to define all possible damage source. For now we will stick to blockbreaking and attacking.
damagedby: ["blockbreaking", "attacking"],
and the durability should be 2000:
	durabilitybytype: {
		"*": 2000,
	},
Variants
Pretty basic so far, let's go more advanced. Let's add some variants to our wand, each of them should represent another tool (shovel, pickaxe, axe).
So first of all we have to add a new variantgroup. The name of your group is tooltype and possible values are "shovel", "pickaxe", "axe":
	variantgroups: [
		{ code: "tooltype", states: ["shovel", "pickaxe", "axe" ] },
	],
Now we need to change our miningspeedbytype property to set the speed of each material for each type:
	miningspeedbytype: {
		"*-shovel": {
			"soil": 7,
			"sand": 7,
			"gravel": 4.4
		},"*-pickaxe": {
			"stone": 7,
			"metal": 7
		},"*-axe": {
			"wood": 6,
			"leaves": 4
		},
	},
Every group will be added after each other to the item name item-myitemname-mygroup-mysecondgroup. In total, our wand has 3 types and their full names are:
- item-wand-shovel
- item-wand-pickaxe
- item-wand-axe
Each of our selectors starts with a * which is a custom symbol and means it can be anything. Through that way you can select specific variants of your item.
If we would add another variant called material (values are magic, air, death) and wanted to select all shovels we would have to do it like that: *-shovel-*. Meaning it can be anything before, but it has to be a shovel and it can be any type of a shovel.
We can also change the durability for each type individually.
	durabilitybytype: {
		"*-shovel": 4000,
		"*-pickaxe": 3000,
		"*-axe": 2000,
	},
Variant Textures
Using the same way we specified the mining speed for each type we can also specify a texture for each type.
	texturebytype: {
		"*-shovel": {
			base: "wand-shovel",
		},
		"*-pickaxe": {
			base: "wand-pickaxe",
		},
		"*-axe": {
			base: "wand-axe",
		},
	}
But we can accomplish the same thing with an easier way:
	texture: {
		base: "wand-{tooltype}",
	}
{tooltype} will be replaced by either shovel, pickaxe or axe.
Texture Overlays
As everybody knows programmers are lazy, so instead of drawing a texture for each variant of our item, we can use overlays instead, which will make it a lot easier.
These are the overlays for each type:   . All we have to do now is to change the base texture to back to the original wand texture and add an overlay texture.
	texture: {
		base: "wand",
		overlays: [ "wand-overlay-{tooltype}" ],
	},
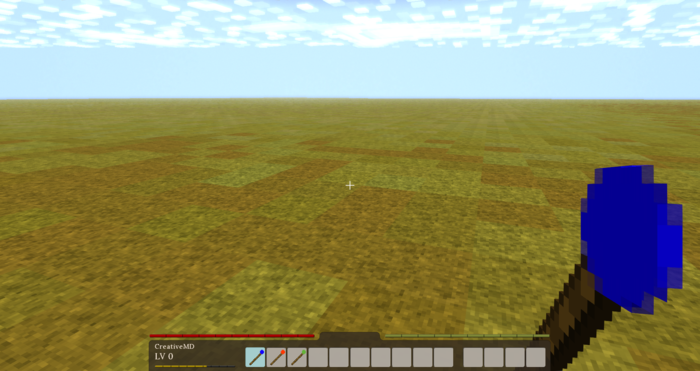
and this is the result:
Download
You can download the mod to test it out yourself: MyAdvancedWandMod.zip

