Survival Starter Guide
Controls
The default key mappings are as follows (you can change these in the settings)
- WASD Keys to move around
- E for Inventory
- B for Block Info (shows you what you currently look at)
- C for Coordinates
- Shift to sneak
- L-Ctrl to run
- T to open the chat dialog
- Left Mouse break stuff
- Right Mouse place/use stuff
Basic Tools
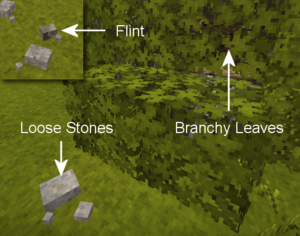
- Find some loose stones and break some branchy leaves. Those 2 ingredients will let you make a stone axe, a stone shovel, a stone pickaxe and a stone hoe
- A Flint and a stick let's you craft a knife that let's you harvest dry grass from tallgrass. Flint are occassionally found amongst patches of loose stone
File:FlintKnifeRecipe.png File:StoneAxeRecipe.png File:StoneHoeRecipe.png File:StonePickaxeRecipe.png File:StoneShovelRecipe.png
Food
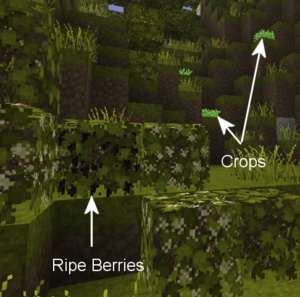
Most importantly you will probably want to explore wide and far for crops and berry bushes to secure your food situation.
- Crops can be planted on any soil after tilling it with a hoe, but grows best on high fertility soil. Crops also require a nearby water source.
- Ripe Berry Bushes can be harvested and afterwards broken+replanted anywhere else. After a while they will start to bloom again.
Inventory Space
Once you have a basic farm set up, you could go ahead and increase your inventory space
- Reeds can be crafting into baskets that have 2 slots each. Place it into one of the 4 bottom-right slots
- If you've found Flax, you can work towards Linen Sacks, which offer 4 slots of space.
Entering the Copper and Bronze Age
Producing ingots
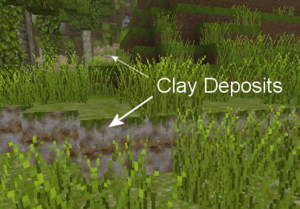
1. Collect some dry grass, clay, some logs, lignite or bituminous coal and native copper
- Clay is found in most areas that are not too dry
- Native copper and coal/lignite can be found in caves
- Dry Grass is made by breaking tall grass with a knife
2. Make a crucible and some ingot molds
- Use the clay to craft a crucible as well as a couple of molds
3. Make a fire pit
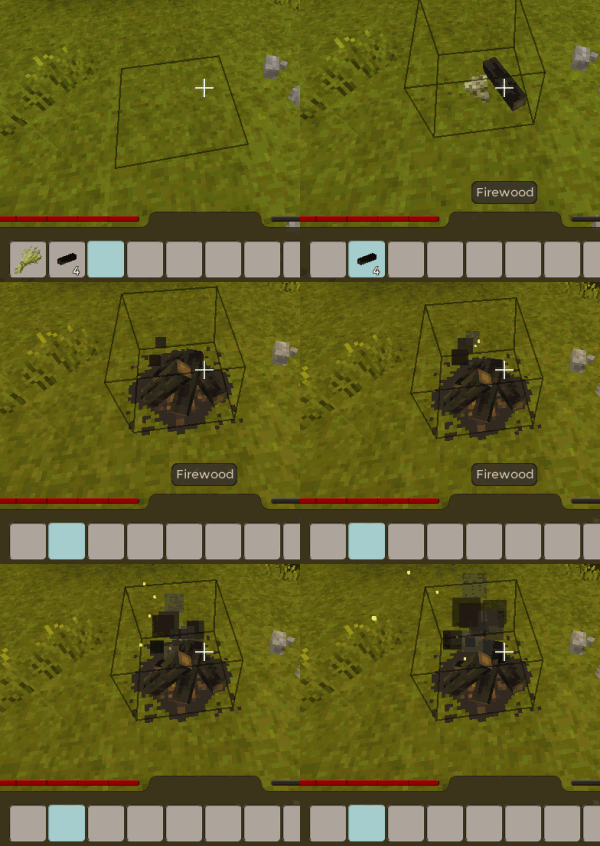
- Put an axe and log in your crafting window to acquire at least 4 firewood
- Put dry grass in your active hand, then right click on the ground, now add firewood with the same method
4. Bake the crucible and molds
- Put your raw clay crafts on the top left slot of the firepit, add more fuel to the bottom slot if required
- Place your baked molds on the ground via Shift+Right click
5. Smelt ores
- Once the crucible is baked, move back from the right slot to the left slow. This will extend the firepit dialog by 4 additional slots
- These 4 slots can now hold your ores for smelting and alloying. Put it your native copper and wait.
Currently available alloys:
- Tin bronze: 88-92% copper, 8-12% tin. Double durability than copper and quite strong
- Bismuth bronze: 50-70% copper, 20-30% zinc and 10-20% bismuth. Slightly higher durability than tin bronze but somewhat weaker (slightly less damage on swords, slightly less mining speeds)
- Black bronze: 70-90% copper, 8-16% gold, 8-16% silver. Highest durability and strength of all bronze alloys.
6. Pour your molten mix into the molds
- Once the molten metal has cooled to 300 degrees you can take out the ingots and place them on the ground or store them in chests
Here is a video of the full smelting process: https://www.youtube.com/watch?v=DkaakcRTjC4
Producing Metal Tools and Weapons
1. Craft an anvil, forge and hammer
File:CopperanvilRecipe.png File:ForgeRecipe.png File:StoneHammerRecipe.png
2. Fill the forge with bituminous coal or lignite and your desired metal holding shift + right mouse click. Ignite with a torch.
3. Once the metal is over 60% it's melting point it can be worked. Take it from the forge and place it on the anvil. This will open up a dialog allowing you to choose what to tool/weapon to craft
4. Your goal is now to fill in the empty blue squares with metal. Hit 'F' with a hammer in your hand to see your tool modes. The first mode spreads metal in all directions, the next 4 in a single direction and the last one removes a piece of metal. If your work item cools down too much you will need to reheat it on the forge.
5. The axe currently requires 2 ingots, you can see the available amount of spreadable metal in the block info. Place another hot ingot on top of the work item for refilling.
Here is a video of the full smithing process: https://www.youtube.com/watch?v=h5_DXjPPU6Y
