Mechanical power: Difference between revisions
(Created page with "''The mechanical work horse is the path to prosperity.'' <br> __TOC__ Mechanical power can be used to mechanize some simple machines. Currently, wind power is used to automate...") |
m (Convention naming) |
||
| (13 intermediate revisions by 3 users not shown) | |||
| Line 1: | Line 1: | ||
''The mechanical work horse is the path to prosperity.'' | ''The mechanical work horse is the path to prosperity.'' | ||
__TOC__ | __TOC__ | ||
Mechanical power can be used to mechanize some simple machines. Currently, wind power is used to automate | Mechanical power can be used to mechanize some simple machines. Currently, wind power is used to automate [[quern]]s for milling and [[helve hammer]]s to work iron blooms and form ingots or smith metal plates. | ||
==Windmill Required Materials== | ==Windmill Required Materials== | ||
To create a windmill, a player needs | To create a windmill, a player needs | ||
* Windmill rotor (1) | * Windmill rotor (1) | ||
* Sails (4 or | * Sails (one set = 4 sails. Full sails = 20 or 5 sets) | ||
* Wooden Axles (Varies) | * Wooden Axles (Varies) | ||
* Angled Gears (Varies) | * Angled Gears (Varies) | ||
<div style="display:flex;flex-wrap:wrap;"> | |||
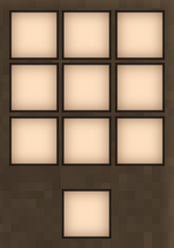
{{Grid/Crafting | {{Grid/Crafting | ||
|A1=|B1=Copper hammer|C1= | |A1=|B1=Copper hammer|C1= | ||
| Line 18: | Line 21: | ||
|A3N=|B3N=|C3N= | |A3N=|B3N=|C3N= | ||
|Output=Windmill Rotor|OA=}} | |Output=Windmill Rotor|OA=}} | ||
{{Grid/Crafting | {{Grid/Crafting | ||
|A1=|B1=|C1=Stick | |A1=|B1=|C1=Stick | ||
| Line 26: | Line 28: | ||
|A3=Stick|B3=Normal stitched linen|C3= | |A3=Stick|B3=Normal stitched linen|C3= | ||
|A3N=2|B3N=2|C3N= | |A3N=2|B3N=2|C3N= | ||
|Output=Sail|OA=}} | |Output=Sail|OA=4}} | ||
{{Grid/Crafting | {{Grid/Crafting | ||
|A1=Copper hammer|B1=|C1= | |A1=Copper hammer|B1=|C1= | ||
|A2=Copper Chisel|B2=|C2= | |A2=Copper Chisel|B2=|C2= | ||
|A3=Log (Oak)|B3=Fat|C3= | |A3=Log (Oak)|B3=Fat|C3= | ||
|Output=Wooden Axle|OA=}} | |Output=Wooden Axle|OA=}} | ||
{{Grid/Crafting | {{Grid/Crafting | ||
|A1=Copper hammer|B1=Copper Saw|C1= | |A1=Copper hammer|B1=Copper Saw|C1= | ||
|A2=Stick|B2=Copper Chisel|C2=Stick | |A2=Stick|B2=Copper Chisel|C2=Stick | ||
|A3=|B3=Log (Oak)|C3=Fat | |A3=|B3=Log (Oak)|C3=Fat | ||
|Output=Angled Gears|OA=}} | |||
|Output= | </div> | ||
=== Building the Windmill === | |||
The windmill requires at least 5 blocks of vertical space between the rotor and the ground or any other solid block to accommodate a full complement of sails. | |||
* '''Rotor''': The rotor should be placed on a tower or the side of a tall building. When building, it may be simpler to place the first axle on the top of the block and attach the rotor to the placed axle. This placement will suspend the rotor empty blocks ''outside'' the building. This space is required to attach the sails. | |||
* '''Sails''': Sails are added to the rotor in sets of four (one for each windmill blade). Each set of sails will increase the power output by 25% and require one full block clearance (per set). If the sails do not have space to move freely, they will break. Axles or angled gears can be attached to the opposite side of the windmill rotor. | |||
* '''Power Train''': The internal system construction (from the rotor to the machine) can vary depending on space, practical considerations and player ingenuity. Power trains are constructed using assemblies of axles and gears. General rules for trains with specific machines will be provided below, but longer trains lose power. | |||
* '''Wooden Axles''' are used to transmit power in a straight line. These may be placed vertically or horizontally in any of the cardinal directions. | |||
* '''Angled Gears''' are used to introduce a right angle turn in a train along any axis. | |||
* | |||
* | |||
One important point to know is that | One important point to know is that trains must be assembled in order. That is, blocks must be placed in a continuous fashion from start to finish. When the gears and axles are turning, all is well. If the assembled train does not accomplish the intended goal, break the gears and axles, and reassemble the train from the rotor to the input block. | ||
===Milling=== | ===Milling=== | ||
For mechanized milling, the windmill is attached to a [[quern]] | For mechanized milling, the windmill is attached to a [[quern]]. With a full complement of sails, the quern will grind materials at wind speeds as low as 25%. | ||
====Materials required for automated milling==== | ====Materials required for automated milling==== | ||
*[[Quern]] | *'''[[Quern]]''' | ||
*Hopper: used for material input/output. | *'''Hopper''': (optional) used for material input/output. | ||
*Chute: used to direct materials from hoppers into chests or other containers. These blocks place directionally, with the output facing away from the player. | *'''Chute''': (optional) used to direct materials from hoppers into chests or other containers. These blocks place directionally, with the output facing away from the player. | ||
<div style="display:flex;flex-wrap:wrap;"> | |||
{{Grid/Crafting | {{Grid/Crafting | ||
|A1=Copper plate|B1=|C1= Copper plate | |A1=Copper plate|B1=|C1= Copper plate | ||
|A2=|B2=Copper plate|C2= | |A2=|B2=Copper plate|C2= | ||
|Output=hopper|OA=}} | |||
|Output= | |||
{{Grid/Crafting | {{Grid/Crafting | ||
|A1=Copper plate|B1=|C1= | |A1=Copper plate|B1=|C1= | ||
|A2=|B2=Copper plate|C2= | |A2=|B2=Copper plate|C2= | ||
| | |Output=chute|OA=}} | ||
</div> | |||
====Automated Quern Train==== | |||
The quern must be powered by connecting the incoming axle on the top or bottom of the quern. The quern cannot be powered by connecting the axle to the side of the quern. For maximum efficiency, connect the power input axle to the bottom of the quern. Automating input/output using hoppers and chutes is optional. | |||
* Input: Placing a hopper above the quern inserts items into the input slot of the quern. If the quern is powered from the top, input cannot be automated. | |||
* | * Output: Placing any item in the output slot will block the output, causing product items to drop out of the sides of the quern. To collect items, hoppers can be fed into chests, or into a system of chutes to direct output to one chest. Place at the ''level of the block supporting the quern'', not next to the side of the quern itself. If the hopper, or any block for that matter, is placed next to the side of the quern, this placement will prevent the quern from producing items as the sides are blocked. Further, if the quern tries to output an item but the side is blocked, ''it will restart grinding'' the item. This means placing one block adjacent to the quern will reduce efficiency by 1 quarter. | ||
===Smithing=== | ===Smithing=== | ||
For mechanized smithing, the windmill is attached to a [[ | For mechanized smithing, the windmill is attached to a [[helve hammer]]. With a full complement of sails, the helve hammer will function, albeit slowly, at wind speeds as low as 30%. | ||
====Materials required for automated smithing==== | ====Materials required for automated smithing==== | ||
* Toggle: Connects the powered axle to the | * Toggle: Connects the powered axle to the helve hammer base | ||
* Helve hammer base: Holds the [[ | * Helve hammer base: Holds the [[helve hammer]], connects the hammer arm to the power circuit. | ||
* Brake (optional): Placed after the | * Brake (optional): Placed after the helve hammer base, stops the hammer when not in use. | ||
<div style="display:flex;flex-wrap:wrap;"> | |||
{{Grid/Crafting | {{Grid/Crafting | ||
|A1=Copper hammer|B1=Copper Chisel|C1= | |A1=Copper hammer|B1=Copper Chisel|C1= | ||
|A2=Oak Board|B2=Wooden Axle|C2=Oak Board | |A2=Oak Board|B2=Wooden Axle|C2=Oak Board | ||
|A2N=4|B2N=|C2N=4 | |A2N=4|B2N=|C2N=4 | ||
|A3=|B3=Fat|C3= | |A3=|B3=Fat|C3= | ||
|Output=wooden toggle|OA=}} | |||
|Output= | |||
{{Grid/Crafting | {{Grid/Crafting | ||
|A1=Copper hammer|B1=|C1=Oak Board | |A1=Copper hammer|B1=|C1=Oak Board | ||
|A2=Copper Chisel|B2=Oak Board|C2= | |A2=Copper Chisel|B2=Oak Board|C2= | ||
|A3=Oak Board|B3=Fat|C3= | |A3=Oak Board|B3=Fat|C3= | ||
|Output=Helve hammer base|OA=}} | |Output=Helve hammer base|OA=}} | ||
{{Grid/Crafting | {{Grid/Crafting | ||
|A1=Copper hammer|B1=|C1= | |A1=Copper hammer|B1=|C1= | ||
|A2=Copper Chisel|B2=|C2= | |A2=Copper Chisel|B2=|C2= | ||
|A3=Log (Oak)|B3=Wooden Axle|C3= | |A3=Log (Oak)|B3=Wooden Axle|C3= | ||
|Output=Brake|OA=}} | |Output=Brake|OA=}} | ||
</div> | |||
====Automated | ==== Automated Helve hammer train ==== | ||
The | The helve hammer must be powered by connecting the incoming axle on the left or right of the toggle and cannot be powered by connecting the axle to the top or bottom of the machine. | ||
# The '''toggle''' | # The '''toggle''' must be placed adjacent to the helve hammer base. The toggle places sideways, be sure to orient the toggle such that the square frames abut the block intended for the helve hammer base. The input axle cannot be placed on the ''frameless'' sides of this block. | ||
# The ''' | # The '''helve hammer base''' should be placed with the long arm of the triangular support and crossbeam facing the direction the payer intends to place the hammer. The sloped sides of the base are the back of the block, and the helve hammer will place directionally. Place an [[anvil]] three blocks away from the base, and then add the helve hammer onto the base. When placed correctly, the helve hammer should rest on the anvil when not in use. When placed on the base, the helve hammer requires two blocks to move freely through its arc. | ||
# The '''brake''' (optional) can be placed on the other side of the | # The '''brake''' (optional) can be placed on the other side of the helve hammer base. | ||
{{Navbox|Vintage Story}} | {{Navbox|Vintage Story}} | ||
Revision as of 13:13, 13 May 2020
The mechanical work horse is the path to prosperity.
Mechanical power can be used to mechanize some simple machines. Currently, wind power is used to automate querns for milling and helve hammers to work iron blooms and form ingots or smith metal plates.
Windmill Required Materials
To create a windmill, a player needs
- Windmill rotor (1)
- Sails (one set = 4 sails. Full sails = 20 or 5 sets)
- Wooden Axles (Varies)
- Angled Gears (Varies)
![]()
![]()
![]()
![]()
![]()
![]()
![]()
![]()
![]()
![]()
![]()
![]()
![]()
![]()
![]()
![]()
![]()
![]()
![]()
![]()
![]()
![]()
![]()
![]()
![]()
Building the Windmill
The windmill requires at least 5 blocks of vertical space between the rotor and the ground or any other solid block to accommodate a full complement of sails.
- Rotor: The rotor should be placed on a tower or the side of a tall building. When building, it may be simpler to place the first axle on the top of the block and attach the rotor to the placed axle. This placement will suspend the rotor empty blocks outside the building. This space is required to attach the sails.
- Sails: Sails are added to the rotor in sets of four (one for each windmill blade). Each set of sails will increase the power output by 25% and require one full block clearance (per set). If the sails do not have space to move freely, they will break. Axles or angled gears can be attached to the opposite side of the windmill rotor.
- Power Train: The internal system construction (from the rotor to the machine) can vary depending on space, practical considerations and player ingenuity. Power trains are constructed using assemblies of axles and gears. General rules for trains with specific machines will be provided below, but longer trains lose power.
- Wooden Axles are used to transmit power in a straight line. These may be placed vertically or horizontally in any of the cardinal directions.
- Angled Gears are used to introduce a right angle turn in a train along any axis.
One important point to know is that trains must be assembled in order. That is, blocks must be placed in a continuous fashion from start to finish. When the gears and axles are turning, all is well. If the assembled train does not accomplish the intended goal, break the gears and axles, and reassemble the train from the rotor to the input block.
Milling
For mechanized milling, the windmill is attached to a quern. With a full complement of sails, the quern will grind materials at wind speeds as low as 25%.
Materials required for automated milling
- Quern
- Hopper: (optional) used for material input/output.
- Chute: (optional) used to direct materials from hoppers into chests or other containers. These blocks place directionally, with the output facing away from the player.
![]()
![]()
![]()
![]()
![]()
![]()
![]()
Automated Quern Train
The quern must be powered by connecting the incoming axle on the top or bottom of the quern. The quern cannot be powered by connecting the axle to the side of the quern. For maximum efficiency, connect the power input axle to the bottom of the quern. Automating input/output using hoppers and chutes is optional.
- Input: Placing a hopper above the quern inserts items into the input slot of the quern. If the quern is powered from the top, input cannot be automated.
- Output: Placing any item in the output slot will block the output, causing product items to drop out of the sides of the quern. To collect items, hoppers can be fed into chests, or into a system of chutes to direct output to one chest. Place at the level of the block supporting the quern, not next to the side of the quern itself. If the hopper, or any block for that matter, is placed next to the side of the quern, this placement will prevent the quern from producing items as the sides are blocked. Further, if the quern tries to output an item but the side is blocked, it will restart grinding the item. This means placing one block adjacent to the quern will reduce efficiency by 1 quarter.
Smithing
For mechanized smithing, the windmill is attached to a helve hammer. With a full complement of sails, the helve hammer will function, albeit slowly, at wind speeds as low as 30%.
Materials required for automated smithing
- Toggle: Connects the powered axle to the helve hammer base
- Helve hammer base: Holds the helve hammer, connects the hammer arm to the power circuit.
- Brake (optional): Placed after the helve hammer base, stops the hammer when not in use.
![]()
![]()
![]()
![]()
![]()
![]()
![]()
![]()
![]()
![]()
![]()
![]()
![]()
![]()
![]()
![]()
![]()
![]()
![]()
Automated Helve hammer train
The helve hammer must be powered by connecting the incoming axle on the left or right of the toggle and cannot be powered by connecting the axle to the top or bottom of the machine.
- The toggle must be placed adjacent to the helve hammer base. The toggle places sideways, be sure to orient the toggle such that the square frames abut the block intended for the helve hammer base. The input axle cannot be placed on the frameless sides of this block.
- The helve hammer base should be placed with the long arm of the triangular support and crossbeam facing the direction the payer intends to place the hammer. The sloped sides of the base are the back of the block, and the helve hammer will place directionally. Place an anvil three blocks away from the base, and then add the helve hammer onto the base. When placed correctly, the helve hammer should rest on the anvil when not in use. When placed on the base, the helve hammer requires two blocks to move freely through its arc.
- The brake (optional) can be placed on the other side of the helve hammer base.
| {{{title}}} | |
|---|---|