Smithing/es: Difference between revisions
No edit summary |
(Created page with ":''Consulta horno bajo y fundición para obtener información más detallada.''") |
||
| Line 8: | Line 8: | ||
En el caso de las aleaciones de cobre y bronce, el metal debe ser [[casting/es|fundido]] para formar lingotes utilizando el [[crucible/es|crisol]] y [[molds/es|moldes de arcilla]] antes de trabajarlos en el yunque. Los lingotes de hierro deben prepararse en un [[bloomery/es|horno bajo]]. | En el caso de las aleaciones de cobre y bronce, el metal debe ser [[casting/es|fundido]] para formar lingotes utilizando el [[crucible/es|crisol]] y [[molds/es|moldes de arcilla]] antes de trabajarlos en el yunque. Los lingotes de hierro deben prepararse en un [[bloomery/es|horno bajo]]. | ||
:'' | :''Consulta [[Bloomery/es|horno bajo]] y [[Casting/es|fundición]] para obtener información más detallada.'' | ||
== Preparing the Ingots == | == Preparing the Ingots == | ||
Revision as of 12:47, 26 December 2022
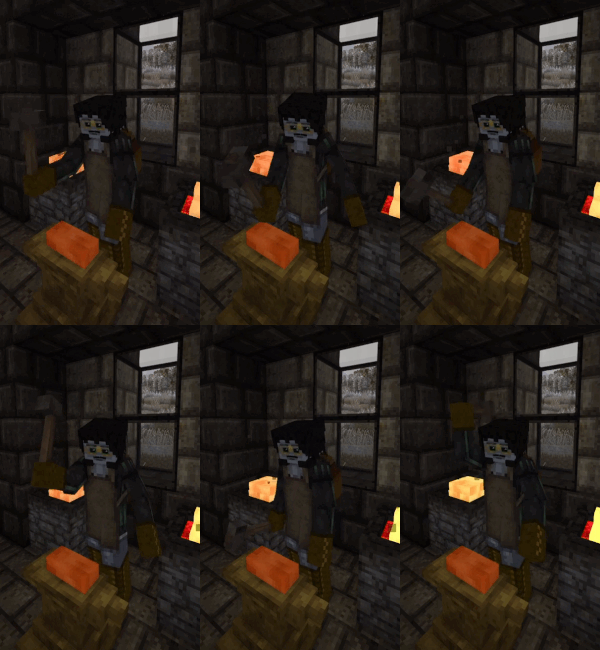
La herrería es una forma poderosa de formar lingotes de metal en componentes de fabricación, materiales de armadura, cabezas de herramientas y armas.
Materiales requeridos
Para forjar objetos, un jugador necesita un yunque, un martillo, una forja con combustible (como carbón o carbón vegetal) y lingotes de metal.
En el caso de las aleaciones de cobre y bronce, el metal debe ser fundido para formar lingotes utilizando el crisol y moldes de arcilla antes de trabajarlos en el yunque. Los lingotes de hierro deben prepararse en un horno bajo.
- Consulta horno bajo y fundición para obtener información más detallada.
Preparing the Ingots
- Load the Forge: Add fuel (coal or charcoal) to the forge, then add up to four ingots.
- Ignite the Forge: Ignite with a torch. Most metals can be worked when they are heated to a temperature above 50% of their melting point. Lead can be smithed at any temperature, iron blooms can be smithed at above 700°C.
- Collect heated ingots:
Remove the ingot from the forge
- Select the tool: Placing an ingot on the anvil, opens a dialog allowing the player to choose what tool, weapon, or item to craft.
Smithing the Item
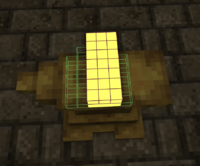
Once the tool, weapon, or item is selected, two different colors of voxel outlines will appear, green and purple. To form the item, the empty green outlines must be filled with metal voxels, and the metal voxels must be removed from the purple outlines. This is done by hitting the metal with a hammer to move the metal from its current ingot shape into the shape of selected item. The hammer has specific modes, explained below, that allow players to choose which direction the metal will move when striking the work item with the hammer. Using the Right-mouse-button will turn the work item around, making it easier to hit certain parts. If the work item cools down too much during this process, use the forge to reheat the work item. Item progress will not be lost if the item is removed from the anvil and replaced. Some items, like plates, require two ingots to complete. To continue work shaping an item that needs more material, add another heated ingot to the work item on the anvil as if placing a new ingot to work.

|
Protip:
While copper and bronze work items can be melted back to an ingot, iron work items must be smelted in a bloomery again. Be careful with them! |
Hammer Modes
To move metal in specific directions, change the hammer mode. Press 'F' with a hammer in the active hand to view and change tool modes.
Hammer modes include three modes:
- Heavy Hit: When used on the bottom layer: No effect, when used on the upper layers: If near the edge, it will move voxels the the lower layer, i.e. flatten the work item. Otherwise it will spread the voxels.
- Upset (Up, Left, Down, Right): When used on the bottom layer: Move voxels to the upper layer, only possible at the edges of a work item, when used on upper layers: Move voxels horizontally or down a layer if at the edge.
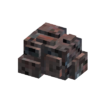
- Split: When used on metal: Permanently removes one voxel. When used on Iron Bloom: Permanently removes up to 9 slag voxels (dark parts) in a 3x3 arrangement (if slag voxels are hit, no metal voxels will be removed.)
Smithing List
Only certain items, weapons, and tool heads are available depending on the metal:
| Icon | Item | Ingots | Copper | Gold | Silver | Tin | Zinc | Bismuth | Lead | Bronze | Iron | Met. Iron | Steel |
|---|---|---|---|---|---|---|---|---|---|---|---|---|---|

|
Anvil Base | 5 | ❌ | ❌ | ❌ | ❌ | ❌ | ❌ | ❌ | ❌ | ✔️ | ✔️ | ❌ |

|
Anvil Head | 5 | ❌ | ❌ | ❌ | ❌ | ❌ | ❌ | ❌ | ❌ | ✔️ | ✔️ | ❌ |

|
Arrowhead | 1 (for 6 or 9 arrowheads) |
✔️ | ✔️ | ✔️ | ❌ | ❌ | ❌ | ❌ | ✔️ | ✔️ | ✔️ | ✔️ |

|
Axe Head | 1 | ✔️ | ✔️ | ✔️ | ❌ | ❌ | ❌ | ❌ | ✔️ | ✔️ | ✔️ | ✔️ |

|
Chisel | 1 | ✔️ | ✔️ | ✔️ | ❌ | ❌ | ❌ | ❌ | ✔️ | ✔️ | ✔️ | ✔️ |

|
Chute Section | 1 (or 1 plate for easier smithing) |
✔️ | ❌ | ❌ | ❌ | ❌ | ❌ | ❌ | ❌ | ❌ | ❌ | ❌ |

|
Cleaver | 1 | ✔️ | ✔️ | ✔️ | ❌ | ❌ | ❌ | ❌ | ✔️ | ✔️ | ✔️ | ✔️ |

|
Hammer Head | 1 | ✔️ | ✔️ | ✔️ | ❌ | ❌ | ❌ | ❌ | ✔️ | ✔️ | ✔️ | ✔️ |

|
Hoe Head | 1 | ✔️ | ✔️ | ✔️ | ❌ | ❌ | ❌ | ❌ | ✔️ | ✔️ | ✔️ | ✔️ |

|
Knife Blade | 1 | ✔️ | ✔️ | ✔️ | ❌ | ❌ | ❌ | ❌ | ✔️ | ✔️ | ✔️ | ✔️ |
| File:Longbladehead-copper.png | Longblade Head | 1 | ✔️ | ✔️ | ✔️ | ❌ | ❌ | ❌ | ❌ | ✔️ | ✔️ | ✔️ | ✔️ |

|
Chain | 2 | ✔️ | ✔️ | ✔️ | ❌ | ❌ | ❌ | ❌ | ✔️ | ✔️ | ✔️ | ✔️ |

|
Plate | 2 | ✔️ | ✔️ | ✔️ | ✔️ | ✔️ | ✔️ | ✔️ | ✔️ | ✔️ | ✔️ | ✔️ |

|
Scales | 2 | ✔️ | ❌ | ❌ | ❌ | ❌ | ❌ | ❌ | ✔️ | ✔️ | ✔️ | ✔️ |

|
Padlock | 1 | ❌ | ❌ | ❌ | ❌ | ❌ | ❌ | ❌ | ✔️ | ✔️ | ✔️ | ✔️ |

|
Pickaxe Head | 1 | ✔️ | ✔️ | ✔️ | ❌ | ❌ | ❌ | ❌ | ✔️ | ✔️ | ✔️ | ✔️ |

|
Pounder Cap | 1 | ❌ | ❌ | ❌ | ❌ | ❌ | ❌ | ❌ | ✔️ | ✔️ | ✔️ | ✔️ |

|
Prospecting Pick | 1 | ✔️ | ✔️ | ✔️ | ❌ | ❌ | ❌ | ❌ | ✔️ | ✔️ | ✔️ | ✔️ |

|
Saw Blade | 1 | ✔️ | ✔️ | ✔️ | ❌ | ❌ | ❌ | ❌ | ✔️ | ✔️ | ✔️ | ✔️ |

|
Scythe Head | 1 | ✔️ | ✔️ | ✔️ | ❌ | ❌ | ❌ | ❌ | ✔️ | ✔️ | ✔️ | ✔️ |

|
Shears | 1 | ✔️ | ✔️ | ✔️ | ❌ | ❌ | ❌ | ❌ | ✔️ | ✔️ | ✔️ | ✔️ |

|
Shovel Head | 1 | ✔️ | ✔️ | ✔️ | ❌ | ❌ | ❌ | ❌ | ✔️ | ✔️ | ✔️ | ✔️ |

|
Spear Head | 1 | ✔️ | ✔️ | ✔️ | ❌ | ❌ | ❌ | ❌ | ✔️ | ✔️ | ✔️ | ✔️ |

|
Shield's boss | 1 | ❌ | ✔️ | ✔️ | ❌ | ❌ | ❌ | ❌ | ✔️ | ✔️ | ✔️ | ✔️ |

|
Shield's hoop | 1 | ❌ | ✔️ | ✔️ | ❌ | ❌ | ❌ | ❌ | ✔️ | ✔️ | ✔️ | ✔️ |
Smithing Tutorial Videos
> >
| Wiki Navigation | |
|---|---|
| Vintage Story | Guías • Preguntas más frecuentes (FAQ) • Vintage Story Original Soundtrack • Versiones • Controles |
| Mecánicas de juego | Fabricación • Talla Lítica • Alfarería • Herrería • Cocina • Temperatura • Hambre • Minería • Estabilidad temporal • Energía mecánica • Comercio • Agricultura • Ganadería |
| Mundo | Generación del Mundo • Biomas • Clima • Tormentas temporales |
| Objetos | Herramientas • Armas • Armadura • Ropa • Mochilas • Materiales • Comida |
| Bloques | Terreno • Plantas • Decorativo • Iluminación • Functional • Minerales |
| Entidades | Entidades hostiles • Animales • NPCs • Jugadores |
| Miscellaneous | List of client commands • Lista de comandos del servidor • Guia de iniciación de Modo creativo • Bot System • Cómo utilizar Worldedit • Cinematic Camera • Adjustable FPS Video Recording • ServerBlockTicking |


